Ashbourne Village is a Location in Salt and Sacrifice (SnS) and is the first of the main destinations players will visit during their adventure. This Ashbourne Village Walkthrough helps you find and fight all Bosses and collect all items in the area. Ashbourne Village used to be a bustling merchant town, but it has now turned into a battlefield overran by monstrosities.
I saw scenes of chaos and destruction in Ashbourne Village, but a silent desolation has gripped it since. The trade town, once hopeful, is now a warped battlefield.
This page is a segment of the Walkthrough, featuring a comprehensive guide that aims to help players complete the main campaign. The Walkthrough covers each location in detail, including all obtainable Items and Equipment, NPCs, Enemies and Bosses, and is organized in by location based on our recommended progression path to completing the game.
- See the Game Progress Route page for a minimalist guide on where to go and what to do next
- See the Quests page for details on quest progression
- See the New Player Help and Game Mechanics pages for tips covering the game's various mechanics
Ashbourne Village Guide
- Previous: Pardoner's Vale
- Next: Bol Gerahn
- Sub-Areas: Root-Ceil Cavern, Greymoss Mire, Craterstone Mine, Archridge District, Valesnight Square, Ashpeak Castle
Ashbourne Village Map
https://easyzoom.com/image/358452
NPCs
- Artifact Merchant
- Inquisitor Amben
- Inquisitor Selet
- Kingdom Knight
- Merchant Raury
- Shopkeeper Arnald
- Sunlight Knight Beatrice
Ashbourne Village Bosses
- Arzhan-Tin, The Ceaseless Fury
- Celus Zend, The Mourning Winter
- Ekriks Graycloud, The Precipice of Chaos
- Kundry Kahn, The Drowned Behemoth
- The Green Huntsman
- Uryks Necklace-of-Ears
Enemies
- Bloated Corpse
- Brute
- Rootspoken Knight
- Rust Knight
- Skallin
- Undead Guard
- Undead Knight
- Undead Sage
- Undead Woodsman
- Verdant Guard
- Valley Bat
- Yew Noble
All Items in Ashbourne Village
Consumables
Materials
- Ashpyr
- Blazepyr
- Blueblossom
- Exotic Strand
- Frospyr
- Goldenpyr
- Haze Spiral
- Irona Ore
- Moltea Ore
- Mosspyr Trio
- Shimmering Bud
- Twin Ashpyr
- Valley Herb
- Voidepyr
- Wispleaf
Equipment & Upgrades
- Beloved Idol
- Chainmail Hauberk
- Champion's Cowl
- Champion's Cuirass
- Champion's Gauntlets
- Champion's Greaves
- Crude Greatblade
- Dalen Armor
- Dalen Boots
- Dalen Gloves
- Dalen Hood
- Engraved Box
- Executioner's Maul
- Eye Patch
- Fencer's Hat
- Fencer's Vest
- Guard's Boots
- Guard's Gloves
- Guard's Spangenhelm
- Heavy Gauntlets
- Heavy Greaves
- Heavy Plate
- Hunter's Cross Spear
- Hunter's Daggers
- Hydropod Head
- Jeweled Fibula
- Knight's Vanguard
- Leather Brigandine
- Lightpriest Mask
- Mask of Fury
- Mask of Stillness
- Mask of Veruna
- Pilgrim's Urn
- Pot Helm
- Ranger's Boots
- Ranger's Gloves
- Ranger's Hood
- Suede Gloves
- Suede Trousers
- Smithing Boots
- Smithing Gloves
- Smithing Smock
- Smith's Hammer
- Steel Rapier
- Throwing Axe
- Throwing Knives
- Wooden Crossbow
- Wooden Scythe
Key Items
Other Items
- Blueheart Token
- Bronze Snuffer
- Facepalm (Gesture)
- Golden Candle
- Gray Tome of Fates
- Pilgrim's Post
- Point Down (Gesture)
- Solidarity (Gesture)
- Squat (Gesture)
- Vulgar (Gesture)
Ashbourne Village Walkthrough for Salt and Sacrifice
Ashbourne Village Main Walkthrough
About Obelisks and obtaining the Grappling Hook
Upon arriving at Ashbourne Village, your first order of business should be to obtain the Grappling Hook. It will make traversal easier, unlock shortcuts and allow you access into otherwise unreachable locations.
As you spawn in, inspect the Obelisk to your left. These act as checkpoints as well as resupply points. Anytime you die, you will drop all your Salt at your site of death. You will resurrect at the last Obelisk you interacted with and will have one chance to collect your dropped Salt. If you die once more before collecting your Salt, they are lost forever. You will also lose half of your Silver upon death. This is not recoverable and is lost forever. At Obelisks, you also have the option to Rest and Resupply which will heal you completely and refill your ammo if you have any in your inventory or Stockpile. Your Hearthen Flask will also be refilled if you have enough Valley Herbs, which is a very common material. Beware that resting at an Obelisk will also respawn all regular enemies. Lastly, you also have the option to Return to Camp at any Obelisk, which will teleport you back to Pardoner's Vale.
From the Obelisk, head west to find a couple of Skallin crouched over a Treasure Satchel. Defeat them and inspect the satchel to obtain some of the region's materials. Continue west towards a slope with a Brute. Either defeat it or slip past it towards the tunnel entrance underneath the slope which leads into the Root-Ceil Cavern sub-area. Follow the steps west until you reach the wooden platforms. Beware as these platforms are crawling with Skallin and Yew Nobles. Continue along west until you hit a wall with a set of steps heading east, eventually leading to a fork with one path leading to the lower western side of the cavern. Ignore this path for now and continue eastward. Note that there is an upper and lower door, both of which lead to the Greymoss Mire sub-area. Take the top door first by climbing up the wooden platforms in the area. It should lead to an upper platform in the Greymoss Mire with a Treasure Chest containing a Golden Candle and Bronze Snuffer. Head back to the caverns so you can safely drop down and take the other door to the main Greymoss Mire floor. Outside, touch the Obelisk and prepare for a boss encounter.
Boss Fight: Uryks Necklace-of-Ears
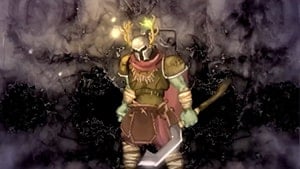
Loot:
- 1x Ashpyr
- 1x Engraved Box
- 1,000 x Salt
Moveset:
Leap - Jumps forward a short distance and either stabs or slashes downwards.
Pierce - Stabs his blade forward. Has a very wide hitbox. Dodge through, not away from it. Performs a spinning uppercut follow-up when below 50% HP.
Slash - Slashes downwards with his blade. Performs two slashes consecutively when below 50% HP.
Strategy:
Uryks is a basic boss encounter with very few mechanics but don't let his simplicity fool you. At this point in the game, unless you've spent some time farming Salt and leveling up a bit, he can still hit very hard if he does catch you. Uryks fights with a Greatblade-type weapon with good reach and a rather wide hitbox. Uryks prefers strong, single strikes but his recovery between attacks can be deceptively quick. Below 50% Health, he will begin using two-hit combos which can catch you if you aren't careful.
At range, Uryks will lumber across the battlefield slowly until he can strike. From medium range, he likes to perform a leaping strike to close the distance which you can roll under to safely avoid. He is most dangerous at melee range where his blade's hitbox can catch you as you try to get away, especially once he starts using combos. A sure-fire way to beat him is to wait for every attack, roll through his legs and attack him once from behind. Do not go for multiple hits as he can quickly turn around after an attack and punish you.
If you wish to speed things up, you can mix it up with ranged attacks by creating distance between you two, attacking with a ranged weapon once and then allowing him to reach you as you prepare to roll through his melee attacks and counter from behind. Keep up this hit-and-run style of play and he should go down in no time.
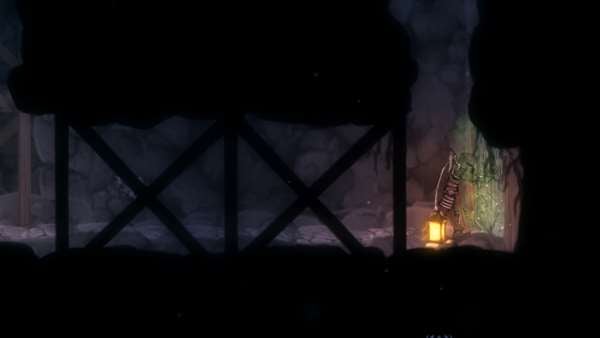
After defeating Uryks, head all the way east where you can enter a small, unnamed cave. Follow the path all the way down and you will find a corpse around some candles. Inspect the corpse to obtain the Grappling Hook Inquisitor Tool. With this item, you will be able to latch onto special grappling points and launch yourself towards them, allowing you to reach new heights. Take this time to familiarize yourself with the tool. Follow the control prompts and use the grappling nodes above the cave to get out.
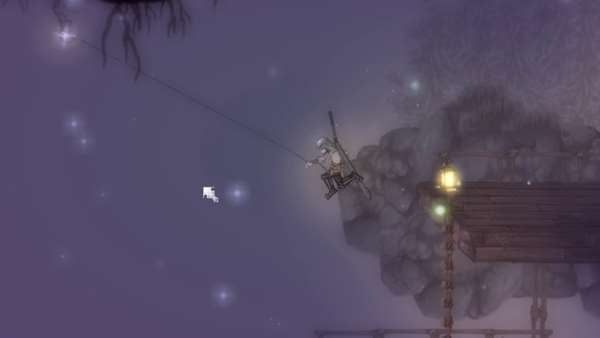
Grappling Points are presented as glistening nodes, usually attached to branches.
Once outside of the cave, look directly above the entrance for a grapple point and use your newly acquired tool to get up there. There are a few wooden platforms you can climb onto to grab a Treasure Satchel, as well as the second (eastern) Obelisk of Greymoss Mire. From here, head east to a tunnel entrance leading to the Craterstone Mine. There is a non-interactive door in your path and a grapple point above. Use it to propel yourself over the door and up on the ledge. Take out the Yew Noble on he platforms and open the Treasure Chest on the right of for a Tender Vine. Most of these mines are locked until you progress further so ignore the eastern side of the area for now and climb up the tall wooden platform here. Once you see two Skallin on the left side, defeat them and follow that path west to exit onto the upper section of Greymoss Mire where you can lower a ladder down to the eastern Obelisk, which will serve as a useful shortcut later on. Head back inside the mines and make your way back to the wooden platform and continue climbing up. Beware of the Skallin, Yew Nobles and Brutes along the way. At the top of the platform, climb up the ledge on the right then the one on the left and exit west into the main Ashbourne Village area.
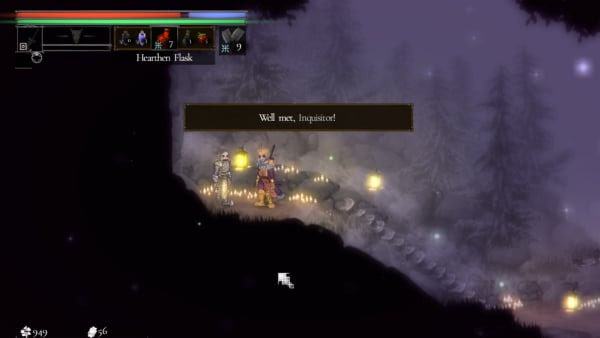
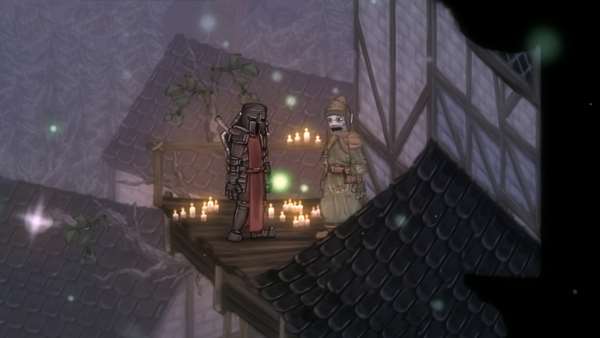
Interact with the Obelisk (Ashbourne east) here and then continue on west, past the Brute and Skallin, as well as the Yew Noble on some wooden platforms. There should be a gatehouse building along the path. Use the wooden platforms to get on top of it and speak with the Kingdom Knight NPC at the top. He will tell you about a Talking Tree and how you must devour a Mage's Heart to proceed. You will also receive the Vulgar gesture upon speaking to the knight.
The first Mage Hunt
Mage Hunts are special boss encounters that tie into your progression in Salt and Sacrifice. You may have noticed some sealed doors while exploring that requires you to have devoured a certain number of named Mage Hearts in order to unlock. Many areas and features are gated in this way and the only path forward is to hunt these Mages down. Note that in the context of unlocking doors, devouring Mage Hearts is exclusive to each major area. This means that devouring a heart in Ashbourne Village does not allow you to unlock seals in Bol Gerahn and vice versa.
For your very first Mage Hunt, you have two options readily available to you. While you only need to defeat one mage in order to move forward, it is highly recommend you go for both of them as they are roughly similar in difficulty and mechanics, and it's a great way to amass some Salt, crafting materials and the aforementioned Mage Hearts required to unlock sealed doors, allowing you to explore more of Ashbourne Village and find even more mages. For simplicity, we will cover the closest mage in this main walkthrough section and cover the other one, as well as any other accessible Mages at the bottom in the Ashbourne Village Continued section and further.
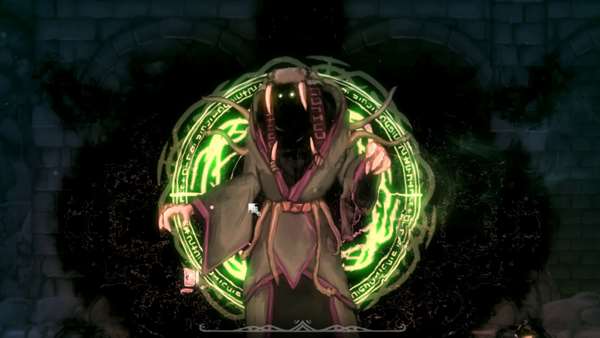
As the Kingdom Knight mentions, there is a Mage directly underneath you inside the gatehouse building. You can access the building from the right side where you just came from. Inside, inspect the corpse to begin the hunt for Arzhan-Tin, a named Pyromancer. Pull on the lever to the left of the corpse as well in order to open the gate leading back to the main western Ashbourne Obelisk (This is the very first Obelisk you encounter upon teleporting to the village).
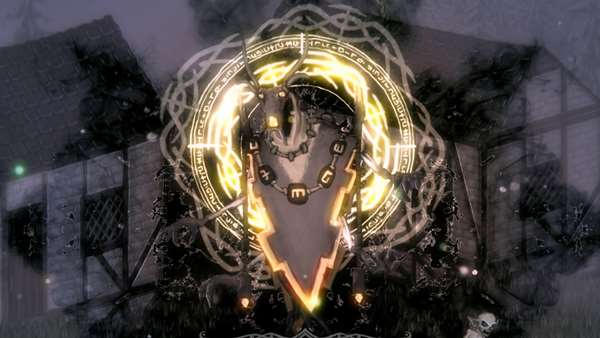
Mage Hunts are split up into two stages: The Chase and the Boss Fight. Upon activating a hunt, elemental trails will begin emanating in the area, pointing you in the direction of the Mage. These trails will take on the same element that the Mage primarily uses. Your primary objective during this stage is to find the Mage, deal some damage to it while fending off the various mobs it summons. The Mage will teleport to different areas several times before finally settling down in a final destination and beginning the boss encounter. This is denoted by the screen zooming in on the Mage and revealing their name and boss health bar. There are a few things to note while chasing a Mage:
- Mages will summon several mobs to assist them. Which mobs are summoned will vary from Mage to Mage but these typically consist of a "Burnt" variant of the area's most basic enemy and 3 unique types dependent on which Mage you are fighting.
- Summoned mobs have a chance to drop Materials from the Mage's loot table, as well as Ashpyr and it seems they drop these items quite frequently so it is well worth defeating them.
- Summoned mobs and the Mages themselves can and will attack the regular enemies found in the area, and vice versa. You can use this to your advantage but of course, be aware that both groups of enemies can damage you in all the commotion.
- Dying during the Chase sequence does not reset the Mage to its original starting location. Instead, once you revive, you can find the Mage at the last spot it teleported to so you can continue the hunt from there. This is also true for when you die during the Boss Fight sequence. You will not need to give chase again once you revive.
- Any damage dealt to a Mage during a chase sequence will be retained for the boss fight and it will have less health when the fight begins.
Mage Hunt: Arzhan-Tin, The Ceaseless Fury
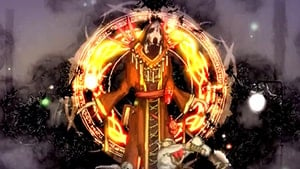
Loot:
- Burning Heart (50%)
- Ash-Caked Lung x 1-2 (50%)
- Gel Sac x 1-3 (50%)
- Sooted Nail x 1-5 (50%)
- Blazepyr x 1-3 (20%)
Summoned Mobs:
Chase Sequence
Arzhan-Tin can be found directly east of the gatehouse when the hunt begins. He then teleports in front of the locked building far to the east of Ashbourne Village. Next, he will teleport to the upper levels of Greymoss Mire. Head into the Craterstone Mine entrance nearby and find the upper western exit where you unlocked a shortcut earlier. Finally, he will teleport down to the main area of Greymoss Mire where you fought Uryks Necklace-of-Ears. Note that you may need to damage him a bit or defeat his minions before the Boss Fight is triggered, but whatever damage you deal will be retained unless you die.
Boss Fight
Moveset:
Fire Stream - Arzhan-Tin releases a steady stream of fire from one hand. This move has two variations: A floor sweep which starts off in front of him and then towards his back and a high spray which starts from the top and then down in front of him. Watch out for his hand position to determine which move is coming. For the low sweep, you can jump as he shoots the flames and the backward sweep should come quickly enough that you can land safely. Jump away from him to be extra safe. For the high spray, roll behind him if you're close enough, or far away if within mid range or further.
Flaming Sword - Arzhan-Tin conjures a flaming sword and quickly performs a downward slash. Roll through him to avoid.
Flame Geysers - Arzhan-Tin slowly raises his glowing hands, creating fiery geysers in several spots on the ground which explode shortly after. Avoid standing in the geysers as they form.
Flaming Orbs - Arzhan-Tin summons a set of 5 orbs in a circular formation which float forward as they rotate. Time your roll to dodge through the bottom-most orb as it approaches you.
Strategy:
Arzhan-Tin is slow enough that most of his attacks shouldn't pose too much of a problem. His most common and most dangerous move is the low-sweeping Fire Stream as it comes out fairly quickly and has very long range. Always watch out for his hands and be ready to jump over the stream. Fortunately, he sweeps it backwards fast enough that you should be able to land safely as long as your initial jump is timed properly. If you feel like taking risks, perform forward jumps so you can take advantage of the opening as he sweeps the flames back, allowing you to get 1-2 hits in.
Another solid opportunity to get a few hits in is at the start of his Flame Geysers move. He raises his hands very slowly and as long as you are not directly within the Geysers' AoE, you can get at least 2 hits in during the animation. Arzhan-Tin is also easy to poke at with ranged weapons as he moves very slowly and will not make too much effort to close the distance.
Once you deplete his HP, he will fall onto his knees and you can press the appropriate button to devour his heart, ending the encounter.
After defeating Arzhan-Tin, return to the top of the gatehouse where the Kingdom Knight is and use your Grappling Hook to climb up the cliffs above and find the Talking Tree. Speak to it to obtain the Runestones that will allow you to travel to Bol Gerahn via the Mirrorgate at Pardoner's Vale.
A sentient, withered tree with a face guides you towards Bol Gerahn.
At this point, you are free to progress ahead to Bol Gerahn. However, if you wish to continue exploring Ashbourne Village as far as you can get at this point in the game, continue reading the sections below.
Ashbourne Village First Visit Additional Content
The following sections pertain to extra content you can complete during your first visit but before you acquire any more Inquisitor Tools.
Sunlight Knight Beatrice and the Dalen Armor Set
After devouring one Named Mage's Heart, head east from the main Ashbourne Village Obelisk towards the gatehouse and take the path beneath its eastern exit. This leads to a mage-sealed door which you can now unlock. It will take you to a cave below. Inside, drop down the ladder to find two paths. The path on the right is a shortcut to the upper-western section of the Craterstone Mines while the path on the left leads to an otherwise unreachable location above Greymoss Mire. Head for this left path and climb up the wooden platform here to open the Treasure Chest which contains the Hunter's Daggers, Throwing Knives, Dalen Hood, Dalen Armor, Dalen Gloves and Dalen Boots.
From here, you can use your Grappling Hook to reach a platform further west where you will meet Sunlight Knight Beatrice. Talk to her to unlock the Solidarity gesture and the Dawnlight Cooperation Faction Hunt, a type of PVP activity.
The hidden upper section of Greymoss Mire and the treasure chest that contains the Dalen Set and other equipment.
After exhausting Beatrice's dialogue, she will move to Pardoner's Vale where you will unlock her as a Merchant. To find her there, head inside the first door you find while running west from the Mirrorgate.
The Merchant and the Cryomancer
There are still plenty of things to discover in Ashbourne Village and one of them is another Mage Hunt for Celus Zend, a Cryomancer. This is one of the two Hunts available early on without requiring you to collect any Hearts prior. There is also a Merchant that you can unlock for Pardoner's Vale along the way. To get to them, head west from the main western Obelisk of Ashbourne Village, up the slope past the Brute. Once you see a set of slope and steps heading up eastwards, take that path up to the Skallin and Brute duo. Before proceeding further, take a detour up and to the west to pick up an item. At the end of this path, you will find a set of wooden platforms atop some pillars. Perform a Wall Jump on the western wall to reach the lowest platform and work your way up from there. There is a Treasure Chest hidden by the foreground to the left of the very top platform. It contains the Executioner's Maul.
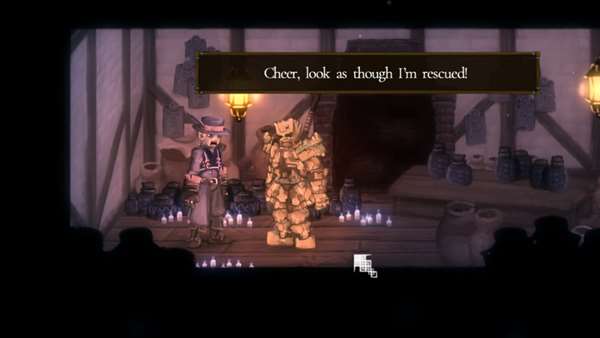
Head back down to where the Skallin and Brute were and use your Grappling Hook to cross the gap towards the large building in the east. Inside, you will find a frozen corpse from which you can initiate the hunt for Celus Zend. Before heading back down, exit through the east to find a balcony-like area where you can find Shopkeeper Arnald, an NPC that had been locked up in the village. He will thank you for rescuing him and will return to Pardoner's Vale where he will set up shop for you to purchase various items. You can find him just below the Trifaul Idol once you return to the village. To Arnald's right, you can grapple up to another platform where you can pick up the Pilgrim's Post from a shimmering pouch on the ground. This item allows you to leave messages for fellow Inquisitors when playing online. There is also a lever here which extends a grappling point, allowing for a shortcut from the cliffs where the Talking Tree can be found.
Mage Hunt: Celus Zend, The Mourning Winter
.jpeg)
Loot:
- Frozen Heart (50%)
- Icy Lung x 1-2 (50%)
- Blue Finger x 1-3 (50%)
- Icy Veinx 1-5 (50%)
- Frospyr x 1-3 (20%)
- Salt x 500
- Silver x 250
Summoned Mobs:
Chase Sequence
Celus Zend can initially be found far west at the main pathway in Ashbourne Village. He will then teleport eastwards, closing in on the main western Obelisk and the gatehouse building. Afterwards, he will start heading back west again. Follow him and when he disappears once more and the elemental trails are pointing up and to the east, he can be found inside the building where the frozen corpse you used to initiate the hunt is. Be careful in here as space is tight and he will be filling the room with his summons. After one final teleport, exit the building from the east and climb up the long ladder to initiate the Boss Fight.
Boss Fight
Moveset:
Rapier Combo - Celus Zend conjures a Frost Rapier and performs a diagonal forward lunge followed by a downward slash. Both hits are easy enough to outrange. You can also roll behind him during the lunge.
Rapier Dashing Thrust - Celus Zend conjures his Rapier in a low position near his leg and then dashes forward a great length while thrusting with the sword. Roll through his legs as he approaches to avoid the attack.
Icicle Throw - Celus Zend conjures three Icicles that target the player and then fly towards them after a short delay. A well-timed jump will cause them to miss and fly straight into the ground. Alternatively, roll through them as they approach. However, due to their staggered positioning, jumping is the safer option.
Ice Orbs - Celus Zend raises his hands up high to his sides and creates several orbs of ice in the air. These orbs do not move but will deal damage and knock players back far away on contact. You can roll through the ones close to the ground. These orbs will disappear after a short duration.
Icicle Storm - Celus Zend brings his hands together and conjures a cloud of ice up high. It paces back and forth slowly while raining icicles downwards along its path. Stay ahead of the cloud whichever way it is moving.
Strategy:
The biggest challenge with Celus Zend is when he uses the Icicle Storm. It can be difficult to keep track of his attacks while being bombarded by the cloud's icicles. When he performs this move, create some distance between yourself and the boss and allow the cloud to approach you. Roll through it to trick it into going in the other direction and then stay away again until it dissipates. It may be too difficult to get hits in while the cloud is active so exercise patience and focus on avoiding damage instead. He can also summon Icicle Storms while another one is still active.
His Rapier attacks are very easy to avoid and the Dashing Thrust in particular has a good amount of recovery time where you can get a couple of hits in. Always be ready to roll through his thrust, turn around and counter. Another good opportunity for attacking is when he raises his hands to summon the Ice Orbs but watch out for where they form. Get behind him immediately as he raises his hands as it doesn't seem like he conjures the orbs behind him. His Icicle Throw move requires some precision timing in order to punish but is generally another good opening.
Once his HP is depleted, he will fall onto his knees allowing you to devour his heart and end the encounter.
Once you defeat Celus Zend, you can speak to his dying human form for some backstory and pick up your loot. Do not head back down yet. Continue west from his arena and use the platforms to climb up to the ledge above. In the east, there is a couple of grappling points you can use to get to a Treasure Chest by the edge of the cliffs containing an Exotic Strand and 5 x Irona Ore. After this, return to the main Ashbourne Village Obelisk.
The Archridge District
Head for the eastern side of Ashbourne Village, past the eastern Obelisk to find a large building which is initially sealed, requiring at least 1 Heart of a Named Mage to unlock. If you've killed one or both of the Mages covered previously, you should be able to unseal the door now which leads into the Archridge District, another sub-area of the village. Unseal the door but before heading in, grapple up to the ledge just above the door to find an NPC who tells you he is a resident of the Archridge District and is trying to return home. Speak to him once more and he will acknowledge you having unsealed the door, allowing him to return home and you will receive the Point Down gesture. He will actually move to the Pardoner's Vale due to his home having fallen to the monsters. On your next visit, he can be found just up the steps to the right of Champion Hera and will act as an Artifact Merchant, providing special Artifact-related services.
A Resident found above the entrance to the Archridge District
Inside, make your way to the back of the building past the Undead Woodsman where you can find wooden platforms which you can use to get to the first floor. Note that there is a shortcut to the second floor by using the third platform, but you need to be fast as this platform will crumble shortly after getting up on it. Otherwise, just take the path to the left through the first floor and up the ladder past another Woodsman. Take another ladder on the second floor to the third and then jump the gap onto the rickety ledge on the right to reach a Treasure Chest containing the Fencer's Hat, Fencer's Vest, Suede Gloves, Suede Trousers, Steel Rapier and Wooden Crossbow. Next, perform a wall jump on the wall on the right to reach the rickety platform above, from which you can jump onto a wooden platform on the left where you can loot a Small Bag of Silver.
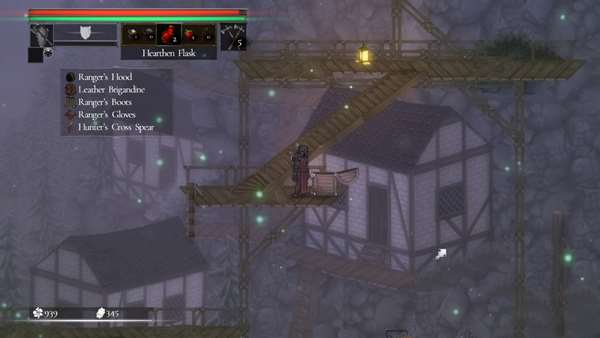
Head back down to the main path and up the stairs on the left guarded by an Undead Woodsman and a Bloated Corpse. Head up the ladder past them and make your way up and to the west by using the wooden platform on the right. From here, you can exit the building from the western door to arrive at the upper levels of Ashbourne Village. Head down the first ladder you see and descend all the way while watching out for the Undead Guards until you are near the bottom where you can lower a ladder, unlocking an important shortcut from the east side of the village. There is also a Treasure Chest here containing the Ranger's Hood, Leather Brigandine, Ranger's Boots, Ranger's Gloves, and the Hunter's Cross Spear.
The Ranger's Set and an imporant shortcut from eastern Ashbourne Village.
Head back up using the series of ladders and grapple points, all the way up to the plaza and then head east into the middle levels of the Archridge District. Inside, continue east and jump the gap to exit east into another plaza. Here, you will find a Mage corpse sitting under a pillar in the center, guarded by a Bloated Corpse. This Mage is Kundry Kahn, a Hydromancer. Before initiating his hunt, take a detour to unlock some shortcuts and grab some items. Head up the ladder to the east and up the wooden platforms. Note the grappling point under the concrete ledge on the left. Grapple to it to reach a wooden platform on the left with a Treasure Chest containing a Simple Key and an Ashpyr. Get up on the concrete ledge and back into the building through the left. You are now in the upper levels of the building. Drop down the floor below and lower the ladder on the left edge to more easily get back here later on. Climb up the other ladder to the right and head west while fending off the Undead Woodsmen and Undead Guard. Exit to the west and lower the ladder for a shortcut from the plaza below. Head back into the building, up the wooden steps and then up the ladder to find the Archridge District's Obelisk. There is also a sealed door here to the left which requires 3 Named Mage hearts to unlock. Ignore it for now and make your way back to Kundry Kahn's corpse to begin the hunt.
Mage Hunt: Kundry Kahn, The Drowned Behemoth
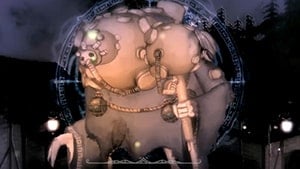
Loot:
- Drowned Heart (50%)
- Weeping Gland x 1-2 (50%)
- Waterlogged Organ x 1-3 (50%)
- Deep Drop x 1-5 (50%)
- Frospyr x 1-3 (10%)
- Voidepyr x 1-3 (10%)
- Salt x 1,625
- Silver x 250
Summoned Mobs:
Chase Sequence
Kundry Kahn can first be found next to the eastern Ashbourne Village Obelisk. He will then move into the Archridge District, beginning at the bottom floor and working his way up through the floors. He will eventually teleport to where his corpse was, where you initiated the hunt and then head further up. From his corpse, climb the ladder on the right, head up the platforms and jump over to the ledge on the left and re-enter the main Archridge building on the left. Inside, climb further up using the platforms and ledges and then exit to the west into a plaza with a pine tree in the middle. Fight him here for a while until he teleports one last time. You can head west from the pine tree plaza to get to the hallway with the Obelisk to set a checkpoint if you hadn't yet but beware of the swinging spiked log trap as you approach. You can roll through it to as it swings by to avoid damage. Head back into the building to the right from the pine tree plaza. and jump across the gap to find another entryway to the east where two walls are close enough to each other that you can keep wall-jumping between them to reach the rooftop where the Boss Encounter begins.
Boss Fight
Moveset:
Staff Slam - Kundry Kahn smashes his staff on the ground, creating a shockwave in a small radius around the impact point. This move has a deceptively large hitbox and should be dodged through, past his legs.
Geyser Burst - Kundry Kahn raises one hand slowly, creating several geysers along the ground which burst after a short delay, creating pillars of water from their eruption point. Step away from the geysers to avoid damage.
Homing Bubble - Kundry Kahn creates a large bubble from his staff which homes in on the player. As it gets closer to he ground, it will speed towards the player horizontally. Dodge through the bubble to pop it early and avoid damage. Alternatively, you can jump over the bubble as it approaches but make sure you are moving forward to clear the entire hitbox.
Bubble Storm - Kundry Kahn raises his staff up high and swirls it around, causing dozens of bubbles to rain downwards. The bubbles follow a vertical trajectory and have very little horizontal movement. Simply watch for where they start and keep moving to dodge them.
Strategy:
Kundry Kahn is likely one of the more difficult Mages you will face at this point as his attacks hit very hard and he has very little recovery time between each attack. At melee range, his Staff Slam is very dangerous as it has a very large hitbox owing to the shockwaves it creates around the point of impact. Do not try to roll away from this. Instead, dodge through his legs, turn around and counter with 1 or 2 hits.
When he casts Homing Bubble, make sure you are facing it and not running away as the spell has very good tracking and speed, and will easily catch up to you. Instead, dodge through the bubble to pop it early and use that split second to get one hit in if you end up close enough to the boss. Another strategy is to let the bubble fall close to the ground where it will speed towards you horizontally and you can jump over it. Perform an attack while in mid-air if you are close enough. Because the boss has very small openings, learn to maximize your efficiency by performing attacks like this while moving. This will come in handy for future bosses as well.
Aside from those small windows, your biggest opportunity to deal damage is while Kundry Kahn is casting Bubble Storm. As soon as you see him lift his staff up high with both hands, close the distance to his legs and attack relentlessly while dodging any incoming bubbles. For his Geyser Burst, it can be fairly difficult to find an opening to attack due to the randomness of the attack. You should instead focus on avoiding the geysers and wait for other openings to deal damage.
Once his health is depleted, Kundry Kahn will fall to the ground, allowing you to execute him and devour his heart, ending the encounter.
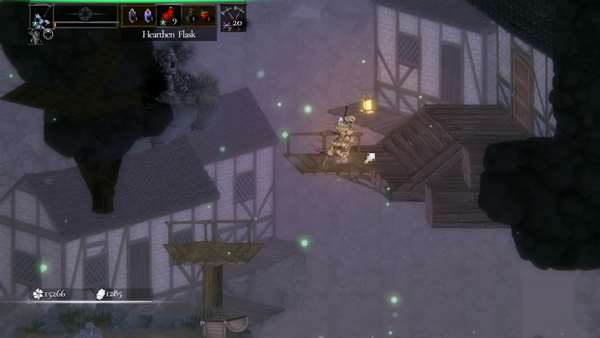
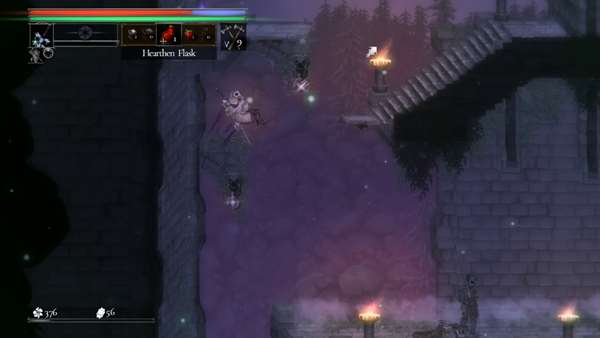
After defeating the Mage, speak to his dying human form and then pick up the loot he drops for one more Voidepyr, a Jeweled Fibula and 2x Weeping Gland. Check the top right corner of his arena where you can grapple up to a ledge with a glowing Treasure Pouch containing a Black Starstone. Then head west across his arena and then grapple across the gap to the next rooftop where a Bloated Corpse, Undead Woodsman and Undead Guard can be found sitting around. Defeat them and then perform wall jumps using the small houses to reach the wooden platforms above. The first platform has a Treasure Chest containing a Wooden Scythe weapon. The second platform leads further west across the rooftop and into a building with a locked Treasure Chest. It can be unlocked using the Simple Key found earlier and contains a Hideout Key.
There is a Nameless variant of Kundry Kahn that can be found west of The Archridge District. To get there, start from the eastern Ashbourne Village Obelisk and make your way up the wooden platforms up to this point and then jump off towards the right:
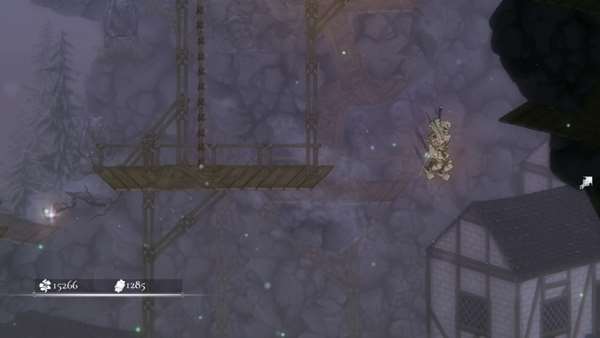
Make your way up the wooden platforms above eastern Ashbourne Village
You will land on a concrete ledge with a Treasure Chest containing an Exotic Strand and 5x Irona Ore. On this ledge, there is a wooden platform you can climb to reach the ledge on the right leading to a door to the middle of The Archridge District's main building that you couldn't open from inside. Unlock it for a quick shortcut. Still outside, look at the ledge in the upper left to find a Mage distortion. You can initiate the hunt for the Nameless Hydromancer from here. The fight works the same way as the fight against Kundry Kahn except this Mage will also drop a unique helm, the Hydropod Head, along with all the other items on Kundry Kahn's loot table.
A hidden path with a Treasure Chest on a concrete ledge, a shortcut door to The Archridge District on the upper right and the Mage distortion for the Nameless Hydromancer in the upper left.
Stonehall Dungeon - The Venomancer and the Blueheart Runner NPC
Stonehall Dungeon is another sub-area of Ashbourne Village. To get there, you first need to have defeated at least 2 Named Mages and devoured their hearts. Head to the Craterstone Mines using the lower-west entrance from Greymoss Mire. From the entrance, grapple up to the ledge above the locked gate and continue east to the mage-sealed door and unlock it.
The entrance to Stonehall Dungeon in lower-west Craterstone Mines
As soon as you enter, you will see an Undead Guard atop a wooden platform on the right. Defeat it and loot the Treasure Chest underneath the platform for a Shimmering Bud. From here, the path splits to the lower west and the lower east. Take the lower west path first, defeating the Undead Knight at the bottom of the steps. Jump onto the wooden platform on the left and up to the ledge with the Undead Guard. After defeating it, pull the lever further to the left to unlock the gate from the lower-west Craterstone Mines entrance.
Now, drop further down to another set of steps and at the bottom, jump across to the tall platform on the left and loot the Treasure Chest for a Crude Greatblade. Directly below this platform is a door on the left that you can unlock with the Hideout Key obtained from The Archridge District (refer to the section directly above this one if you've not yet collected the key). Inside, you will find an NPC who had been captured and held prisoner in the dungeon.
The Blueheart Runner Merchant Raury found in a locked room in western Stonehall Dungeon
This is Merchant Raury, the Blueheart Runner. Speak to him here and answer "Yes" to his question to unlock the Facepalm gesture and the Blueheart Run, a type of PVPVE activity. He will move to Pardoner's Vale after you leave and you can find him in the caves underneath the village where he will act as a Merchant, selling various items and equipment including the Blue Candle, a multiplayer item used in the aforementioned Blueheart Run activity.
Head back outside and continue to the east of the dungeon. Beware the Verdant Guard at this bottom floor. Depending on when you tackle the area, it may prove quite the challenge to defeat. At the end of the path on the bottom floor is a set of stairs leading to a wooden platform that you can use to climb to the floor above. On the very left of this floor is a Mage distortion where you can initiate the hunt for Varren Ovrin, a Venomancer. Note that the path to the upper east just leads back to the top of the dungeon where the path split off earlier.
Mage Hunt: Varren Ovrin, The Vilest Hatred
Loot:
- Poison Heart (50%)
- Venom Gland x 1-2 (50%)
- Toxic Gut x 1-3 (50%)
- Poison Drop x 1-5 (50%)
- Mosspyr x 1-3 (20%)
- Salt x 1,675
- Silver x 250
- Guiltless Shard
Summoned Mobs:
Chase Sequence
After initiating his hunt, Varren Ovrin will be found in Craterstone Mines, right above the entrance to Stonehall Dungeon. Use alternating wall-jumps to get up there and fight him and his mobs until he teleports. Next, he will move to upper Greymoss Mire. Simply exit through the middle-west of the caves to find him. After this, he will teleport down to where you fought Uryks Necklace-of-Ears. Fight him here for a while and he will teleport back to Stonehall Dungeon at the very bottom floor where the Verdant Guard was. Finally, he will teleport back up to where you initiated his hunt and the Boss encounter will begin.
Boss Fight
Moveset:
Venomous Daggers - Varren Ovrin raises one hand, conjuring a venomous dagger in it. After a brief delay, he stabs diagonally towards the front of his legs and then quickly follows up with his other hand from the lowered position. The second strike has a longer horizontal travel but the Mage cannot change directions in the middle of the combo so simply dodge through him during the first attack.
Arcing Stab - Varren Ovrin raises one hand behind his head as a venomous dagger manifests in it. He then performs a stab with a large arcing motion above his head and in front of him, ending with the dagger in the ground. He then drags the dagger backwards along the ground a short distance. All motions in this attack have a hitbox and can deal damage but all can be avoided by rolling away from the Mage.
Venomous Needles - Varren Ovrin leans back slightly while raising both hands in front of him as they glow green. After a brief delay, he fires several green projectiles in front of him which travel in a small arc, falling to the ground shortly after release. These projectiles will deal damage to anything in their path but again, the Mage cannot change directions once he initiates this move so dodge through him to completely avoid the needles. He will sometimes perform an alternate version of this which starts with the same telegraph but instead of firing the needles, he summons several small green arcs in a circular formation around an area. After a brief delay, the arcs each shoot a needle into the inner part of the circle. Simply avoid the circular formation in this case.
Homing Needles - Varren Ovrin holds one hand in front of him around waist-high with his palm faced up while holding the other high up behind his head as it glows green. After a brief delay, he releases a fan of 5 needles from the glowing hand which travel in a large cone, eventually homing in on the player. Each needle has the same travel speed and all of them can be dodged with a single well-timed roll as they approach.
Venomous Clouds - Varren Ovrin moves his hands in a slow circular motion right in front of his torso and then brings each hand up to the sides past his shoulders. After this, several small orbs of venomous clouds appear at the player's location. Each cloud will appear at the player's current location after a very short interval. You should keep on the move for the duration of the spell to avoid the clouds. Simply running around will do the trick.
Strategy:
The first thing to note when fighting Varren Ovrin is that all of his attacks build up the poison stat when they connect. While this can be bothersome, all of his attacks are well-telegraphed and easy to avoid if you follow the moveset notes above.
You have plenty of windows of opportunity to attack after dodging as the Mage has a fair bit of recovery time between every move. Just make sure you are dodging through to get behind him as most of his moves only hit from the front and he cannot change directions mid-attack. Your biggest window for retaliating is during either variant of his Venomous Needles move as he is locked in the animation while the projectiles are released. You can easily get 3 hits in with most weapons. Another great opportunity is as he is beginning to cast the Venomous Clouds spell. The beginning channel for this move has a very long animation which you can abuse for easily 4-5 hits before the clouds appear if you can close the distance quickly. Do be aware of when the clouds are about to spawn in as getting caught in one can stagger you and set you up for further hits from the rest of the clouds, which can easily devastate your health and fill up your poison meter.
Lastly, Varren Ovrin is very easy to stagger with multi-hitting attacks, no matter the damage. Assault him relentlessly and you may even get him into a special stagger animation where his eye glistens momentarily, similar to grappling points. When you see this, jump up and grapple up to his face to perform a special dagger attack which deals loads of damage and can be followed-up further with a falling attack for even more damage.
Once his health is depleted, he will collapse to the ground where you can perform a finisher to devour his heart, ending the encounter.
After defeating the Mage, speak to his dying human form for some backstory and collect extra loot including a Beloved Idol.
Greymoss Mire - Inquisitor Amben
After defeating 3 Named Mages and devouring their hearts, return to the Greymoss Mire and make your way up to the second Obelisk by the platforms in the upper east. Climb to the top of the platforms and then grapple across the gap towards the west to reach a ledge with a mage-sealed door at the end.
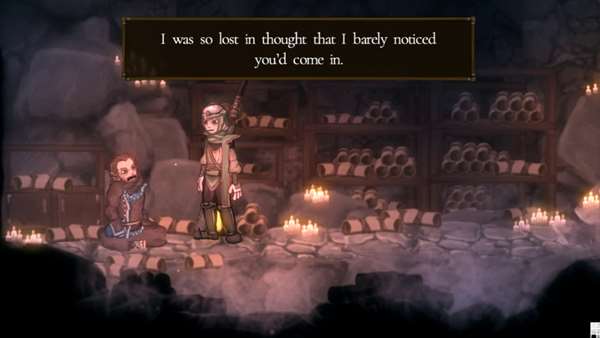
The door leads to a small room full of scrolls with an NPC inside. This is Inquisitor Amben. Speak to him to begin his quest chain. He will travel to Bol Gerahn next.
Valesnight Square
After defeating 3 Named Mages in Ashbourne Village, you can now unlock the mage-sealed door to the left of the Archridge District Obelisk, leading to the Valesnight Square sub-area where you will be immediately met with a Boss encounter.
Boss Fight: The Green Huntsman
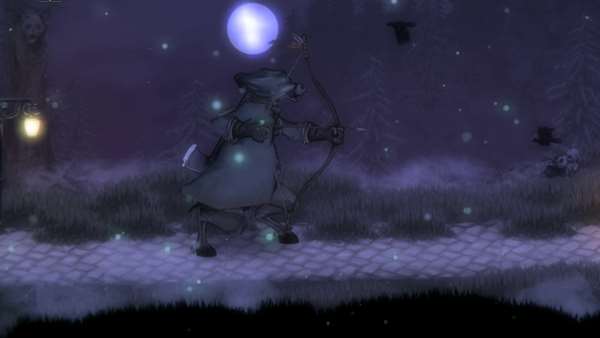
Loot:
- Ashpyr x 2
- Incantation Bowl
- Salt x 4,450
- Silver x 700
Moveset:
Axe Swing - The Huntsman quickly swings his axe downwards. This attack comes out very quickly and requires precise timing to dodge with a roll. Below 50% HP, the Huntsman will swing twice in rapid succession.
Leaping Axe Smash - The Huntsman closes the distance by leaping towards the player and smashing his axe down on the ground. You can roll under the Huntsman while he is in the air.
Bow Shot - The Huntsman draws his bow and then shoots a single arrow towards the player. The arrow travels diagonally regardless of distance and can be dodged through.
Strategy:
The Green Huntsman is a simple boss with but a few moves. Despite his small moveset, he is very quick and has very little recovery time between attacks. Success in this encounter hinges on your ability to precisely dodge attacks and retaliate with pokes and single strikes with the small windows of opportunities you are allotted.
To consistently deal damage to the Huntsman, you will need to dodge through his axe swings and quickly attack him once from behind. When he readies his bow, immediately move towards him and get ready to roll through the arrow and if you are within range, hit him once. Regardless of your weapon, you will likely only have enough time to hit him once for each opening. Don't get greedy and you should be able to whittle his health down in no time.
Once he reaches 50% HP, you will need to switch to a bait strategy due to his very fast double axe swing. Bait out the move at a distance and roll forward just as the second swing initiates in order to have enough time to retaliate. Be wary of rolling behind him during the first swing as he can quickly turn around for the second swing which is likely to land as you get out of your roll.
Grab your loot after defeating the Huntsman, continue on westward to find the Valesnight Square Obelisk underneath a wooden pillar. To the right of the pillar, there is also a tall rock formation with a dead tree and a distortion in the area. Inspect the distortion to initiate the hunt for Ekriks Graycloud, an Electromancer.
Mage Hunt: Ekriks Graycloud, The Precipice of Chaos
Loot:
- Crackling Heart (50%)
- Silver Tooth x 1-2 (50%)
- Graphite Nail x 1-3 (50%)
- Static Fiber x 1-5 (50%)
- Blazepyr x 1-5 (5%)
- Salt x
- Silver x
- Guiltless Shard
Summoned Mobs:
Chase Sequence
Note that you may encounter unnamed Mages during your hunt for Ekriks Graycloud. They serve to distract you but may also drop their respective crafting materials if you choose to go after them. Ekriks Graycloud can first be found west of the Valesnight Square Obelisk, on the bridge towards the castle. He will then teleport to the middle-western exit of Archridge District, in the plaza. After this, he will teleport back into the main Archridge District building, one level below. Simply drop down the ladder from the plaza and re-enter the building from the entrance here. After fighting him here for a while, he will teleport further to the third floor of the building in the lower east. His next teleport spot will be right outside the main Archridge District entrance to the west of the bottom floor. After one last encounter, he will teleport past the eastern Ashbourne Village Obelisk and begin the Boss Fight.
Boss Fight
Moveset:
Lightning Storm - Ekriks Graycloud brings two hands to his side while lightning begins to emanate from them. He slowly raises both hands and summons columns of lightning that cascade forward in front of him. The telegraph is difficult to identify but the bolts themselves are telegraphed on the ground before they strike and can be dodged through with proper roll timing.
Ball Lightning - Ekriks Graycloud quickly tosses out an orb of lightning that travels outwards in a straight line from him. After a while, the orb bursts into 3 smaller projectiles that home in on the player. The large orb itself will not hit you unless you jump up into its path. The smaller projectiles can be jumped over if they take a lower trajectory or dodged through.
Channeled Lightning - Ekriks Graycloud raises both arms in front of him and channels streams of lightning that hits below and slightly in front of him. Get behind him to avoid the attack or run far away if you can't make it to his back.
Lightning Spear - Ekriks Graycloud conjures a spear of lightning and stabs downwards diagonally in front of him. He follows up by stabbing the spear into the ground directly below him. This sends columnds of lightning cascading outwards from both sides of him, similar to the Lightning Storm attack.
Strategy:
The fight with Ekriks Graycloud can be quite difficult due to the amount of things going on and all the projectiles and effects to keep track of. Ekriks Graycloud has attacks that cover both short and long distances so you need to be constantly on the move. Strangely enough, he seems to prefer attacking from mid or short range and has an extremely slow walking animation which you can take advantage of by pelting him with ranged attacks and throwables from a distance.
You will need to create openings in his attacks in order to deal damage. The biggest opportunity to do this is during his Lightning Storm move. You must be quick and get behind him as he channels. The attack will only hit his front and he cannot change directions once he begins channeling the spell. Furthermore, he will be locked in the cast animation for a good amount of time, allowing you to get at least 3 hits in.
When he summons the Ball Lightning, focus on dodging as the projectile burst can take on erratic trajectories and can be difficult to avoid. For his Channeled Lightning move, you want to be behind him when the attack begins or far away if you can't make it. In either case, make use of the time he is channeling to get some attacks in from either melee or range.
Finally, be wary of fighting Ekriks Graycloud from melee distance. His lightning spear attack comes out very quickly and the follow up can present real problems with dodging, especially as he can quickly cast his other spells right after the cascading lightning portion, placing plenty of projectiles and effects on screen at once. You can dodge through the diagonal stab and run away from the vertical stab, getting ready to dodge through the cascading lightning.
Once his health is depleted, the mage will collapse to the floor, allowing you to press the appropriate key to devour his heart, ending the encounter.
After defeating the mage, speak to his dying human form for some backstory and pick up your additional loot. At this point, you can return to the Valesnight Square Obelisk and continue on west past the bridge to Ashpeak Castle, the entrance to which you can now unlock. However, it is best to save this area for later as you will not get very far without getting more Inquisitor Tools. We will cover this location in the Ashbourne Revisited tab found at the top of the page.
Trivia & Notes
- Trivia and notes go here
Ashbourne Revisited
The following sections pertain to revisits of areas after acquiring more Inquisitor Tools aside from the Grappling Hook.
Ashpeak Castle - Finding Inquisitor Selet
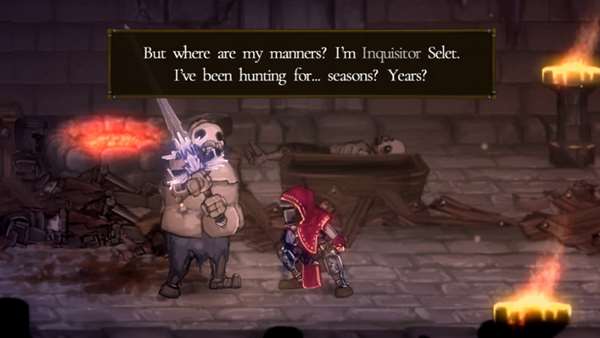
Finding Inquisitor Selet in Ashpeak Castle requires you to have acquired the Magnesin Supply Inquisitor Tool from Bol Gerahn. Inside the first room of Ashpeak Castle, climb down the ladder beneath the stairs and make your way across the platforms on the left side to find a Treasure Chest containing a Pilgrim's Urn and 3x Ashpyr. Drop down below to find an Undead Knight. Defeat it and unlock the door on the right side of the room for a shortcut back to the upper section of Ashbourne Village where you will find a Rust Knight. If you haven't done so, pull the lever at the bottom of the stairs and to the left here to lower some grappling points, unlocking another shortcut. Head back inside the castle and continue downward to the castle's basement sections. About halfway through, you will find a brown door to the right which you can unlock for another shortcut from Ashbourne Village's upper middle section. Continue further down, fighting through the Undead Guards and Undead Knights. At the very bottom, you will find a Treasure Pouch containing a Salt Sliver as well as a lever you can pull, unlocking the lower gate from the western section of Ashbourne Village. Step outside and power up the Pulley right by the gate and ride it up to a ledge above and to the left. The door here leads to the castle's forge and requires you to have devoured 4 Named Mages in the area. Inside, you will find Inquisitor Selet crouched and afflicted by the Spellmark. He asks you for a Guiltless Shard to rid himself of the affliction. Give him a shard to begin his quest chain. He will move to Bol Gerahn after you leave the area.
The Spellmarked Inquisitor found near the bottom of Ashpeak Castle
Check the Treasure Chest behind the Inquisitor for the Smithing Smock, Eye Patch, Smithing Gloves, Smithing Boots and the Smith's Hammer. Look up to find a grappling point and grapple your way to the ledge on the upper left. Walk up the stairs on the right and pull the lever to unlock the gate to the rear castle yard where the castle's lower-west Obelisk can be found. The lower right path just leads back to the basement path.
Ashpeak Castle - Getting the Fated Tome
Acquiring the tome requires you to have acquired the Magnesin Supply Inquisitor Tool from Bol Gerahn. From the castle's lower-west Obelisk and rear castle yard mentioned above, climb up the platforms on the right as high as you can get and then cross over to the left using the makeshift bridge made up of rickety platforms. Before entering the building here, drop down into the lower platform attached to the west wall. From here, drop down once more and carefully descend by pushing against the wall as you fall. Your goal is to get into an opening in the wall to find a hidden room with a Treasure Chest containing 3x Twin Ashpyr and the Chainmail Hauberk, Guard's Spangenhelm, Guard's Gloves and Guard's Boots.
Make your way back outside, climb up the platforms again and cross the makeshift bridge to the the left once more. Enter the building and loot the Treasure Pouch next to Undead Knight for 3x Frospyr and a Salt Sliver. Climb up the ladder and the stairs. There is a ledge above with a Mage hunt distortion (Nameless Pyromancer) and another Obelisk further up but you can't reach them from here so exit the to the east for now.
Outside, cross over the rickety platforms to the right and activate the Pulley start point connecting to the lower section for a shortcut. Climb up the ledge to the right and head inside the building. Continue east until you reach the another outdoor section. Climb up to the very top where you can see a platform on the top right you can grapple to. Defeat the flying Undead Sage and the grapple up to the platform to collect the Treasure Pouch containing a Blueblossom. Jump back down and head through the upper west doorway past two screens to end up in the upper sections of the rear yard. From here, grapple over to the platform with the ladder on the left and climb up. Power up the Pulley here and ride it to the west. Near the Pulley's end point is another Pulley you can activate for a shortcut from the lower levels of the rear yard. Continue on west and defeat the Undead Guard and Undead Knight. Behind them are two grappling points up above but before grappling up there, take the ladder downwards and enter the doorway below. This leads to the nameless Pyromancer Mage hunt and Obelisk mentioned earlier. Lower the ladder next to the Mage's distortion for an easy shortcut. Note that if you choose to fight this Mage, it is essentially the same fight as Arzhan-Tin except for the Chase Sequence as this one will be teleporting all around Ashpeak Castle. It will also drop all the same loot as Arzhan-Tin but will also award a unique helm, the Mask of Fury upon defeat.
Retrace your steps back to the grappling points and use them to get to the ledge above where a Treasure Pouch containing the Gray Tome of Fates can be found. Return this item to Runereader Diedela back at Pardoner's Vale to unlock your first set of Fated Hunts.
Grappling Points leading up to the Gray Tome of Fates
Ashpeak Castle - Shortcuts and Other Equipment
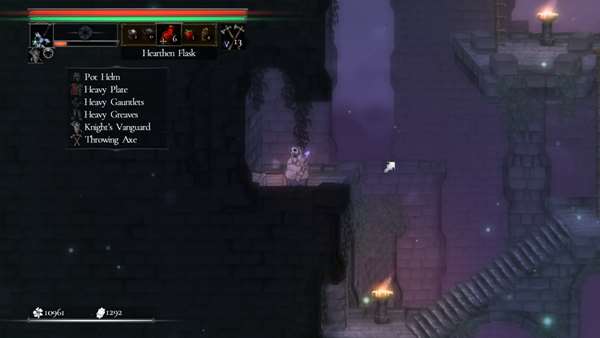
From the castle's main entrance chamber. Get up to the rickety platform above using the solid platform on the right. Upon reaching it, quickly run to the wall on the left, perform a wall jump to get up to the solid platform above and then exit east to a balcony above the castle bridge. You can power up the Pulley here to unlock a quick shortcut from the Valesnight Square Obelisk. Note that there is also a distortion here for an optional hunt against an Nameless Electromancer, if you need its materials. This is essentially the same fight as Ekriks Graycloud but it will also drop a unique helm upon defeat called the Lightpriest Mask. Climb the ladder to the left of the distortion and then jump past the second ladder to land on the ledge to the left with a Treasure Chest containing the Pot Helm, Heavy Plate, Heavy Gauntlets, Heavy Greaves, Knight's Vanguard and the Throwing Axe.
The Heavy Armor Set and other equipment
Head back up to the ladder and climb the second one as well. Head into the entrance on the left to find a small room patrolled by an Undead Sage. There is another Treasure Chest at the bottom containing 3x Goldenpyr and a Guiltless Shard. In the top left, there is a ledge you can grapple to where you can initiate the hunt for a Nameless Cryomancer. This is the Nameless version of Celus Zend and will reward you with the Mask of Stillness upon its defeat along with other items from Celus' Zend's loot table.
Go back to the balcony section outside, grapple up to the ledge above and to the left and climb up the long ladder to reach the Castle's eastern rooftop. Note the platform up above with a Stone Circle. You will not be able to reach it from this point. Instead, power up the Pulley to the left and ride it to the western rooftop where a Rootspoken Knight awaits. This knight may be quite difficult to deal with at lower levels and armor upgrades. Upon defeat, it will drop a Gray Starstone and an Ashpyr. Continue westward and drop down the left edge of the rooftop. Jump over to the platform on the left and ride the Pulley up here to the west where an Undead Guard and Undead Knight await. If you've not yet obtained the Gray Tome of Fates, this is an alternate path that will take you to it. Use the grappling hooks above the western wall to get to the floor above. The tome is on the ledge on the left.
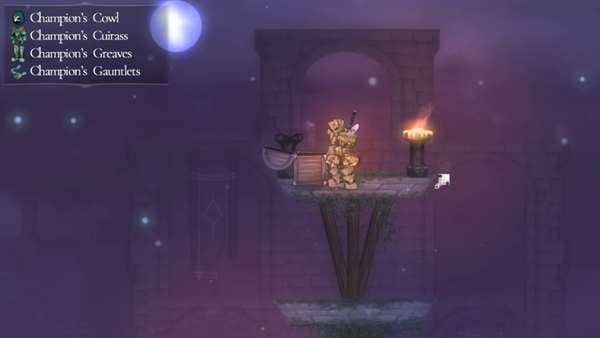
Continue to the east and drop down to the ledge with a Stone Circle. This next bit requires that you have collected the Luminstone and Ethercloth Bolt Inquisitor Tools from Corvius' Mire and Dreadstone Peak, respectively. Use the Luminstone to activate the Stone Circle and reveal a set of luminous platforms allowing you to go further east. Quickly make your way up the first platform and then ride the Ether Vent using the Ethercloth Bolt to get to a second platform and then onto a solid roof section with another Stone Circle. Defeat the Undead Sage flying overhead and then activate this Stone Circle to reveal another luminous platform, a couple of luminous grappling hooks and one more platform leading up to the top section of the Castle's eastern rooftop that you couldn't get to. Lower the ladder to the right to unlock a direct shortcut and then climb up the platforms above. Defeat the three Undead Sages and then loot the Treasure Chest to obtain the Champion's Cowl, Champion's Cuirass, Champion's Greaves and the Champion's Gauntlets.
Interestingly, if you return to this area on your next visit, you will find Champion Hera standing next to the empty chest. She will tell you that the armor belonged to a friend who had stashed it up here and she laments having found the chest already pilfered but she also comments that if you'd been the one to take the armor, you more than deserve it.
Root-Ceil Cavern - Mage-sealed door
There is a mage-sealed door in the lower-west section of the Root-Ceil Cavern which is guarded by an Undead Knight and requires that you have killed 4 Named Mages and devoured their hearts to unlock it. Through this door is a large cavern with several wooden platforms of different heights and a lone Rootspoken Knight awaiting. The knight drops an Ashpyr upon death and the cavern does not appear to have any uses. While you can technically unlock this door on your first visit, the Rootspoken Knight may prove too difficult to fight until you've leveled up a bit and have acquired more upgrades.
Craterstone Mines - Nameless Venomancer Hunt
After acquiring the Ethercloth Bolt Inquisitor Tool in Dreadstone Peak, you can return to the Craterstone Mines using the lower-west entrance from Greymoss Mire. Grapple up to the ledge and continue east towards the door to Stonehall Dungeon but do not enter. Instead, use alternating wall-jumps to get to the ledge above and follow it east to find a set of Ether Vents. Ride the vents up a previously unreachable ledge where a Treasure Pouch with 3x Mosspyr Trio and 3x Blueheart Token can be found. Behind the pouch is a Mage distortion where you can begin the hunt for a Nameless Venomancer. This is essentially the same fight as Varren Ovrin and he will drop the same loot as well as a unique helm, the Mask of Veruna.
Trivia & Notes
- Trivia and notes go here
 Anonymous
 Anonymous

Did the black starstone get removed i just opened that pouch and it was something different
0
+10
-1