Dreadstone Peak is a Location in Salt and Sacrifice (SnS) and is the fourth destination players will visit during their adventure. This Dreadstone Peak Walkthrough helps you find and fight all Bosses and collect items in the area. Dreadstone Peak is the site of a large temple ravaged by monstrosities, its various scholars and monks transformed by the powers of the warp. Atop its snowcapped mountains is the wreckage of a large skyship, its hull and deck still teeming with activity from reanimated deckhands and sailors.
Snowy mountains rise to the west, where an abandoned temple dwells beneath a towering tomb for the realm's last bluestone ship. Rare treasures, hoarded and forgotten, prove irresistible to voracious Mages.
This page is a segment of the Walkthrough, featuring a comprehensive guide that aims to help players complete the main campaign. The Walkthrough covers each location in detail, including all obtainable Items and Equipment, NPCs, Enemies and Bosses, and is organized by location based on our recommended progression path to completing the game.
- See the Game Progress Route page for a minimalist guide on where to go and what to do next
- See the Quests page for details on quest progression
- See the New Player Help and Game Mechanics pages for tips covering the game's various mechanics
Dreadstone Peak Guide
Previous: Corvius' Mire
Next: Elder Copse
Sub-Areas: Whitecrag Path, Temple of Eleven, Old Annex, Pilgrim's Respite, Blasphemer's Vault, The Falling Star, Sentinel Caves
Map
https://easyzoom.com/image/350606
NPCs in Dreadstone Peak
Dreadstone Peak Bosses
- Draeaxenerion, The Scaled Nobility
- Nephael Mos, Knight of the Chasm
- Inquisitor Selet
- Kraeaxenar, Wyrm of Sky
- The Two That Remain
- Vodin Tenebre, The Lurking Shadow
- Zaruman Tam, The Wraith Temporal
- Zyzak Zuun, The Curse-Riddle Mind
Dreadstone Peak Enemies
- Cleftin Soldier
- Crysocest
- Eternal Guard
- Fangbreaker
- Rimereader
- Skyswept Deckhand
- Skyswept Enforcer
- Temple Highblade
- Yakari Ranger
- Valley Bat
- Vault Retainer
All Items in Dreadstone Peak
Consumables
Materials
- Ashpyr Cluster
- Exotic Strand
- Fine Leather
- Frospyr Cluster
- Frospyr Trio
- Goldenpyr Cluster
- Grimgrip Cap
- Haze Spiral
- Irona Ore
- Lumas Ore
- Steel-glass Ore
- Umbral Creeper
- Valley Herb
Equipment & Upgrades
- Bloodletter's Hood
- Carved Feline
- Carved Vessel
- Cerebral Cap
- Diablo Mask
- Dragonhead Helm
- Dusken Boots
- Dusken Cuffs
- Dusken Hood
- Dusken Tunic
- Highblade's Boots
- Highblade's Gloves
- Highblade's Hat
- Highblade's Mantle
- Incantation Bowl
- Iron-band Stave
- Jeweled Fibula
- Ostarin Armor
- Ostarin Bracers
- Ostarin Greaves
- Ostarin Helm
- Royal Crown
- Royal Cuirass
- Royal Gauntlets
- Royal Greaves
- Steel Blade
- Temporal Mitre
Key Items
Other Items
- Other Items
Dreadstone Peak Walkthrough for Salt and Sacrifice
Dreadstone Peak Main Walkthrough
Temple of Eleven and the Ethercloth Bolt
You spawn into the Dreadstone Peak in a sub-area called the Whitecrag Path. Activate the Obelisk here and then head east. Defeat the Cleftin Soldier and the Yakari Ranger along the path and then grapple up to the ledge to find another set of the same enemies on the platforms above. Make your way up the platforms and grapple your way to the next section of the hill for yet another set of the same enemies. Past them, grapple up to one more ledge and loot the Treasure Pouch for a Salt Piece. Continue on to the upper east and defeat one more Cleftin Soldier and Yakari Ranger guarding the gates to the Temple of Eleven sub-area. You will not be able to enter from here yet. Instead, use a combination of wall-jumps and grapples to reach the top. Loot the Treasure Pouch next to the second grapple point for a Grimgrip Cap. Defeat the Fangbreaker enemy on the roof here and then drop down the ledge to the right of the building where you can enter through the opening on the left.
Inside, navigate your way to the ground floor and defeat the Cleftin Soldier. Next, pull the lever on the left side to unlock the gates you couldn't enter earlier and then exit from the right of the building. Outside, climb up the platform above the gate and activate the Temple's Obelisk. Continue on eastward and take out the Yakari Ranger atop a platform above the next building's entrance then head inside. Head down the steps and you will be met with the first Boss Encounter of this location.
Boss Fight: The Two That Remain
Loot:
- Incantation Bowl
- Jeweled Fibula
- Salt x 24,300
- Silver x 1,380
Moveset:
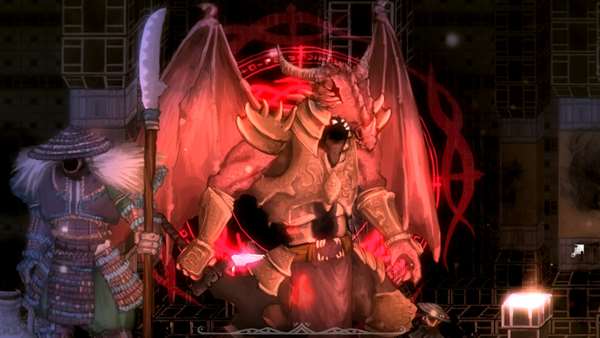
Ouros, The Living Will (Minotaur)
Axe Smash - Ouros holds his battle axe up high and then performs a slow, powerful strike in a downwards arc in front of him.
Skyward Cleave - Ouros holds his battle axe behind him. After a short delay, he violently slashes upwards in front of him, sending players flying if the attack connects. Dodge through and behind him before the attack goes off.
Axe Stab - Ouros holds his battle axe diagonally over his waist and then stabs with the top of the axe head. This attack can be rolled through.
Leaping Strike - Ouros leaps towards his target, smashing with his battle axe as he lands. Roll underneath the minotaur or time your i-frame through the attack.
Disengage - Ouros leaps away and smashes the ground with the butt of his axe. He can also use this move offensively. Simply avoid his landing zone.
Charging Bull - Ouros holds his battle axe with the axe head pointing diagonally at the ground. After a brief moment, he performs a mad dash across the screen, trampling the player on contact. Requires very precise dodge roll timing to avoid.
Runic Explosion - Only used below 50% HP. Ouros plunges his axe head-first into the ground, creating a set of runes in a block formation in the air. After a short delay, the runes explode, dealing heavy damage in the zone. Get out of the area as soon as you see the runes come up.
Tenur, Valorous Blade (Slender Knight)
Wide Slash - Tenur holds her sword with one hand to her waist on the opposite side and then performs a wide slash in front of her. Basic attack that can easily be rolled through.
Helmsplitter - Tenur holds her sword up high with both hands and performs a quick overhead slash after a brief delay. Roll through and get behind her.
Skyward Cleave - Similar to Ouros' version, Tenur holds her sword behind her and then violently slashes upwards after a brief delay. Dodge through her when you see her hold the sword this way. Otherwise, create distance between you two.
Advancing Kick - Tenur quickly kicks with one leg while moving forward. She will sometimes use this move to follow-up her repositioning leaps. Roll through her as she approaches.
Retreating Thrust - Tenur leaps backwards a medium distance and then thrusts forward with her sword after a brief delay. Avoid following her during the leap and the attack should not hit you. Otherwise, simply roll through it.
Reposition - Tenur leaps a great distance to reposition in a different location in the arena. She deals damage and knocks players away upon landing but she will rarely use this move offensively like so. Avoid being in her landing zone.
Blazing Fist - Only used below 50% HP. Tenur performs a high leap straight up as her fist glows white-hot. She then throws a fiery projectile diagonally at the player. Quickly run or roll forward to avoid the projectile. She will sometimes throw two projectiles in rapid succession.
Strategy:
This is a duo boss fight against Ouros, the Living Will, a minotaur warrior wielding a large battle axe and Tenur, Valorous Blade, a female knight clad in golden armor and wielding a greatsword. The most difficult aspect of this fight is that they will simultaneously attack and perform their moves while constantly attempting to sandwich you between the two of them. However, these two warriors share a single health bar and there is no need to focus on one or the other.
Both bosses have leaping attacks as well as retreating moves which they will constantly use to reposition around the arena. The most dangerous position you can be in is between the both of them while they are close to each other. Try to constantly manipulate their positioning by rolling behind one of them. Neither warrior is faster than the other and both telegraph their moves, nearly all of which have a brief delay before going off. Learn their telegraphs and attack patterns so you can effectively dodge and retaliate. Do not get greedy with your strikes. Keep it to 1-2 hits at most throughout the fight. You will not get a good window for more due to the nature of the encounter.
When their health bar dips below 50%, be on the lookout for Ouros' Runic Explosion attack as it has a very large hitbox and hits very hard. When you see the runes appear, get as far away as possible. Dodge behind him if necessary but do not let your guard down as Tenur can quickly apply pressure with her special Blazing Fist move as well.
Once their HP is depleted, the boss you hit last will get vanquished but you will need to land one last hit on the remaining one to end the encounter.
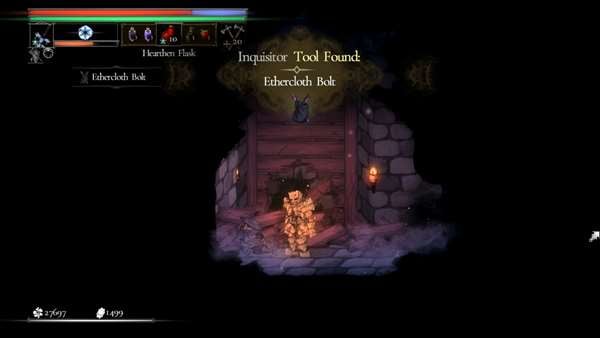
After defeating the bosses, head east and grapple up to the upper ledge on the right. Continue east to find another Obelisk. From here, make your way up the platforms above, the first of which contains a Treasure Pouch with a Salt Piece inside. Keep going up you will find another Treasure Pouch containing a Guiltless Shard. Head into the opening on the left to a small room with a corpse. Inspect the corpse to obtain the Ethercloth Bolt Inquisitor Tool.
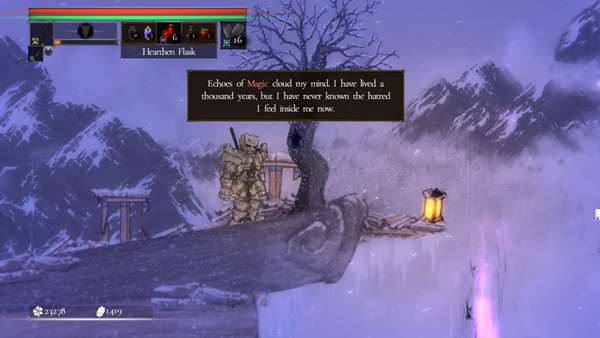
This tool works like a special parachute that will allow you to ride the many Ether Vents scattered across the land, such as the one just outside the small room you collected the tool from. Ether Vents are magical columns of air and using the Ethercloth Bolt while leaping towards one of these vents will allow you to ascend to greater heights, get to otherwise inaccessible areas as well as serving as important shortcuts.
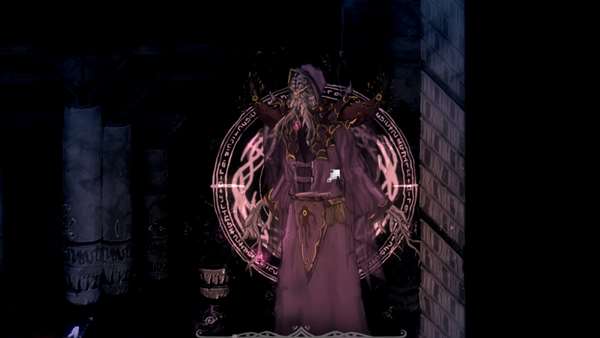
Head out of the room and test out your new tool on the Ether Vent just outside. This leads to a platform up above with a Talking Head NPC inside a Kiosk. Speak to it for some backstory then head back down. Your next goal is to kill a Named Mage in order to unlock a nearby mage-sealed door and progress forward. Head west from the Obelisk and at the edge of the path, grapple up to an Ether Vent above. Ride the vent to the second floor and then head west past the two sets of Eternal Guard and Temple Highblade enemies. Head up the stairs to find a Mage's distortion at the end of the path. Interacting with this initiates the hunt for Zyzak Zuun, a Neuromancer.
Mage Hunt: Zyzak Zuun, The Curse-Riddle Mind
Loot:
- Thinking Heart (50%)
- Enlarged Lobe x 1-2 (50%)
- Slippery Node x 1-3 (50%)
- Neural Fluid x 1-5 (50%)
- Twin Goldenpyr x 1-3 (20%)
- Salt x 9,895
- Silver x 3,037
- Guiltless Shard
Summoned Mobs:
Chase Sequence
Zyzak Zuun can first be found at the bottom floor of the Temple, right below the Ether Vent you took to get up to the second floor. Fight him and his mobs here for a while and he will teleport up right next to the eastern Obelisk. Next, make your way back up to the second floor where the Mage will have teleported. After this spot, he will teleport further up to the third floor. To get here, head west to his hunt initiation point and grapple your way up and to the east. After this spot, he will teleport further up. Head east from where you are and grapple your way across to the right ledge leading to a mage-sealed door. Wall-jump up to the platforms above to reach the fourth floor and take the ladder on the left to find the mage again. From here, he will teleport to another floor up above. Jump over to the right side of where you are to collect the Treasure Pouch which contains a Salt Piece. Head down the ladder and go east, up the stairs and then grapple your way up and to the left. Fight the Mage here and he will teleport one last time to the upper east. Head east to find the Temple's upper-eastern Obelisk and then climb further up to begin the Boss Encounter.
Boss Fight
Moveset:
Hand Whip Uppercut - Zyzak Zuun quickly cracks his hand like a whip, elongating it like a root striking upwards. This move is very hard to read due to its speed but can be rolled through.
Neural Wave - Zyzak Zuun's forehead glows with a bright light. After a brief delay, he releases a set of wide arched beams that travel diagonally towards the player. Roll through the attack as the mage releases it.
Neural Burst - Zyzak Zuun briefly raises both hands to his sides as energy funnels into his torso. After a brief delay, the energy bursts in a large radius around him, dealing damage to anything it comes into contact with. Stay away from the Mage as he channels the attack.
Tethered Lightning - Zyzak Zuun raises both hands high above to either side of him, summoning several tiny white orbs with randomized positioning. Immediately after they appear, a beam of lightning pulses along a path, connecting each orb to the next and dealing damage on contact. This lightning pulses several times over a few seconds before the orbs disappear. Avoid the standing in between any two lightning orbs.
Strategy:
Due to the very long arena and Zyzak Zuun's very slow walking speed, you can employ a ranged strategy to keep relatively safe. Run far to the opposite of where he is and he will very slowly lumber in pursuit of you without performing any other attacks until he is in range. Take advantage of this by pelting him with your ranged weapons and throwables. Zyzak Zuun is easily staggered and he can enter a special stagger animation where his eye glistens brightly for a brief moment. When this happens, you can leap towards him and grapple towards his head, culminating in an aerial knife attack that deals lots of damage.
His Neural-energy powered attacks can be quite dangerous due to their range and large hitboxes. Watch out for the telegraphs listed above and dodge accordingly. His Tethered Lightning attack can become quite troublesome if you don't know how to read the attack. Learn this attack as fast as possible to prevent falling to it.
Once the Mage's health is depleted, press the appropriate button to devour his heart and end the encounter.
Speak to the Mage's dying human form for some backstory and collect your extra loot.
Temple of Eleven - Second Mage Hunt
You will need to devour two more Mage hearts in order to move forward with the campaign. Having devoured one heart, you can unseal the door on the left of the current area. This leads outdoor to the Temple's upper-western balcony. At the very edge is a Mage distortion where you can initiate the hunt for Zaruman Tam, a Chronomancer. Before beginning the hunt, take a quick detour to collect some items and unlock a few shortcuts.
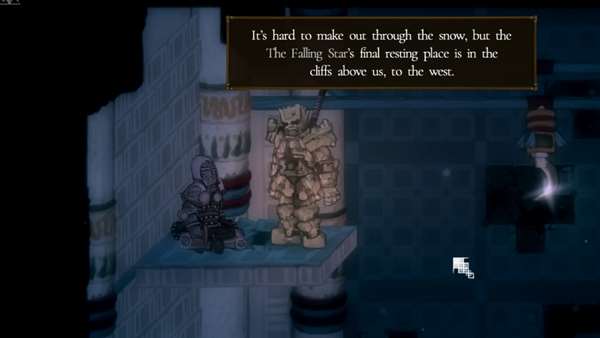
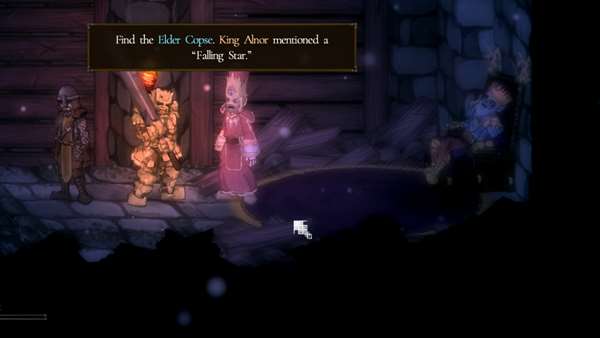
Drop down the ledges below and to the left of the balcony. You can always get back up via the grappling points. Pick up the Treasure Pouch on one of the ledges here, it contains an Exotic Strand and a Salt Piece. Navigate your way across the roofs below, defeating the Cleftin Soldiers and Fangbreakers along the way as you move westward. Eventually, you will come across a building section with ledges sticking out of the left side and a mage-sealed door in the middle section. You will not be able to open this door just yet but there is a Pulley you can activate at the bottom ledge. Ride the Pulley to another building further west and activate a second Pulley to the right side of it which leads down below to a lower section of the previous building where another mage-sealed door can be found, as well as a third Pulley. This Pulley leads to the top of the very first building you encountered when you first entered Dreadstone Peak. If you enter this building again from the opening in the top right, you will find the Kingdom Knight from previous locations in the top left corner who will tell you about a skyship called The Falling Star that crashlanded somewhere in the west.
The Kingdom Knight who mentions a ship called The Falling Star
Now, you can make your way back up to the balcony and initiate the mage hunt.
Mage Hunt: Zaruman Tam, The Wraith Temporal
Loot:
- Shifting Heart (50%)
- Seeing Eye x 1-2 (50%)
- Temporal Lobe x 1-3 (50%)
- Ephemeral Lash x 1-5 (50%)
- Twin Blazepyr x 1-3 (20%)
- Salt x 14,780
- Silver x 3,180
- Guiltless Shard
Summoned Mobs:
Chase Sequence
Head back into the Temple via the same door on the right to find Zaruman Tam. Fight him and his mobs here until he teleports back outside to the balcony. Follow him back out and fight him there. He will then teleport several times as he descends towards the west. Follow him to the east of the very first building encountered in this area. After that, he will teleport east into the arena where you fought The Two That Remain. Finally, he will teleport to the second floor of the main temple building, above the Ether Vent and his Boss Fight will begin.
Boss Fight
Moveset:
Crescent Blade Slam - Zaruman Tam leaps into the air towards the player and then slams his crescent blade down. This attack has a very large hitbox due to the size of his weapon. Move under the mage as he leaps into the air.
Crescent Blade Combo - Zaruman Tam winds up by holding his crescent blade behind him. After a very brief delay, he performs three upward slashes in rapid succession while advancing forward. Get behind the mage during the wind-up, otherwise the combo is very difficult to avoid.
Temporal Shower - Zaruman Tam raises both glowing hands in front of him while a portal appears behind his head. Shortly after, dozens of tiny projectiles start shooting out of the portal diagonally towards the ground a short distance in front of the mage. You can avoid this attack by rolling behind the mage or remaining just out of reach of the projectiles' hitzone.
Void Tendrils - Zaruman Tam summons a large portal, usually on either side of the arena. Several tendrils partially break through the portal and thrash about for a few secons, dealing damage to anything they hit. Simply avoid being near the portal to prevent getting hit.
Temporal Pillars - Zaruman Tam raises his glowing hands in front of him as outlines of 3 energy pillars begin to manifest in the arena. Once fully formed, these pillars slow anything caught in their areas of effect down to a crawl. The pillars disappear after a short duration, reverting the speed of all affected back to normal. Position yourself away from the pillars as they begin to manifest.
Temporal Void - Causes the exact same effect as the Temporal Pillars move. The only difference is the shape of the effect. This one manifests as a large clock-like circle in a singular location. It has a fairly large hitbox but is otherwise identical to the pillars.
Strategy:
Zaruman Tam is unique in his ability to manipulate time and significantly slow down players. Watch out for his temporal magic and be sure to avoid their area of effect before they fully manifest as they can set you up for his more devastating moves such as his Crescent Blade Combo.
Despite his large arsenal of moves, Zaruman Tam also leaves himself open to retaliation a lot of the time due to his channeling animations. Take every opportunity to hit him once or twice while he's casting spells. Your biggest opportunity for damage is during his Temporal Shower attack as he is locked in a channeling animation for quite some time. You just need to make sure you close the distance before the projectiles start firing. Dodge behind him as he channels and punish the mage. Remember to take the opportunity to do grapple stabs when he gets staggered and his eye glistens briefly like a grappling point.
Once his health is depleted, press the appropriate button to execute him and devour his heart, ending the encounter.
Speak to the mage's dying human form for some backstory and then collect your extra loot. Now that you've devoured two hearts, drop down to the bottom of the Temple and unlock the mage-sealed door to the right. This leads into the Old Annex sub-area where you can find another Named Mage hunt.
Old Annex
Inside, navigate to the narrow pathway below with two Temple Highblades. Take the stairs to the left and you will find a Mage distortion. Interact with it to initiate the hunt for Draeaxenerion, a Dracomancer. Before initiating the hunt, take a detour to unlock a shortcut and collect some items.
Head east from the hunt's start point and drop down the narrow chute. There is a Treasure Pouch in the next section that contains a Salt Piece. Note that you can drop down from the floor here into another narrow chute with an Ether Vent running through it. Drop down and use your Ethercloth Bolt to manage your descent and prevent fall damage. At the bottom, you will find an NPC known as Eater Manrin. This is the Chaos Hunger NPC who is involved in certain PVP activities and will move to the Treacher's Grotto below Pardoner's Vale after speaking to him here. He will serve as a Merchant, selling various equipment and items.
Eater Marin, the Chaos Hunger NPC found at the bottom of a chute in the Old Annex
Head back up using the Ether Vent and continue down the long set of stairs heading to the lower west and defeat the Temple Highblade along the way. At the end of the path, jump into another Ether Vent by the west wall and maneuver yourself to land in the cavity in the wall on the right with a Treasure Chest which contains the Highblade's Hat, Highblade's Mantle, Highblade's Gloves, Highblade's Boots and the Steel Blade.
Jump back into the Ether Vent and grapple at the top to a ledge on the left. To the left of the next ledge is an opening that leads to the sub-area called the Pilgrim's Respite. Before heading there, jump onto the ledge with the stairs on the right and at the top, use alternating wall-jumps to get to the top of the right wall where you can activate a Pulley that leads back down to the Mage distortion. Initiate the hunt now and then take the Pulley back up and enter the Pilgrim's Respite.
Mage Hunt: Draeaxenerion, The Scaled Nobility
Loot:
- Scaly Heart (50%)
- Drake's Claw x 1-2 (50%)
- Ember Scale x 1-3 (50%)
- Dragon's Tear x 1-5 (50%)
- Twin Blazepyr x 1-3 (5%)
- Twin Ashpyr x 1-3 (5%)
- Salt x 17,530
- Silver x 3,037
- Guiltless Shard
Summoned Mobs:
Chase Sequence
Draeaxenerion can first be found in another sub-area called the Blasphemer's Vault. To get there, you must first pass through the Pilgrim's Respite cave. From the cave's upper-east entrance, navigate your way down to the middle section where a Stone Circle can be found next to some wooden platforms. Before activating it, head up the stairs to the west and pull the lever at the end of the path. This opens the gate next to it which leads to the side of the mountain in Whitecrag Path so you can more easily get back to this area later. Head back to the Stone Circle and activate it to reveal a luminous grappling point to the upper right, allowing you to reach the ledge above the locked gate. To the right of this ledge is a hidden opening that leads into the Blasphemer's Vault's first hallway. Drop down and pull the lever to the left to unlock the main gate. Fight the Mage and his mobs here for a while until he teleports. You can open the door at the end of the hallway to find an Obelisk and save your progress. Head back into the main hallway and drop down the chute in the floor using the cross platforms. At the bottom, take the east path to find the Mage again. After he teleports, head back west and drop down the chute at the end to find another Obelisk. From here, head to the right and drop down the platforms to a large hall with several Vault Retainer enemies. You will find the mage here as well.
Boss Fight
Moveset:
Blade Slash - Draeaxenerion raises his sword slightly with one hand and then grips it with both hands, perform two quick slashes in front of him. The attacks have rather narrow hitboxes and can be avoided by backstepping. Otherwise, roll through the mage and get behind him.
Blade Smash Combo - Draeaxenerion leaps towards the player and then performs 2 to 3 quick and powerful double-handed slashes with his Dragon's Maw sword while slowly advancing. He can also perform this move after landing from any aerial move. Roll behind the mage to avoid the slashes.
Draconic Laser - Draeaxenerion raises one hand as it glows a bright red. Shortly after, he tracea a thin laser beam along the ground in front of him, superheating the area and causing it to explode in a cascading manner along the laser's path. Avoid the laser's path or dodge through and behind the mage before the laser is released.
Aerial Draconic Laser - Draeaxenerion leaps into the air and then raises one hand in front of him as it glows a bright red. He then traces a laser beam across the ground below him, superheating the area and causing it to explode in a cascading manner along the laser's path. This version of the laser has much longer travel path compared to the ground variant. He will also follow this up with Blade Smash Combo as he lands. Avoid the laser's path at all costs when he performs this aerial version and get ready to dodge through him for the melee combo follow-up.
Draconic Fireball - Draeaxenerion raises one hand in front of him as it glows a bright red, similar to the laser move but instead fires off a single, small fireball which travels diagonally towards the player and explodes on impact. Easy to avoid by rolling.
Explosive Flight - Below 50% HP, Draeaxenerion's leap animation for his Aerial Draconic Laser move is modified to add an offensive component. He holds his blade with both hands with the blade facing straight down.as energy gathers below it. After a brief moment, an explosion occurs underneath the mage and he leaps upward to chain into his laser move.
Strategy:
The difficulty in this fight stems from Draeaxenerion's very long, powerful combos which are made even longer as he dips below 50% HP.
An effective strategy early on in the fight is to keep the Vault Retainers alive so they can damage the boss. However, due to his sheer strength, he will eventually overpower them but not before they've taken a large chunk off his health bear if you're lucky.
It is generally dangerous to attempt to punish the Mage during his Blade Smash Combo as he can quickly change directions in between each slash. Focus on dodging instead. A good window to attack is whenever he casts the ground version of Draconic Laser. This move has a slightly long recovery time, perfect to get 2-3 hits in. Just make sure to roll through the initial portion of the laser to end up near his legs.
Another strategy is to use the very long hallway to bait him into his very slow walking animation. Simply lure him to one side and quickly run in the opposite direction. As he inevitably pursues you, pelt him with ranged attacks. If you deal enough damage, you may even get him into the special stagger animation where his eye glistens briefly like a grappling point. Allowing you to grapple to his head and execute a knife move that deals lots of damage.
Once the Mage's HP is depleted, he will collapse to the ground on his knees allowing you to execute him and devour his heart, ending the encounter.
Speak to the Mage's dying human form for some backstory and collect your extra loot. Head all the way to the east into a small room to collect a Treasure Chest which contains a Large Bag of Silver and 3x Goldenpyr Cluster. Now that you've devoured 3 Hearts, your next goal is to get to The Falling Star skyship.
The Falling Star
To get to The Falling Star, make your way back to the Temple of Eleven and navigate your way to the top of this building:
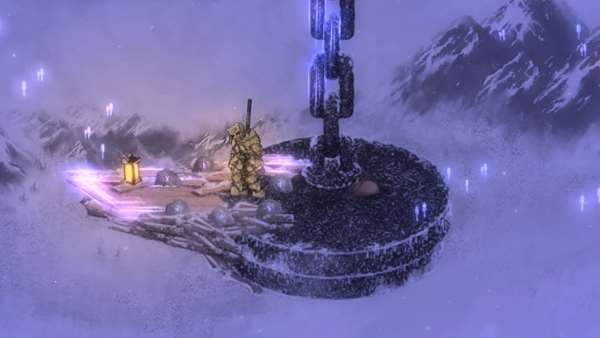
You can get here either through Pulley shortcuts you've previously unlocked or via the balcony on the top floor of the eastern-most, largest building. Note the Stone Circle on the platform to the left of the roof. Activate this stone circle to reveal luminous platforms and grappling points leading to the west, to a steel platform held aloft by a gigantic metal chain.
Giant Chain Platform high above Whitecrag Path and the Temple of Eleven
Activate the Stone Circle on this platform and grapple your way through the luminous grappling points further west to a second chain platform. Climb up the wooden platforms along the chain and you'll have arrived at the bottom hull of The Falling Star. The right side has a door that won't open from this side and the left side has a mage-sealed door that you can now unlock, having devoured 3 Mage Hearts. Note: You can also reach this area through the Sentinel Caves which you can get to by riding the Ether Vents west of the main Whitecrag Path Obelisk but the path through the Temple of Eleven is generally much faster.
Inside the ship, activate the Obelisk in the west and jump to the platform above. Grapple east onto a rickety platform and then grapple again to reach the ledge to the upper right of the entrance. Defeat the two Skyswept Enforcers here and continue along east. Defeat the Skyswept Deckhand and another Skyswept Enforcer by the ladder in the next section. Drop down to the lower section and unlock the door to the left, which is the previously locked door to the right on the outside by the giant chains. Head as far east as you can get in the lower hull and jump up the ledge to the right at the end to pick up the Treasure Pouch containing 3x Ashpyr Cluster but watch out for the Skyswept Deckhand who will ambush you from the upper left.
Make your way back to the platform with the ladder and climb it. Take a quick detour by heading up the stairs to the right. Navigate your way to the top floor while defeating several Skyswept Deckhands and loot the Treasure Pouch in the top-right, guarded by a Skyswept Enforcer for an Umbral Creeper. There is also a door here on the left but it won't open from this side. Go back down to the ledge atop the ladder and grapple over the gap to reach the ledge on the left where another Skyswept Enforcer and Skyswept Deckhand await. Head west after defeating them and you should be able to grapple across a rickety ledge to a platform with another Skyswept Deckhand on the left. The Skyswept Enforcer at the floor below may jump up to this platform as well. Drop down to where the enforcer was and continue on west. At the end of the path, there is a Treasure Pouch with a Salt Bunch as well as some rickety platforms above. Use the platforms to get to the next few floors above. At the top, fight off the Skyswept Deckhand and Skyswept Enforcer and then head through the exit on the right to reach the ship's main deck.
Important: Take a quick detour before heading further east onto the middle of the deck as this leads to a Boss Fight and the nearest Obelisk is far at the bottom of the ship's hull. Instead, climb up the platforms near the door and make your way to the upper west towards the stern of the ship. Defeat the Skyswept Enforcer up here and continue on to find a Treasure Pouch containing 3x Frospyr Cluster and a Salt Cluster. Jump off the edge of the stern and use the Ether Vents to slow your descent. There are also wooden platforms along the side of the cliffs to the left, along with several ore nodes you can mine.
Ether Vents found at the stern of The Falling Star, providing a shortcut from the hull
Your goal is to reach the bottom of this chasm safely and unlock the western door at the bottom of the ship's hull, giving you a direct shortcut from the Obelisk up to the ship's deck. Once you've done this, make your way back up to the deck and head to the middle to initiate the Boss Fight against the Wyrm of Sky.
Boss Fight: Kraeaxenar, Wyrm of Sky
Loot:
- Carved Feline
- Frospyr Trio
- Salt x 17,400
- Silver x 740
Moveset:
Dragon Breath - Kraeaxenar stands tall with blue flames forming at his mouth. He then slams down with his forelegs and breathes fire at the ground in front of him. Both his claw slam and breath can hit the player from melee and medium range. To avoid the attacks, run far away from the dragon.
Tail Sweep - Kraeaxenar stands tall and spreads his wings slightly. After a very brief delay, he sweeps his tail across floor in front of him. The attack can be rolled through with good timing. Otherwise, get away from melee range. Beware as Kraeaxenar can quickly follow this up with his Dragon Breath combo.
Chomp - Kraeaxenar pulls his head back and delivers a powerful bite near the ground in front of him. This attack can be rolled through with good timing. Otherwise, get far away from the dragon.
Melee Combo - Kraeaxenar swipes with one claw and then stomps with the other directly in front of him. He finishes off with a Chomp. Get out of melee range during the claw attacks and roll through the Chomp as it comes down.
Grounded Breath - Kraeaxenar stands tall, pulling his head further up as blue flames form at his mouth. He then lowers his head close to the ground, breathing a long stream of fire across the deck. This move is very difficult to avoid and you will need to jump several times in order to mitigate damage from it. However, it will still hit you as long as you are in front of the dragon.
Sweeping Breath - Kraeaxenar stands tall as blue flames form at his mouth. He then tilts his head down, pointing slightly towards his torso. He then breathes fire towards his tail and then sweeps the flames outwards. Get far away from the dragon as you see him breathe towards his tail.
Strafe Run - Kraeaxenar takes flight and begins a strafe run, breathing fire across the ship's deck. Once he's in the air, sprint towards and underneath him to prevent getting incinerated. If you are too far away, wait for the breath to approach and roll through it to avoid damage.
Strategy:
The difficulty with the fight against Kraeaxenar stems from his ability to cover melee and medium ranges very effectively. Many of his attacks also require you to get far away to safely avoid, allowing you very few chances to get hits in.
By far his most dangerous move is the Grounded Breath attack which not only has an incredibly long range but also a lingering hitbox. You can safely avoid this attack by running far away, to the very edge of the flames and jumping as it approaches. This will allow you to not get hit but will also prevent you from retaliating. If you are close enough to the dragon when the attack begins, you can roll forward past his lowered head and get at least 3 hits in. If you are caught in the middle of the breath, you can jump and combine ranged and melee attacks to increase your airtime.
Another move to watch out for is his Sweeping Breath. This move covers the dragon's rear all the way past midrange in his front so you will not have an opportunity to attack in melee. Focus on running away and pelt him with ranged attacks instead. Finally, his Chomp and Tail Sweep attacks can easily be rolled through, allowing a small window for you to attack as well.
Play defensively for this fight, make liberal use of your Hearthen Flasks and always be on the move. It may just be one of the most difficult ones by far and requires you to properly learn to read the boss' attacks.
After defeating the dragon, continue on east towards the bow of the ship. Underneath the stairs, you can unlock a door leading back into the cabins in ship's hull. Up the stairs and at the very end of the bow, you will find the Hazeburnt Tree.
The Hazeburnt Tree at the bow of The Falling Star
Speak to the tree to acquire the Runestones that will allow you to open a portal to the final major area, the Elder Copse from the Mirrorgate back at Pardoner's Vale. Before leaving, use the Ether Vent to the right and descend down to another giant chain platform where you can loot a Treasure Pouch containing the Cyan Tome of Fates. Return this to Runereader Diedala back at Pardoner's Vale to unlock another set of Fated Hunts. Finally, you can activate the Pulley to the right which leads back to the Temple of Eleven.
Note: You can take the Pulley from here down to the roof of a building in the Temple complex with a Stone Circle. If you activate the Stone Circle and quickly ride the Pulley back up to the chain, you can use a luminous grappling point to the left to reach a ledge on the side of the ship's hull where you can initiate the hunt for the Nameless Neuromancer, a variant of Zyzak Zuun. If you choose to fight him, he will drop all the same loot as well as a unique helm, the Cerebral Cap.
Now that you have acquired the Runestones to the Elder Copse, you have effectively completed the mandatory sections of Dreadstone Peak. You can go ahead and move on from here but note that there are still many things to discover in this area, which we will cover in the Additional Content sections below. If you haven't already done so, now is also a great time to revisit the previous Locations as you now have all of your Inquisitor Tools, allowing you access to all the hidden areas.
Dreadstone Peak Additional Content
The following sections pertain to optional content and activities you can complete that are not required in order to finish the game. However, they can lead to more equipment, bosses, quests and more that can greatly help you on your adventure.
Temple of Eleven - Ostarin Set
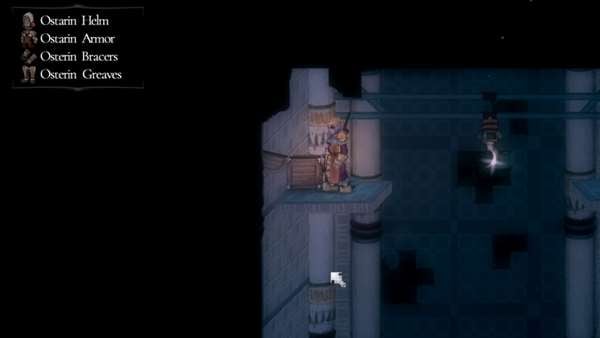
After defeating Kraeaxenar and unlocking the Elder Copse, leave Dreadstone Peak and return. Make your way back to the first building of the Temple of Eleven complex where you found the Kingdom Knight earlier. He will have moved to Pardoner's Vale and in his place will be a Treasure Chest containing the Ostarin Helm, Ostarin Armor, Ostarin Bracers and Ostarin Greaves.
A treasure chest with the Ostarin Set in place of the Kingdom Knight
Temple of Eleven - Nameless Chronomancer
After devouring the hearts of 2 Named Mages, return to the Temple of Eleven and navigate your way to the top of this building:
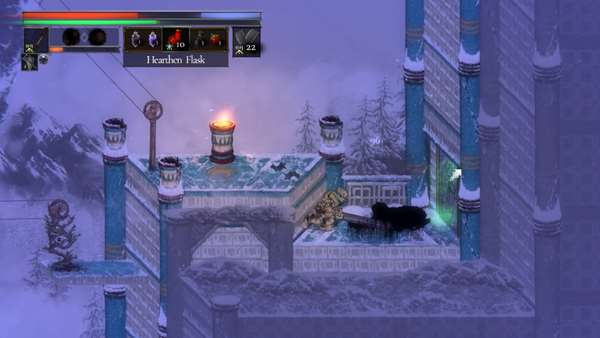
If you've unlocked shortcuts, this should easily be reachable via Pulley from the top of the first building in the Temple complex. Otherwise, navigate your way through the rooftops from the main building's western balcony. Unseal the door here to find a ledge high above the hall where The Two That Remain were fought. On this ledge is the Mage distortion from which you can initiate the hunt for the Nameless Chronomancer, a variant of Zaruman Tam. He will drop all the same loot as well as a unique helm, the Temporal Mitre.
Temple of Eleven - The Royal Retinue and the Royal Set
After speaking to them in Pardoner's Vale and completing Corvius' Mire, the King's Royal Retinue will move to Dreadstone Peak, in a mage-sealed door inside the main, largest building of the Temple of Eleven. This door can be found on the floor above Zyzak Zuun's initiation point, on the eastern side just before the platforms leading up to the next floor. To unseal this door, you will need to kill and devour the hearts of 2 Named Mages. Inside, you can speak to the Knight, the Priest and the King for some backstory and hints on what to do next.
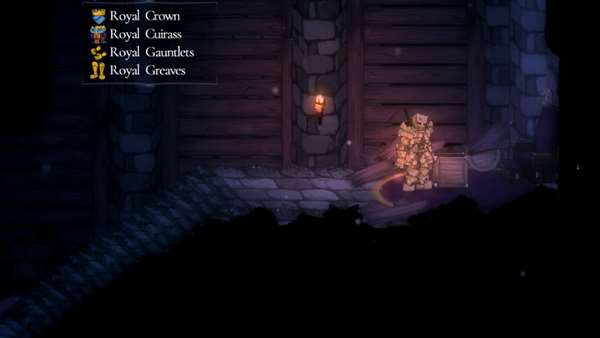
After defeating Kraeaxenar and unlocking the Elder Copse, leave Dreadstone Peak and return. Make your way back to the room. The Royal Retinue will have moved on to the Elder Copse and in their place will be a Treasure Chest containing the Royal Crown, Royal Cuirass, Royal Gauntlets and Royal Greaves.
A treasure chest with the Royal Set in place of the Royal Retinue
Whitecrag Path - Inquisitor Amben
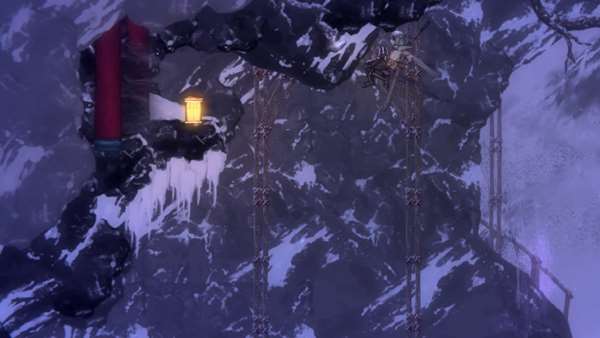
After obtaining the Ethercloth Bolt from the Temple of Eleven, head west from the starting Obelisk in Whitecrag Path. Past the Cleftin Soldier and Yakari Ranger, wall-jump on the cliff face to reach the first Ether Vent along the western mountain. Ride it up to a second vent which will take you up to a wooden platform along a ledge on the cliff face. Note the blue mining node here. Use the series of grappling points and vents to ascend further up onto a rickety platform suspended by ropes. Quickly jump onto the next Ether Vent on the right and then grapple up to an opening in the cliffs on the left, marked by two red pillars. This leads into the scroll room of this area.
If you've followed Inquisitor Amben's questline and have found and spoken to him at each of the major locations visited prior, he will be found in this room. Once again, exhaust his dialogue here and he will move to his next location in the Elder Copse.
Sentinel Caves
The Sentinel Caves is found in the upper-west of Whitecrag Path, with its entrance just opposite the scroll room noted above where Inquisitor Amben is located. Simply follow the same path riding the Ether Vents along the western mountain. At the top, grapple to the right instead of the left to reach the caves' entrance.
The entrance to the Sentinel Caves in the upper-west of Whitecrag Path
You will find the area's Obelisk as soon as you enter. Climb the platform above it to get to the level above and defeat the Rimereader and Crysocests there. Climb the wooden platform's first level and then use the grappling point on the right to get to the ledge on the upper right where another Rimereader awaits. Follow the steps up and wall-jump to reach the next floor in the upper left and defeat two more Rimereaders along the path. Continue west to another wooden platform with a Treasure Pouch containing a Salt Cluster and 3x Voidepyr Cluster. There is also a Treasure Satchel on the platform above it.
Continue on to the ledge in the upper right. Past the Rimereader is a ladder and behind that, is a mining node and another Treasure Pouch containing a Shimmering Bud. Climb up the ladder and from here, following the path east just leads to an exit near the giant chain platforms under The Falling Star. Still in the caves, jump up to the wooden platform above the ladder and grapple to the upper-west side of the caves where you can find the Mage distortion in an alcove where you can initiate the hunt for Vodin Tenebre, the Umbramancer. Before initiating the hunt, climb up to the floor above and wall-jump up the wooden platforms to loot the Treasure Chest above which contains the Dusken Hood, Dusken Tunic, Dusken Cuffs, Dusken Boots, and the Iron-band Stave.
Mage Hunt: Vodin Tenebre, The Lurking Shadow
Loot:
- Void Heart (50%)
- Creeping Claw x 1-2 (50%)
- Sunken Eye x 1-3 (50%)
- Glistening Dark x 1-5 (50%)
- Twin Voidepyr x 1-3 (20%)
- Salt x 12,099
- Silver x 3,037
- Guiltless Shard
Summoned Mobs:
Chase Sequence
After initiating the hunt, Vodin Tenebre can first be found at the base of the western mountain in Whitecrag Path leading to the Sentinel Caves. Head back down there and fight the Mage and his mobs until he teleports back to the cave. From here, it's a straight forward chase as he ascends the cave from floor-to-floor. Starting at the Obelisk, climb up the platform and to the next floor on the left to find him. He will then teleport directly above. Use the wooden platform to reach him. After this, continue on to the next floor by heading east. Fight him on this floor twice (he will teleport further west) and then he will finally teleport to the very top of the caves, where the Boss fight will begin.
Boss Fight
Moveset:
Overhead Combo - Vodin Tenebre conjures his blade and raises it above him, quickly performing an overhead slash. He will then follow-up with an upward slash. The Mage can change directions between the two hits so be careful when rolling through.
Umbral Thrust - Vodin Tenebre conjures his blade, holding it in one hand with the blade pointing towards the ground. After a brief delay, he dashes forward a medium distance, thrusting the sword at the end of the move and then following up with a big overhead swing. Dodge through the dash by beware of the follow-up swing as the Mage can quickly change directions.
Rising Crescent - Vodin Tenebre sinks into the ground and travels a short distance forward, emerging with a powerful upward slash. This move is very, very quick but has a short travel distance and you can easily outrange it. Alternatively, you can anticipate the slash and dodge forward to avoid it.
Umbral Missiles - Vodin Tenebre raises his front hand up high as it glows purple. After a brief delay, he releases 4 bullet-like projectiles that fly towards the player. These projectiles have poor tracking and easily be dodged by moving forward or backward, or simply dodging through and behind the Mage.
Crescent Slash Combo - Vodin Tenebre raises his sword above him, holding it very briefly. He then proceeds to perform two sets of two very quick slashes that each send a crescent wave of umbral energy traveling the entire length of the side of the arena he's facing. Each wave also spans the entire height of the arena. This move is very difficult to avoid and requires very precise rolling. Roll through the Mage as he does the first two slashes and then roll through him again as he can change directions for the third and fourth slashes.
Umbral Blade Barrage - Vodin Tenebre crouches slightly and then spins his sword in front of him. After the animation, he slams the sword pommel-first into the ground, sending dozens of smaller umbral blades bursting out of the ground in a very wide area in front of the Mage. Dodge through the Mage to avoid this attack.
Strategy:
One of the difficult things about fighting Vodin Tenebre is that his entire body is a translucent void and his arena is in a dark cave. It can be very difficult to see him except when executing his very devastating attacks. You can use his three glowing eyes to more easily keep track of his position if this is an issue. Vodin Tenebre is also incredibly fast and can change directions between movements in the same attack. For this fight, it is best to play evasively and only attack once or twice when you absolutely have an opening.
By far, his most dangerous move is the Crescent Slash Combo. The blade waves this creates are nearly impossible to avoid at range and even if you manage to dodge one, the subsequent blades will very likely catch you and juggle you. To deal with this move, stick close to the Mage and dodge through him for the first two slashes, then quickly dodge through again before the third and fourth as he will change directions. If successful, you can hit him twice before he begins his next move.
The other very dangerous move in his arsenal is the Umbral Blade Barrage but it has a more obvious telegraph than the crescent slashes. Once again, dodge through the Mage and retaliate with one or two hits.
You can pretty much use this same routine to deal with the entire encounter. Dodge through and dodge through again in case of a second hit. Retaliate only when you are sure his attack is over. Do be warned that his Umbral Missiles can fly behind him if you dodge too early.
After depleting his HP, the mage will collapse to the ground and you can devour his heart, ending the encounter.
After defeating the Mage, speak to his dying human form for some backstory and collect your extra loot including a Carved Vessel.
To find his Nameless variant, return to the Temple of Eleven complex and navigate to this section by using the Pulley shortcuts you've unlocked from the Obelisk next to the first building:
A mage-sealed door in the outdoor section of the Temple of Eleven
If you've not unlocked the shortcuts, you can alternatively reach this door by navigating across the rooftops from the upper-western balcony of the main building in the east. This door can be unsealed once you've defeated all 5 Named Mages of Dreadstone Peak. The door leads to an otherwise unreachable ledge of the Temple where you will find a Mage distortion from which you can initiate the hunt for the Nameless Umbramancer. This variant of Vodin Tenebre will drop all the same loot as well as a unique helm, the Bloodletter's Hood.
Pilgrim's Respite - Diablomancer
Nephael Mos is a Named Mage that can be encountered in the Pilgrim's Respite sub-area. To find him, head all the way to the upper-west from the cave's entrance from the Old Annex. At the end of the path, you will find a Mage distortion with a blood-red rune emanating from it where you can initiate the hunt.
Mage Hunt: Nephael Mos, Knight of the Chasm
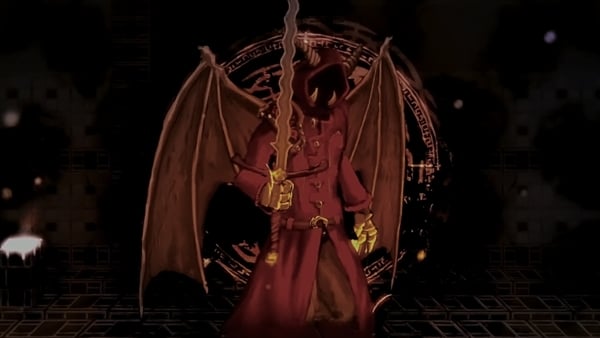
Loot:
- Infernal Heart (50%)
- Jagged Sternum x 1-2 (50%)
- Runed Knuckle x 1-3 (50%)
- Demon Fang x 1-5 (50%)
- Blazepyr Trio x 1-3 (20%)
- Voidepyr Trio x 1-3 (20%)
- Salt x 14,325
- Silver x 3,037
- Guiltless Shard
Summoned Mobs:
Chase Sequence
After initiating the hunt, Nephael Mos will be found at the first hall of the Blasphemer's Vault. Fight him and his mobs here, but watch out for the many Vault Retainers as they are incredibly powerful. You can also let the retainers fight the Mage's mobs as they will generally win each time. After a while, he will teleport down to the large hall in the eastern side of the floor below. His next destination will be in the hall just below and to the right of the vault's lower Obelisk. Finally, he will teleport one last time further east of this hall to begin the Boss Fight.
Boss Fight
Moveset:
Slash and Stab - Nephael Mos performs an overhead slash with his greatsword, quickly following-up by stabbing at the ground. Dodge through the overhead slash to avoid the combo.
Dashing Slash - Nephael Mos dashes forward with his sword held behind him. At the end of the dash, he performs a wide swing. Dodge through the dash to avoid the attack.
Runic Bombardment - Nephael Mos raises one hand straight ahead in front of him, creating two large circular runes in the air. The runes lock onto the player and after a brief delay, they fire several projectiles. Wait for the moment they fire before dodging.
Runic Needles - Nephael Mos wiggles one hand in front of him, creating two triangular runes in the air. These runes slowly fire glowing needle-like projectiles into the ground which linger for a few seconds and deal damage on contact. Watch the curved side of the runes to see where they are about to fire the needles.
Needle Rain - Nephael Mos holds one hand to his chest as several needle projectiles manifest behind his legs. After a brief moment, the needles fly forward in an arc, getting stuck in the ground and lingering for a few seconds. Wait until the last second before dodging through their trajectory.
Runic Lightning - Nephael Mos raises one hand up high as he creates a single bright, circular rune with a septagram pattern. After a brief delay, the rune fires a powerful lightning bolt at a slight down-forwards angle. The bolt explodes on impact, releasing a burst of energy in a large radius on impact. This move will only hit in front of the Mage so dodge behind him to avoid the attack.
Strategy:
Nephael Mos has some very powerful spells. Particularly, the energy needles he leaves on the ground, despite being very slow, deal a lot of damage on contact and can quickly shred your health. This is what you should be on the lookout for throughout the fight. Consider using a powerful ranged weapon as it can make this fight a lot easier by baiting his various needle attacks while you pelt him from afar.
While his spells are very powerful, they do leave him vulnerable to retaliation as each spell has quite a bit of a cast time compared to most other Mages. Your biggest window is whenever he casts Runic Lightning, which he likes to spam below 50% HP. This spell has a very obvious telegraph and can completely be avoided by rolling through the Mage. Quickly turn around and exploit his casting and recovery time by attacking up to 3 times. Do be careful if he casts this spell while there are needles on the ground behind him.
The Mage's melee attacks are nothing special but he does tend to follow-up his Runic Bombardment and a Dashing Slash. Beware of this and watch your dodge timing.
Once the Mage's health is depleted, he will collapse on the ground and you can devour his heart to end the encounter.
After defeating him, speak to the dying mage's human form for some backstory and collect your extra loot including a Golden Armlet.
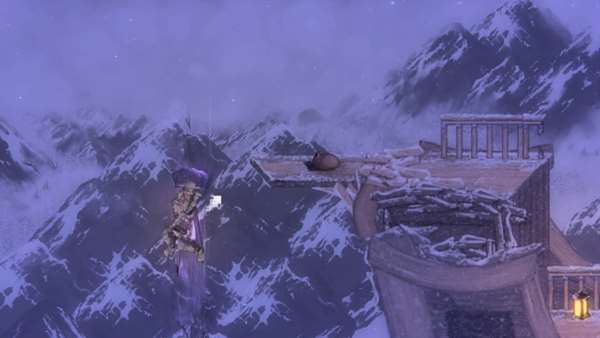
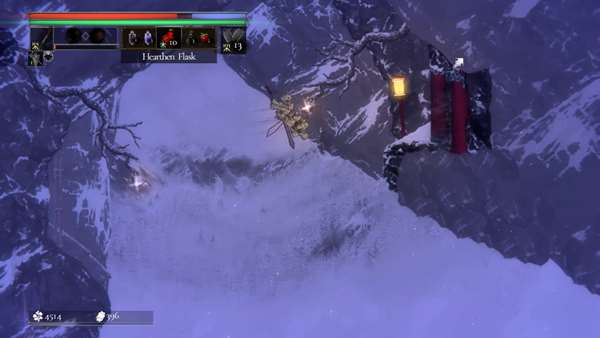
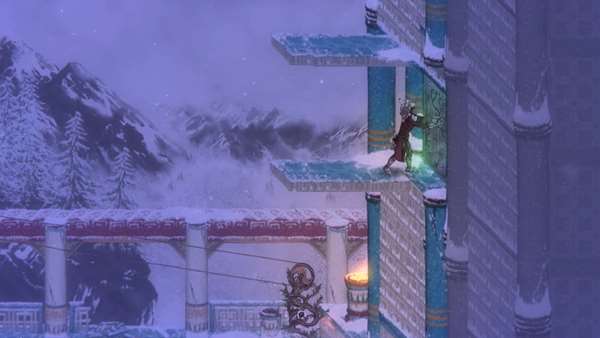
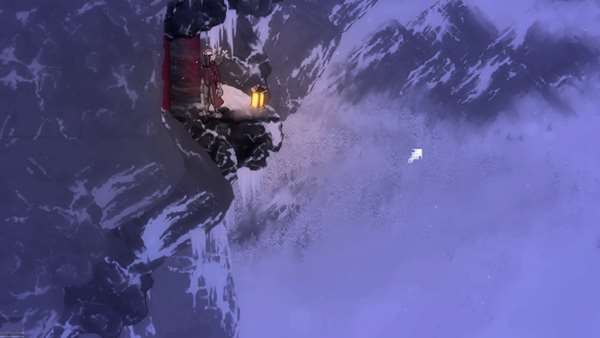
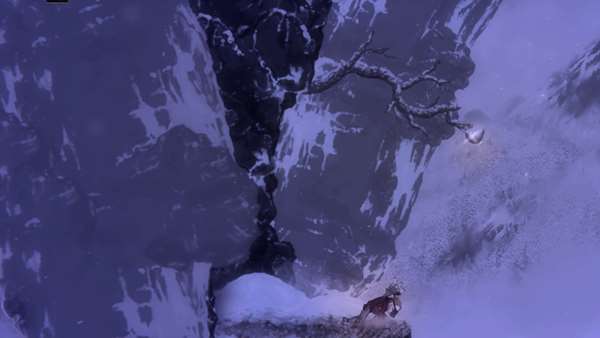
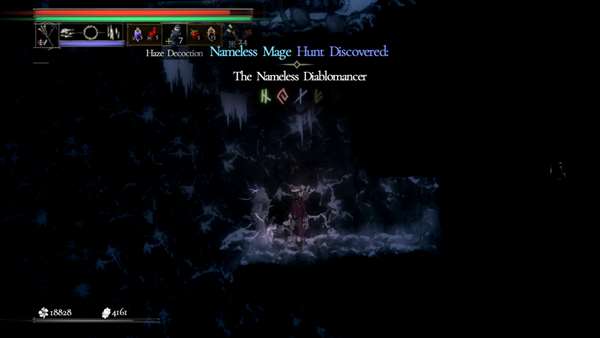
To find Nephael Mos' Nameless Variant, head to the Sentinel Caves. Climb all the way to the top exit leading to The Falling Star. From here, you are going to jump down and fall along the side of the mountain, looking for a grappling point far at the bottom leading to an opening in the left. Head through this opening to an otherwise unreachable ledge inside the caves where you can find the Nameless variant's distortion. This variant will drop all the same loot as well as a unique helm, the Diablo Mask.
Navigate to this cliffside using the upper-east exit of the Sentinel Caves. Drop off the edge and prepare to grapple to the left side.
Grapple to this ledge on the side of the bottom of the mountain. Go through the opening to reach a hidden section of the caves.
Blasphemer's Vault - Inquisitor Selet Fight
If you've been following Inquisitor Selet's questline through the previous major locations, finding and giving him a Guiltless Shard at each one, he can be found at the Blasphemer's Vault, his questline culminating in a Boss Encounter. To find the Inquisitor, make your way to the Obelisk just above and to the left of the very large hall where Draeaxenerion is fought. From this Obelisk, navigate your way to a ledge far to the upper-east by using the grappling points in the ceiling above the hall.
The path to Inquisitor Selet through the grappling points above the large hall in Blasphemer's Vault
Once on this ledge, head through the archway to a narrow corridor with an Ether Vent at the end. Loot the Treasure Pouch for a Bluestone Mushroom and then ride the Ether Vent up to a large area above. At the eastern end of this area, you will find Inquisitor Selet crouched down. Interact with him and he will transform into his corrupted Boss form, beginning the encounter.
Boss Fight: Inquisitor Selet
Loot:
- Mangian Helm
- Manganian Cuirass
- Manganian Bracers
- Manganian Greaves
- Salt x 20,080
- Silver x 850
Moveset:
Advancing Smash - Inquisitor Selet closes the distance by leaping forward from medium range and smashing his greatsword on the ground as he lands. This move comes out very quickly and has no obvious telegraphs but he will typically only use this from short-medium range, not from melee. Note that the leap portion of this attack will also deal damage as the Inquisitor leads with his knee. Dodge through the leap to avoid damage.
Overhead Combo - Inquisitor Selet raises his greatsword to his shoulder before delivering a powerful overhead strike. He will then perform the same attack again as a quick follow-up. Watch out when rolling through this attack as the Inquisitor can quickly change directions for the second strike.
Greatsword Flurry - Inquisitor Selet quickly spins 360 degrees while advancing forward, following-up the movement with an upward slash with his greatsword. He then performs a quick stab and then grasps his sword by the blade, performing an overhead strike with the pommel. Unlike the Overhead Combo, the Inquisitor will not change directions between each part of the combo so you can safely roll through the upward slash and punish as he continues his combo still facing the other direction. Note that if you stagger him at any point during this combo, he will continue the combo where he left off after regaining his composure.
Strategy:
The fight with Inquisitor Selet is a straightforward melee-centric battle. He only has 3 attacks in his moveset and he has no fancy gimmicks. However, he is very fast and relentless in his pursuit. Success in this fight hinges on your ability to keep up with his speed while mastering reading his three moves. You should typically be rolling through all his attacks.
Your biggest opening is during his Greatsword Flurry. Rolling through the spinning upward slash that initiates this move will allow you to retaliate with at least 3 hits with most weapons as he continues to attack air on the other side. He is unable to change directions in the middle of this combo so make sure to use this to your advantage.
For his Overhead Combo, be careful when rolling through the first strike and make sure to follow-up with a second roll in the same direction as the Inquisitor will quickly follow up with a second smash with excellent tracking. If you are fast enough, you can quickly turn after the second roll and hit him with a ranged attack before he begins his next move.
Finally, his Advancing Smash travels a considerable distance during the leap portion so beware when rolling through and trying to retaliate as you may not be close enough to do so in time. Consider using the same strategy of turning around quickly after the roll and using a ranged attack or throwable to keep your damage up.
Upon depleting his HP, Inquisitor Selet will burst into an explosion of energy and get disintegrated, dropping his entire armor set and ending his questline.
Blasphemer's Vault - Nameless Dracomancer
From the vault's lower Obelisk, climb up the platforms and head west into the area with the large pit and a long, rickety platform running across it:
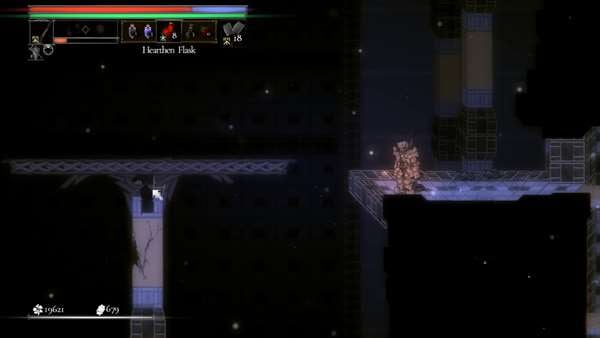
Run across the rickety platform and jump at the very end without grappling to the ledge on the opposite side. Do not let go of the forward button as you fall. You will miss the ledge and should land in a hidden opening in the left wall at the bottom. This opening leads to an underground room where a Mage distortion can be found. Activate it to initiate the hunt for a Nameless Dracomancer, a variant of Draeaxenerion who will drop all the same loot as well as a unique helm, the Dragonhead Helm.
Trivia & Notes
- Players earn The Mountain
 trophy when they first learn the runes to reach Dreadstone Peak.
 Anonymous
Need some help here, after i defeated the two that remains i cant get up in the ledge, someone is having the same problem? Sorry for the bad writing im not american


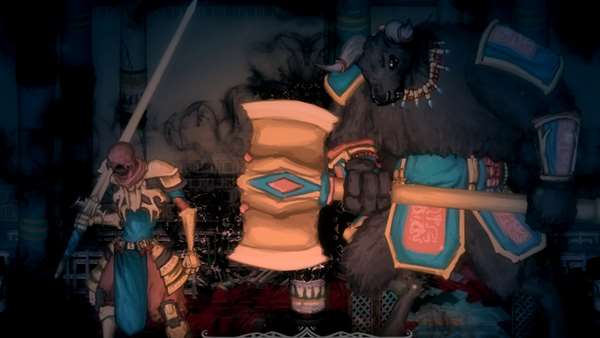

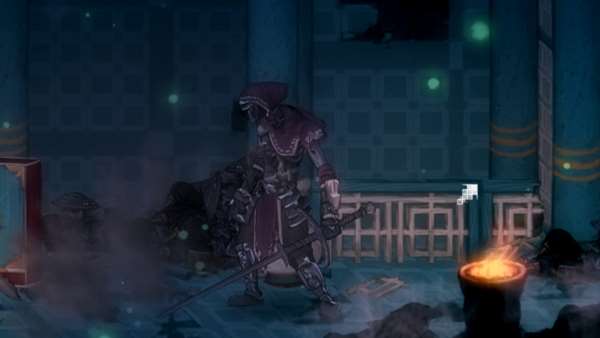
Anyone know why the nameless mage in sentinel cave is being ignored? Ive tried falling/grappling from the upper exit of the cave and i can see the ledge to reach the mage from the outside but i cant figure out how to reach it
0
+10
-1