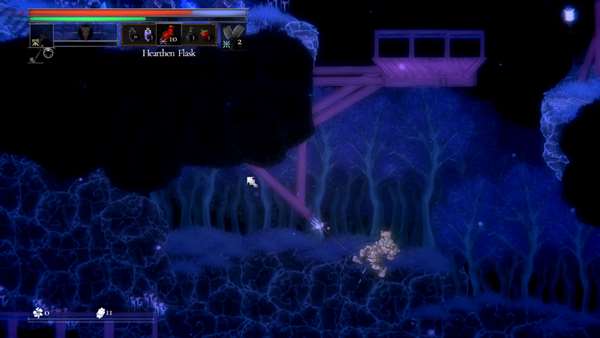
Elder Copse is a Location in Salt and Sacrifice (SnS) and is the last main destination players will visit during their adventure. This Elder Copse Walkthrough helps you find and fight all Bosses and collect all items in the area. The Elder Copse is comprised of a mystic wooded area surrounding three towering structures. The energy in these woods is powerful and is evident in its majestic, luminescent plantlife. However, something menacing stirs in the air as the Inquisitor carves a path to the end of their journey.
Just as every Mage has a heart of pure corruption, so do these magical woods. Magic radiates from a place of unimaginable energy, where a mocked divinity cuts a deep wound in reality itself.
This page is a segment of the Walkthrough, featuring a comprehensive guide that aims to help players complete the main campaign. The Walkthrough covers each location in detail, including all obtainable Items and Equipment, NPCs, Enemies and Bosses, and is organized by location based on our recommended progression path to completing the game.
- See the Game Progress Route page for a minimalist guide on where to go and what to do next
- See the Quests page for details on quest progression
- See the New Player Help and Game Mechanics pages for tips covering the game's various mechanics
Elder Copse Guide
Previous: Dreadstone Peak
Next: None
Sub-Areas: Unprofaned Lake, Citadel of Sky, Imperfect Shrine, Temple of Embers
Elder Copse Map
[map goes here]
NPCs in Elder Copse
Elder Copse Bosses
- Icon of Pandemonium
- Inquisitor Amben
- Logostus Rime, Undying Scholar
- Parxa Krass, Force Incarnate
- The Undone Sacrifice
- The Worm That Does Not Die
Elder Copse Enemies
- Aberrant Heart
- Ashen Congregant
- Candlebearer
- Chromeles
- Citadel Guardian
- Citadel Monk
- Elder Maw
- Inphyrean Warden
- Searing Confessor
- Sentinel Eye
- Skittering Maw
- Unknown Tender
- Valley Bat
All Items in Elder Copse
Consumables
Materials
- Ashpyr Cluster
- Ashpyr Trio
- Blazepyr Brick
- Blazepyr Trio
- Dismin Ore
- Frospyr Brick
- Golden Morel
- Goldenpyr Brick
- Haze Spiral
- Irona Ore
- Lumas Ore
- Mosspyr Brick
- Mosspyr Cluster
- Shimmering Bud
- Twin Blazepyr
- Valley Herb
Equipment & Upgrades
- Carved Feline
- Emerald Feather
- Engraved Box
- Page and Nail
- Pilgrim's Urn
- Strigid Cloak
- Strigid Mask
- Strigid Skirt
- Strigid Sleeves
Key Items
Elder Copse Walkthrough for Salt and Sacrifice
Elder Copse Main Walkthrough
The First Mage Hunt and the Unprofaned Lake
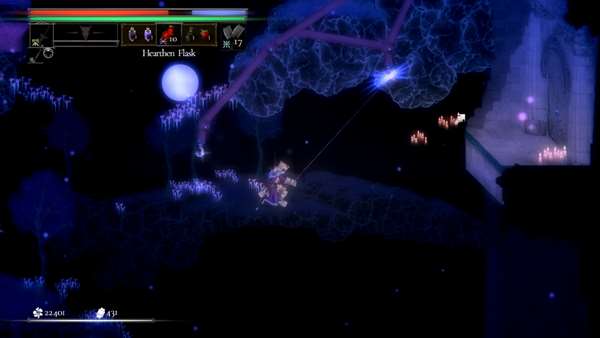
When you first arrive at the Elder Copse, your first order of business should be to find and hunt down two named Mages and devour their hearts. Activate the Obelisk on the right and ignore the path to the east for now as you will not be able to get very far. Head to the west instead and defeat a set of two Unknown Tenders and a Skittering Maw. Past them, descend the platforms and ladder. Note the large chasm to the right with an Ether Vent. Ignore it for now as you won't be able to descend safely.
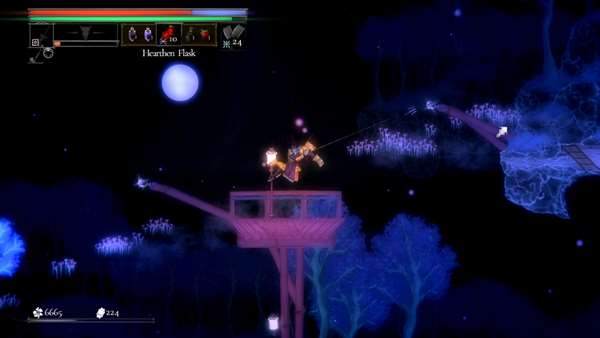
Take out the Skittering Maw at the bottom of the ladder and continue on and defeat two more Unknown Tenders. At the end of the path, grapple towards the wooden platform on the left and loot the Treasure Pouch which contains a Pilgrim's Urn then head down the ladder and continue west ward. At the top of the next ladder, jump onto the ledge to the left to find the first Mage distortion where you can initiate the hunt for Parxa Krass, a Kinetomancer.
Mage Hunt: Parxa Krass, Force Incarnate
Loot:
- Quivering Heart (50%)
- Glowing Flesh x 1-2 (50%)
- Kinetic Bone x 1-3 (50%)
- Force Mote x 1-5 (50%)
- Ashpyr x 1-5 (5%)
- Goldenpyr x 1-5 (5%)
- Salt x 9,575
- Silver x 4,787
- Guiltless Shard
Summoned Mobs:
Chase Sequence
As soon as you initiate the hunt, Parxa Krass will appear right below you. After fighting him and his mobs here for a while, he will teleport to the upper-east where you original came from. Climb up the two ladders and grapple over the gap to the upper east to find him again. He will teleport again shortly in the same direction. Keep following up east. After fighting him near the main Obelisk, he will teleport to the lower sections of the area. To get to him, head back to where you initiated his hunt and take the lower east path this time. Below a set of stairs that you drop down to, there is a door your can open to find another Obelisk. Head back outside and continue eastward to the Unprofaned Lake sub-area where you will find the mage again shortly. After a couple more teleports, his Boss Fight will ensue once you reach the waterlogged area of the lake.
Boss Fight
Moveset:
Kinetic Axe Combo - Parxa Krass conjures a set of dual axes made of sharp rocks and begins a three-hit combo starting with a quick overhead slash from each axe ending with a double axe smash. Do not attempt to roll behind the mage until the final hit as this attack has very good tracking and the mage will quickly change directions to chase you.
Kinetic Axe Dash - Parxa Krass conjures his dual axes and raises one of them high up overhead. After a brief delay, he dashes forward and performs a downwards slash in a very wide arc. This attack can be dodged through with a properly timed roll.
Kinetic Axe Uppercut - Parxa Krass performs a quick upward slash with one of his axes. This attack has a bit of forward movement which also serves as its telegraph, but it can be very hard to read. It can be dodged through with good roll timing. Otherwise, back away from the mage.
Shatter Burst - Parxa Krass tilts slightly backwards and raises both glowing fists. He then punches the air diagonally downwards, creating a craggy construct along his arms which shatters after a brief moment, sending shards bursting outwards a short distance. You can stand right up against his legs to avoid damage from the construct's creation and then roll to his back to avoid the burst.
Kinetic Ring - Parxa Krass holds his glowing fist in a wide stance while creating a ring-like construct. The construct begins homing in on the player before locking on after a brief period. The mage will then throw the construct at the player. It will shatter upon impact with the player or the ground. Watch out as the resulting shards can still deal damage. You can avoid this attack by keeping on the move and waiting til the last second before dodging.
Kinetic Upheaval - Parxa Krass raises holds both glowing hands to his sides and raises them high up. As he does this, a set of three sharp rock formations form on the ground on both sides of the mage which explode after a brief delay, sending shards flying upward. You can avoid this attack by hugging his legs or staying far away. Beware not to rush towards the mage prematurely after the burst as the shards' hitboxes can linger a short while.
Strategy:
Parxa Krass is a very straightforward encounter with some easy-to-read moves. However, you should watch out for his melee attacks as not only does he have a devastating 3-hit combo by default, he has very little recovery time during his melee attacks and can easily extend his combos with any of his moves. When this happens, back away from the mage immediately until it breaks the melee chain.
Your biggest window to attack is during his Shatter Burst attack as long as you can stick close to his legs. While he is creating the construct and shattering it, you will have enough time to dish out 4 attacks with most weapons. Be careful as he may follow up with a Kinetic Upheaval which will force you to create distance or get hit hard. For his Kinetic Ring attack, make sure you aren't dodging prematurely as the ring attempts to create a lock on you. Always dodge at the last second and you should have no trouble closing the distance and getting at least 2 hits in.
Avoid fighting Parxa Krass at a distance as this not only opens you up to his highly damaging and very fast melee Dash attack. Instead, hug his legs to be able to deal consistent damage and back away when necessary.
Once his HP is depleted, he will collapse to the ground allowing you to devour his heart and end the encounter.
Speak to the Mage's dying human form for some backstory and collect your extra loot. Continue eastward, fighting the Skittering Maws along the way. You will also run into an Elder Maw here which is a much larger, much stronger variant. Further east are a set of Unknown Tenders by the eastern stairs. Look closely at the red wooden stairs here. Underneath them is an opening to a cave. Inside, use the Ether Vent to slow your descent and pick up the Treasure Pouch at the bottom for a Beloved Idol. Proceed to the left of the cave to find another Obelisk and then head back out.
Mage Hunting Continued
Back outside the cave, continue up the stairs to the east and use the wall to make your way up the platforms, noting the ore nodes by the walls. Ride the Ether Vent up here and then grapple to the platforms further up and to the right. On the top-most platform on the right, you can find the next Mage Distortion from which you can initiate the hunt for Logostus Rime, a Bibliomancer.
Mage Hunt: Logostus Rime, Undying Scholar
Loot:
- Storied Heart (50%)
- Tattooed Finger x 1-2 (50%)
- Runed Tongue x 1-3 (50%)
- Forgotten Page x 1-5 (50%)
- Twin Voidepyr x 1-5 (5%)
- Twin Goldenpyr x 1-5 (5%)
- Salt x 12,400
- Silver x 6,200
- Guiltless Shard
Summoned Mobs:
Chase Sequence
Logostus Rime can first be found high above his initiation point, on a long set of stairs. Jump onto the land west of the platforms and climb up the ladder. Continue on west until you see a tall wooden structure with a grappling point attached on the left. Grapple up to the platform above this structure and then grapple again to the landmass in the upper-east where the stairs and the Mage can be found. After fighting him and his mobs here for a while, he will teleport west. Retrace your steps from the grappling points and jump onto the landmass to the west where a set of stairs can be found with a lever at the top. Fight off the Mage here until he teleports and then pull the lever to lower a grappling point which will allow you to more easily reach this area later on by heading east from the main Elder Copse Obelisk. The Mage will teleport just to the west of this grappling point and then further west of the aforementioned Obelisk. Follow him while defeating his mobs and dealing damage to the Mage. He will eventually teleport down to the Unprofaned Mage and will finally settle in the same area you fought Parxa Krass earlier. Remember that there is an Obelisk west of the lake if you want to more easily return to the Boss Fight in case of death.
Boss Fight
Moveset:
Tome Combo - Logostus Rime holds his Tome with one hand in front of him, slams it down on the ground and then spins the Tome around all around his body three times while advancing forward before culminating in a final double-handed slam. This move is not only quick but it also covers the Mage's whole melee range. Do not try to find any attack openings and focus on getting away instead. You can however dodge through the final slam and get one or two hits in if you are quick.
Tome Burst - Logostus Rime flicks his Tome upwards in front of him where it spins in place briefly before exploding, sending a shockwave burst out in a medium radius. Roll through the mage to avoid this attack.
Rune Barrage - Logostus Rime forms a circle of runes in front of him. After a brief delay, each rune fires in a line towards the player. This attack will very quickly shred your health if each rune hits. To avoid this, roll behind the Mage as soon as he forms the runes as he will not change direction after summoning them and they will only fly in front of the Mage.
Rune Wall - Logostus Rime throws a wall of runes from behind him a short distance towards his front. You can roll through the runes as they approach but beware of a follow-up attack from the Mage.
Rain of Runes - Logostus Rime lifts up one hand on either side and releases a single rune with a dark aura around it which floats up into the sky while releasing several runes similar to the Rune Barrage move. The runes have a slight lock-on on the player at the beginning of the ability but you can avoid the brunt of the attack by keeping on the move.
Strategy:
Logostus Rime is one of the most difficult Mages you will encounter due mostly to his capability to deal large amounts on damage in a very short amount of time. Your priority should be learning the various patterns and telegraphs associated with his Rune Barrage and Rain of Runes attacks. These two moves will absolutely shred your health even at high levels and equipment upgrade levels if all or most of the runes connect.
For the Rune Barrage, rush towards the Mage as soon as he forms the circle of runes and dodge behind him. The runes will not hit you as long as you are not in front of the Mage. While this move is very dangerous, it is also your biggest window to get some attacks in so be sure to utilize this double-edged sword of an attack to full efficiency. His Rain of Runes will only home in on your during the beginning of the attack so keep on the move to bait the runes' trajectory. After they're set, you can roll through the runes and perhaps get a couple of attacks in on the Mage as he recovers.
Logostus Rime is not any easier at melee range, unfortunately, as he has one of the longest and fastest-hitting melee combos in the game. To top it off, he also advances forward during the combo and hits all around himself so you really don't have any openings to retaliate. Be patient however as the final slam in his melee combo can be rolled through and the short recovery state afterwards can be punished.
Logostus Rime also has quite a good resistance to staggering, but if you don't wait too long between attacks and can get a consistent chain of combos going, you can put him in the special stagger state where his eye glistens for a brief moment, allowing you to use it as a grappling point to dash towards his face and perform a powerful knife attack that deals a lot of damage. Make sure to utilize these moments when they come up.
Once the mage's health is depleted, press the appropriate button to devour his heart and end the encounter.
After defeating the mage, speak to his dying human form for some backstory and extra loot. Now that you have 2 Hearts devoured, you can continue on to the next major section of this area. Return to the main Elder Copse area's Obelisk and travel west up until you reach the first wooden platform at the edge of the ledge. Use the grappling hook above to get to the tall platform on the left and from there, grapple once more to reach the stairs leading up to a large building with a mage-sealed door. This is the Citadel of Sky and is your next goal now that you can unseal the entrance.
The path to the Citadel of Sky
The Citadel of Sky
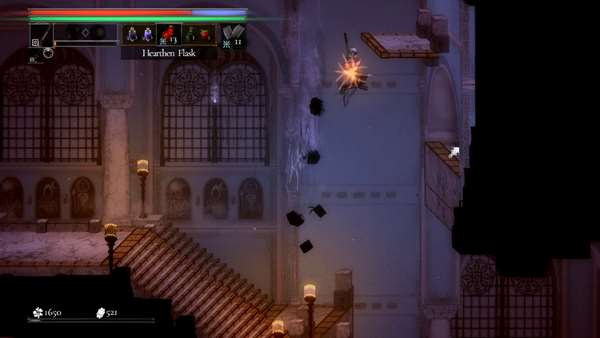
As soon as you enter, you will encounter a large Citadel Guardian up the stairs to the left. Be careful as these enemies are powerful and have quite a lot of health. Loot the Treasure Pouch by the wall for 3x Mosspyr Cluster, Perform a wall-jump on the left wall so you can reach the Ether Vents. Ride it up to a grappling point above and grapple across to the rickety platform on the right then drop down onto the stairs below. Follow the path east and jump into the opening up on the wall to reach a balcony outside where an Obelisk can be found. If you've found and spoken to the King and his Royal Retinue back in Dreadstone Peak, you will be able to find them directly above the Obelisk and you can reach them by climbing the platforms and ledges on the side.
The Royal Retinue found on a balcony in the Citadel of Sky
Speak to the adviser in pink and exhaust his dialogue to receive a Divine Sight Elixir. Drinking this item will change the animation for devouring Mages, revealing your true form. After drinking the elixir, you can speak to the adviser again to receive an Elixir of Peace which will revert the effect. From this point on, you can always return to the adviser at this location to receive these elixirs, alternating between the two depending on whether you are currently "seeing truth" or enjoying "peace in ignorance".
Head back inside and jump up the wooden platforms above the top of the stairs, taking out the Citadel Monks on each one. Use the Ether Vent to the left of the second platform and cross over to another platform on the left but lookout for another Citadel Monk and the bird-like Chromeles on the left. Ride the same Ether Vent to the ledge in the upper-right and take out the Citadel Monk on the platform above. There is another Citadel Guardian to the right. Defeat it and continue on east up the two ledges and watch out for the Chromeles swooping by from the left. Head through the large archway on the right.
Outside, use the grappling hooks to navigate your way to the balcony above the one you are in. Head back into the Citadel from that floor and get to the west, jumping on the first wooden platform you see which has a Treasure Pouch on it containing 3x Ashpyr Cluster. Use the Ether Vent on the left to continue going upwards and mind the Citadel Monk on one of the platforms to the right. Get to the platform on the left, activate the Pulley which leads to the floor below and jump up the ledge next to it. On this next floor is another Chromeles and a Citadel Guardian. Jump up the ledge to the right and follow the stairs east to another group of enemies including a Chromeles, Citadel Monk and a Citadel Guardian. At the end of this floor is another Ether Vent. Ride it up to another ledge on the right leading up to a narrow vertical section of the building where you can perform alternating wall-jumps to get to the top.
On this next floor, watch out for the spinning traps above that will periodically shoot out three projectiles that fan out. Take out the two Chromeles enemies here as well. Ride the nearby Ether Vent to the upper platform here and continue westward. Jump onto the platform with a Pulley and activate it. Ride the Pulley and it will take you through an opening in the west wall. Where you can unlock a door that serves as a shortcut from the floor below. Ride the Pulley back up. Jump up to the platform above the Pulley start point and climb the ladder. Climb up to the ledge on the left and walk past the Stone Circle towards the wall. Use to to get up to the platform above where a Treasure Pouch can be looted for a Golden Morel. Drop back down and activate the Stone Circle which reveals a couple of grappling points above the Ether Vents to the right. Once you activate it, very quickly ride the two Ether Vents to reach the luminous grappling points. Ignore the ledge to the far right with the Chromeles hovering over it. Your goal is to grapple up to the ledge on the upper left. The timing for this is very tight so make sure you get moving as soon as the Stone Circle is activated. Once you reach the ledge, you can activate the Obelisk to create another checkpoint. Note the door to the top left of the Obelisk. It does not open from this side but will serves as a shortcut later. Continue on upwards to begin the Boss encounter against the Icon of Pandemonium.
Boss Fight: Icon of Pandemonium
Loot:
- Carved Feline
- Ashpyr Trio
- Salt x 20,077
- Silver x 560
Moveset:
Rake - The Icon pulls back 3 of its limbs and then quickly strikes in front of it. This move has a very short distance and can easily be avoided or rolled through.
Lightning Strike - The Icon charges one claw with lightning and releases it in a cone towards the ground in front of it. The lightning has a large hitbox and decent range. Avoid this move by rolling underneath the boss as it charges.
Grounded Lightning - The Icon raises its claws, charging them with lightning. After a brief delay, it throws the lightning on the ground directly underneath it. The lightning splits into two bolts which travel along the ground in both directions. It does this with both hands one after the other. You can jump over the bolts as they approach to avoid damage.
Ball Lightning - The Icon raises its claws in front of it, charging them with lightning. After a brief delay, it releases an orb of lightning that travels a short distance forward in the air before splitting off into 5 smaller bolts that home in on the player. The ball lightning itself will not hit you unless you jump in its path and the smaller bolts have a similar travel speed and can all be rolled through with good timing or baited into crashing in the ground.
Lightning Storm - The Icon flies high up while raising its claws and charging them with lightning. After a brief moment, several lightning orbs appear randomly in the air and rain lightning in an area below them. These orbs appear and attack in a staggered fashion so watch out for them manifesting and avoid the area underneath them.
Lightning Burst - The Icon raises both claws to its sides, charging them with lightning as blue rays of energy coalesce underneath the boss. It then brings its claws to the coalescence, causing it to explode in a burst of lightning, dealing damage in a medium radius around the Icon. It also moves forward a very short distance after the burst, carrying a ball of lightning that lingers underneath it for a brief moment.
Strategy:
While the Icon of Pandemonium has a lot of moves, its constant state of flight also makes it easier to get underneath or behind it and this should be your general strategy against most of its attacks. The only attacks you need to create distance from are the Lightning Burst and the Lightning Storm depending on where the orbs spawn. Aside from these two attacks, keep close to the Icon and utilize a dodge and poke tactic. Dodge an attack and retaliate with a single strike. Don't get greedy as the boss does not have much health to begin with. Take your time and play safe.
Another note for this fight is during its Grounded Lightning move, you are supposed to jump over the bolts to avoid damage but be careful not to jump prematurely as it will release two sets of bolts with a small delay between them. Jumping too early will get you through the first set of bolts but you will get hit by the second one.
Aside from these notes, the fight should be a fairly straightforward affair.
After defeating the boss, exit east onto a balcony where you can loot a Treasure Pouch for the Essence of Sky key item. Grapple across to a platform on the right where you can loot another Treasure Pouch with a Frospyr Brick and activate a Pulley leading to the lower west. Before riding the Pulley, look to the right of the platform for an Ether Vent. Ride this up to another series of Ether Vents and carefully navigate your way to the roof of the Citadel in the upper-west. Once on the roof, continue westward to the edge and drop down below, using the Citadel wall to slow your descent. At the bottom, you will find a mage distortion where you can initiate the hunt for a Nameless Kinetomancer. This is essentially the same boss as Parxa Krass who drops the same loot but will also drop his unique helm, the Force Slab. This is an optional boss and you can save him for later. From here, you can drop down from further to the left and unlock a door below which leads back to the last Obelisk before fighting the Icon of Pandemonium.
Make your way back to the balcony east of the Icon's boss arena and ride the Pulley you activated earlier. Descend the next area towards the east where you can find another Pulley. Ride this Pulley down to the lower east where a Treasure Chest containing a Shimmering Bud can be found. From here, drop down the ledges to the left to find yet another Pulley. This one leads back to one of the lower balconies you visited earlier. Get to the red wooden platforms on this balcony and then drop down and quickly grapple across to the right to find a large stone gate. This leads into the Imperfect Shrine, a key sub-area.
The path to the Imperfect Shrine
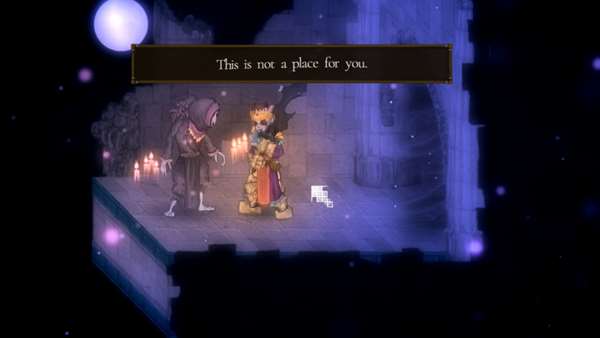
Now that you've acquired the Essence of Sky, you'll be able to unlock this gate. At this moment however, you won't be able to ascend the shrine completely but there are some items you can collect and shortcuts you can unlock. From the gate, climb up the pillars above to find a Treasure Pouch containing a Salt Chunk. Head back to the entrance and continue further down by dropping down the ledges to the right and descending the long ladder. In the large area below the ladder, head all the way to the right to find a Treasure Pouch by the eastern wall containing a Goldenpyr Brick. Retrace your steps and go past the ladder towards the west into a chute leading to a narrow section below. You can head out of the opening on the left to a balcony where you will find an unnamed NPC. Speak to this person for some backstory about the Shrine and something they refer to as a "Sacrifice" at the very top.
An unnamed NPC found in the lower-west balcony of the Imperfect Shrine
After speaking the NPC, head back into the Shrine and continue through the narrow lower section, exiting out to the east. In the next area, you can lower a ladder, unlocking a shortcut from the red wooden platforms above the main Elder Copse Obelisk. Interact with the Obelisk to reset your check point. Your next goal is to ascend another large structure to the east called the Temple of Embers.
The Temple of Embers
The entrance to the Temple of Embers is at the top of the staircase where you first found Logostus Rime during his chase sequence. To get back there, head east from the main Elder Copse Obelisk. At the end of the path, grapple up to the high ledge using the grappling point shortcut you should have lowered via the lever earlier. Otherwise, refer to the sections cutting through the Unprofaned Lake. On the other side of the ledge, grapple up to the tall wooden platform and then grapple once more to the ledge with the long staircase leading up to the temple. Unlock the mage-sealed door and head into the temple.
The path to the Temple of Embers
Inside the temple, defeat the two Ashen Congregants in the first room and climb up the platform on the right. Use it to reach the grappling point that will take you to the ledge above the entrance where a Searing Confessor is floating around. Be careful when fighting these types of enemies from a great height as they can grab in mid-air and drop you and depending on where they do so, you may die from the fall damage. Take the enemy out and continue west where you will encounter a Candlebearer. Climb the ledge past it to fight another Ashen Congregant and two more Searing Confessors at the end of the path. Use the western ledge and wall to reach the platform above where you can grapple up to the second floor on the right. Watch out for the Candlebearer waiting by the edge and another one right behind it. At the end of this path, there are two more Ashen Congregants and a platform above them with a ladder. Use it to climb to the third floor and face off against more of the same enemies. Continue west to the end of the path, jump the gap and kill the Ashen Congregant and climb up to the platform to loot the Treasure Pouch which contains an Emerald Feather.
From the platform, jump to the right and grapple up the two points to reach the next floor in the upper-east. You may need to use the left wall to gain enough height to reach the grappling points. On the other side, fight through the group of enemies and then ride the Ether Vents at the end to reach a platform on the upper-right with a Treasure Pouch containing a Golden Morel. Jump over to the left or ride the Ether Vents again to reach another series of grappling points that will take you to the west, up another floor. Here, defeat the group with a Candlebearer and two Ashen Congregants and then exit through the arch up the ledge at the end. This leads outside to a balcony with a ladder where you can climb further up.
Before climbing up the ladder, drop down onto the ledge on the left which is overgrown with bioluminescent plantlife. Activate the Pulley here and ride it down to another ledge in the lower west. Loot the Treasure Chest on this ledge for a Shimmering Bud. Activate and ride another Pulley from this ledge down to the lower east. From here, drop down the ledge on the left and lower the ladder to unlock a shortcut from the lower floors of the shrine. Get back up and activate a third Pulley. This one leads to a gate to a section of the Imperfect Shrine but you will not be able to unlock it yet. Make your way back up to the balcony with the ladder to continue ascending the tower. At the top of the ladder, note the platform on the left with a Pulley's end point. You will unlock a shortcut to this later on. For now, head back inside the temple through the archway in the east.
Inside, you will arrive at another large gap guarded by a Searing Confessor. Defeat it and grapple across to the other side where another Searing Confessor and twoAshen Congregants await. Climb up the platforms above and jump over to the ledge on the left where another Ashen Congregant and Candlebearer are waiting. Defeat them and then jump up the ledge to the right and then climb up the pillar here to loot the Treasure Pouch at the top which contains a Pilgrim's Urn. Head back down and continue west past the middle ledge and onto another ledge with another Candlebearer and a Searing Confessor hovering above. Drop down the ledge on the left and take out the Ashen Congregant laying against the wall. Head up the stairs to the left, wall-jump up to the platform above and climb the ladder to find an Obelisk on the next floor. Use the Ether Vent to the right of the Obelisk to reach the next floor but watch out for the Candlebearer who will attack you immediately as you approach. Take it out and head up the stairs behind it to begin the Boss Encounter of this temple.
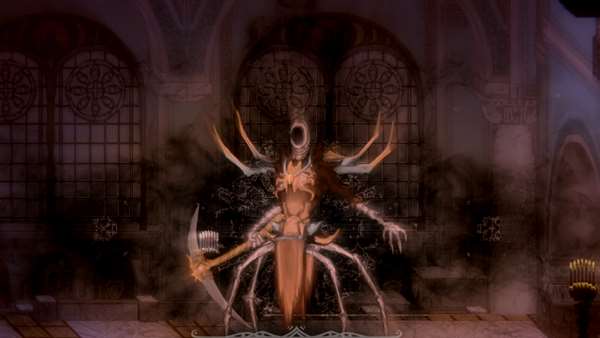
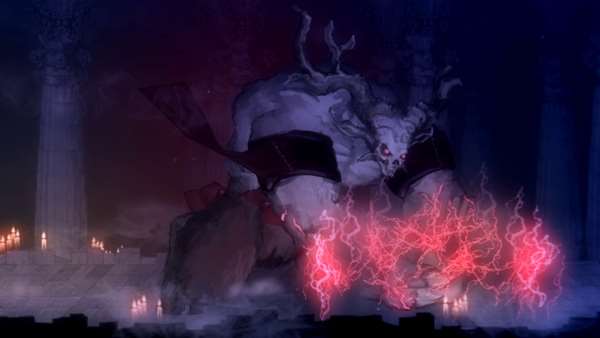
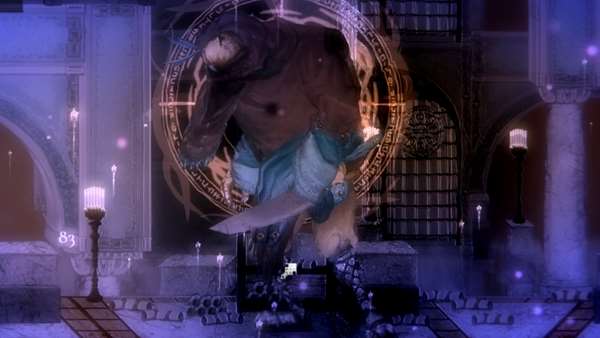
Boss Fight: The Worm That Does Not Die
Loot:
- Carved Feline
- Blazepyr Trio x 2
- Twin Blazepyr
- Salt x 26,005
- Silver x 150
Moveset:
Double Scythe Slash - The Worm performs a simple overhead slash with his scythe, followed by a second slash. Dodge through the boss during the first slash as he cannot change directions during the animation.
Helmsplitter - The Worm leaps high into the air, performs a second jump and then comes crashing straight down scythe-first. The boss will often perform a backwards leap to disengage before using this move. Simply watch for where the boss performs the second jump and avoid the area directly underneath him. He will also often perform a follow-up scythe jab and an upward slash, both of which you can roll through.
Flaming Geysers - The Worm whips a trail of flames in an upward arc with his free hand while raising his scythe as it glows a fiery orange. After a brief delay, several geysers appear in the arena, creating a pillars of fire that linger for a few seconds. The lower the boss' health is, the more geysers are created by this move. The geysers can be rolled through if you need to reposition around them. Watch out for the start-up animation as the whipping flames can also deal damage in melee range.
Hellfire - The Worm whips a trail of flames in an upward arc with his free hand, similar to the Flaming Geysers move, but this time, a septagram also appears behnd him. After a short delay, a violent flames erupt from the boss' center, cascading outwards. Run away from the boss as soon as you see the septagram. Watch out for the start-up animation as the whipping of the flames can also deal damage in melee range.
Meteor Shower - The Worm raises its scythe along with its free hand as it glows a bright orange, releasing a stream of fire up in the air as a fiery portal is created above the boss. Shortly after, the Worm brings his hands down as multiple fireballs shoot out of the portal. The fireballs will first shoot directly downwards, sweeping in an arc outwards in front of the boss. You can avoid this move by getting behind the boss as he forms the portal.
Strategy:
The Worm That Will Not Die is primarily a fire-based spellcaster whose spells will inflict burn, dealing damage over a short period of time after a direct hit. While the damage from this burn effect is minimal, his spells can still be quite devastating and it can be difficult to get close to him due to the area the spells cover.
Using ranged attacks is a viable strategy especially immediately after the fight begins at the Worm's walking speed is on the slower side. You can easily bait him to one end of the arena and make a run for the opposite side and pelt him with ranged attacks and throwables as he slowly closes the distance.
His most dangerous moves by far are the Hellfire and Meteor Shower moves. The Hellfire attack deals immense damage in a very wide hitbox from the center of the boss. You will need to run away from the boss as the septagram appears behind him to avoid this move. Alternatively, you can time your roll to i-frame the flames as they spread and get at least one hit in as the boss recovers. For the Meteor Shower, it is imperative that you get behind the boss as he channels the ability and the portal appears above him. He will not change directions during the attack and being behind him will prevent you from getting hit. The meteors will push you forward and upward, putting you along their firing path and quickly shredding your health so be sure not to get hit by even one of these small projectiles.
Finally, the Flaming Geysers are very easy to avoid but they linger for quite some time and the lower the boss' health, the more geysers are created. Be sure to roll through the flame pillars they create if you need to pass through.
After defeating the boss and collecting your loot, head out through the archway in the east of his arena to a small room with a Treasure Pouch containing the Essence of Fire. This will allow you to open gates with a red crystal in the Imperfect Shrine. Head back into the boss' arena and jump up to the platform in the west leading up. Defeat the Searing Confessor here and continue on west through the archway to a balcony. Activate the Pully here and ride it to a ledge in the lower west where you can pick up a Treasure Pouch which contains a Salt Chunk. Drop down to the ledge below and activate a second Pulley which leads down to a balcony that you passed through as you were ascending the temple. Before riding it down, you can drop down from this ledge onto another ledge below where you can find the mage distortion where you can initiate the hunt for a Nameless Bibliomancer. This boss is the same as Logostus Rime whom you fought earlier and will drop the same loot along with his unique helm, the Page and Nail. You can leave this for later and get back to the aforementioned balcony by riding the Ether Vent to the right. From the balcony, descend the ladder and drop down to the ledge on the left. Ride the Pulley here which you activated earlier and follow the series of Pulleys down until you reach the Imperfect Shrine's eastern gate.
The Imperfect Shrine's eastern gate, accessed from the balconies of the Temple of Embers
Now that you have both the Essence of Sky and Essence of Fire, you'll be able to unlock all the gates of the Imperfect Shrine and it's finally time to ascend this building and complete the main story.
Ascending the Imperfect Shrine
Coming in from the eastern entrance, make your way towards the western entrance and climb the pillars above it. From the very top pillar platform, grapple your way across the room towards the upper-east and exit through the archway there onto the eastern balcony. Climb up the ladder and platforms here and unlock the gate with the Essence of Fire then step back inside. Grapple to the platform below you to the left and lower the ladder to create a shortcut and then head west. There is a ladder on a platform at the end of the path but head down the pillar platforms to the lower west first so you can lower a ladder and unlock another shortcut. Climb up the platform and pillar and make your way up the pillar above. On a ledge to the left, you will find another unnamed NPC, similar to the one from earlier. Speak to him for some more backstory.
Another unnamed NPC at the Imperfect Shrine
After exhausting the NPC's dialogue, continue on east through two large platforms and then grapple to the eastern-most ledge and climb to the next floor. At the corner of the next floor, you will find yet another of those unnamed NPCs. Exhaust his dialogue for more backstory and then continue ascending the shrine by heading left a little and up the platform. Above, use the wall on the right to reach a grappling point leading to the next large platform in the west. At the end of this platform, grapple to another ledge on the left with a ladder. Climb the ladder and then grapple to the right. To the right of the next platform, you will find three Ether Vents. Ride them to a set of stairs in the upper-east and proceed upward to another set of stairs, at the end of which is the shrine's Obelisk. To the left of the Obelisk is another Ether Vent you can ride to a ledge with several collectable nodes such as a Bush Node, Rubble Node and Ore Node.
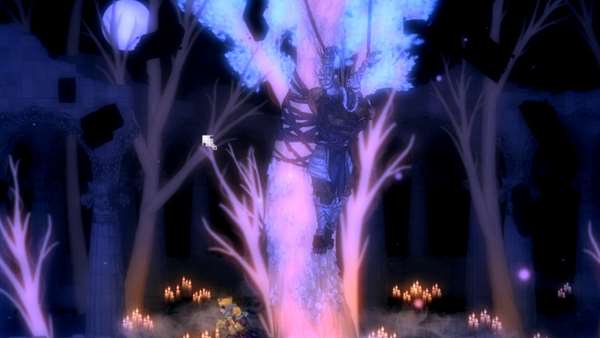
Head east from the Obelisk and exit through the archway at the end to an upper balcony of the shrine. You will find yet another one of those Shrine NPCs overlooking the edge here. Speak to him for even more backstory. He alludes to a choice you have to make at the top of the Shrine. Jump to the platform to his left and continue westward to a large open area. In the center, you will find the Husk that all those NPCs kept mentioning tied to a glowing tree.
A Husk at the top of the Imperfect Shrine
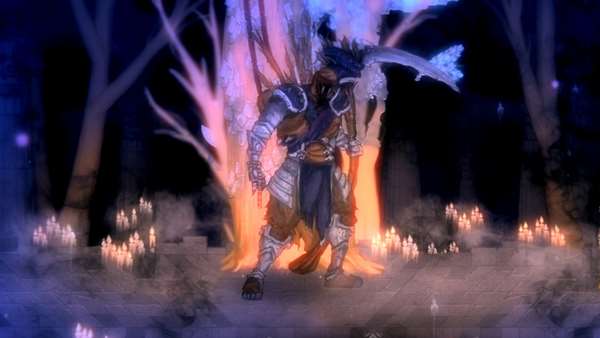
Before interacting with the husk, head all the way to the end of the path to the west to loot a Treasure Pouch containing the Cerulean Tome of Fates. Return this to Runereader Diedala in Pardoner's Vale to unlock the final set of Fated Hunts. Return to the center of the area and look for the prompt slightly to the right of the Husk. You are about to fight the Final Boss of the game. When ready, interact with the Husk to throw your Grappling Hook at it, yanking him down from his restraints, revealing his name as The Undone Sacrifice and beginning the encounter.
Boss Fight: The Undone Sacrifice
Loot:
- Engraved Box
- Salt x 0
- Silver x 795
Moveset:
Crash Landing - The Undone Sacrifice leaps straight up into the air and then swoops down toward the player. As he crashes into the ground, he sends a wave of lightning and debris spreading outward a medium distance on both sides of the impact point. Quickly rush underneath the boss as he performs the leap upwards.
Whirling Uppercut - The Undone Sacrifice performs an uppercut with his scythe while twirling it at the end of the move. This move will hit several times and requires precise timing to dodge.
Scythe Combo - The Undone Sacrifice performs a downward slash with a slight backpedal, followed by another downward slash and then an uppercut culminating in a power slam that sends a wave of lightning and debris spreading outward over a medium distance on both sides of the impact point, similar to the Crashlanding move. This combo is very difficult to avoid due to the sheer speed and virtually no telegraphs. However, there is a very tiny window between each strike in which you can spam your roll. If you manage to get behind him, the rest of the move will not hit you. If you roll away instead, you should have enough time to run away from the rest of the combo.
Splinter Barrage - The Undone Sacrifice levitates a short distance above ground with his scythe on his shoulders and his other arm stretched out to the side. Several of the splinters on his back are released into the air and after a brief delay, he sends them shooting outwards in a very large arc. Get behind the boss as soon as you see him levitate.
Fulgurite Strike - The Undone Sacrifice spins his scythe several times, culminating in a big slam attack that lodges the blade into the ground. After a brief moment, small bolts of lightning strike the ground one after the other. Each bolt sends a small spire of fulgurite bursting out of the ground. You will need to constantly be on the move until the boss pulls his scythe out of the ground as fulgurites will continually burst out of the ground, following you around the arena.
Stomp Combo - The Undone Sacrifice holds his scythe to his side in a low stance with his other elbow posed behind him. After a very brief delay, he dashes forward and stomps the player as he slides forward. He stomps one more time and strikes the player, sending them sliding forward a short distance. He ends the combo with a Fulgurite Strike. The initiating stomp can be avoided with a perfectly-timed roll through the boss. If done correctly, the rest of the combo will not occur. If you get caught in the stomp, you are effectively locked in an animation until he sends you sliding forward. After this point, you should immediately roll forward to avoid the incoming fulgurites and get behind the boss.
Strategy:
The Undone Sacrifice may quite appropriately be the most challenging boss you will face in Salt and Sacrifice. This boss utilizes a combination of nearly all the boss mechanics you've encountered thus far and with staggering proficiency. While primarily a melee-oriented boss, he has several ranged attacks that are extremely demanding and require the tightest timing on dodges to overcome.
You will quickly find that there is no good positioning from which to trade blows with The Undone Sacrifice. You must constantly be on the move and carefully read his moves instead of trying to bait out attacks. His melee scythe attacks and combos are some of the fastest in the game and with the least amount of recovery, requiring you to create openings by learning how to i-frame them.
One of the moves that he tends to use a lot is the Crash Landing attack. Not only is a direct hit from this move deadly, the lightning and debris wave released on impact can catch you off guard as it has a very wide hitbox on either side of the boss. When you see him leap up, immediately rush under him but do not stop moving or the wave will hit you. A less risky way to approach this attack is to roll towards him a split second after he lands in order to i-frame the shockwave and position you close enough for a 1-2 hit counter.
His Scythe Combo is one of the most dangerous and difficult moves to avoid. It comes out very quickly and does not have a clear telegraph. If you get caught in this combo, it is best to spam your roll to mitigate the damage and potentially avoid further hits if you can manage to roll behind him. Another move to watch out for is the Fulgurite Strike telegraphed by the boss spinning his scythe before slamming it down. He will sometimes use this while you are nowhere near melee range but do not be fooled. The ensuing fulgurite bursts will follow you all around the arena for several seconds until the move is over. It is recommended you focus on evading the fulgurite bursts instead of trying to find an opening during this move.
To round out his most dangerous moves, players should learn how to effectively avoid his Stomp Combo. This move works similarly to a grab and locks you in the animation while taking a chunk off your health bar if the initiating stomp connects. It has a very short and subtle telegraph where the boss holds his scythe to his side with his other elbow behind his body, preparing for a dash. A split second later, the boss rushes forward at incredible speed. This is your window to avoid this move by rolling through. If caught in the stomp, you will be helpless until he strikes you with the scythe and you slide forward. Do not attempt to heal after this point as he will end the combo with a Fulgurite Strike which will very likely finish you off if you don't move.
Your biggest window for attacking will likely be during his Splinter Barrage move. As soon as you see him levitate, quickly roll behind the boss and retaliate with 2-3 hits and get ready to disengage, waiting for his next move. As long as you can get behind him before the splinters are released, they will never hit you. If you are caught within range of the attack as it starts, keep moving towards the boss as you can roll and i-frame through the portion of the splinters that land closest to him without taking damage.
Lastly, remember to make use of the environment. The arena is a very wide space and the Undone Sacrifice does not have a very fast walking speed. Like the previous bosses in the Elder Copse, you can abuse this by running far away and pelting him with ranged attacks and throwables to chip away at his health.
Similar to mages, once you deplete the Undone Sacrifice's HP, he will collapse to the ground and you will need to press the appropriate button to finish him off and end the encounter.
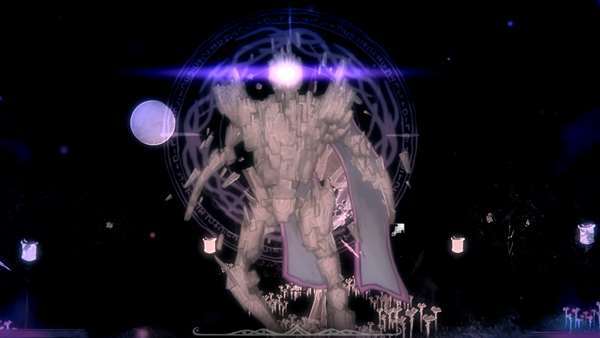
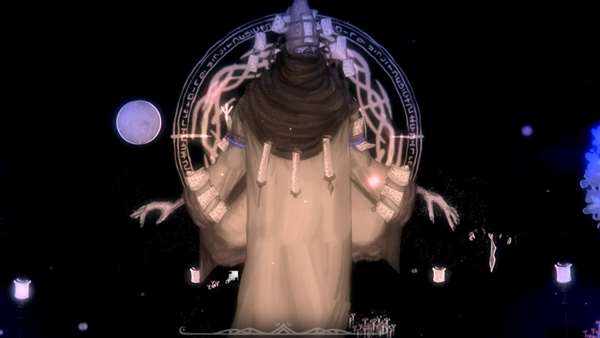
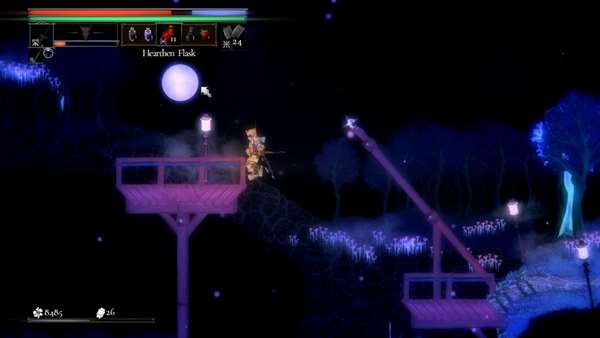
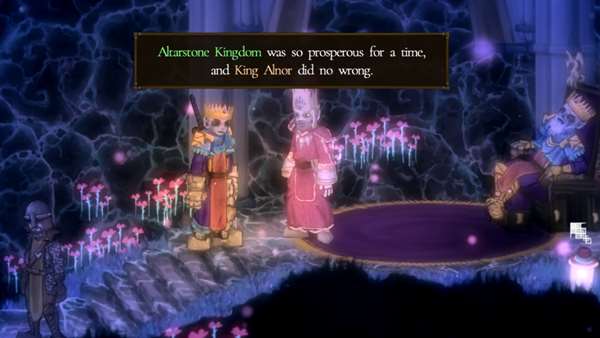
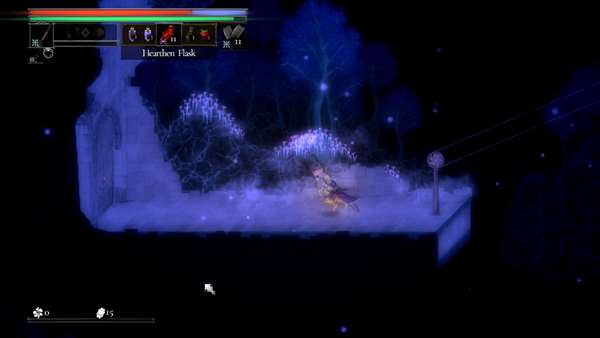
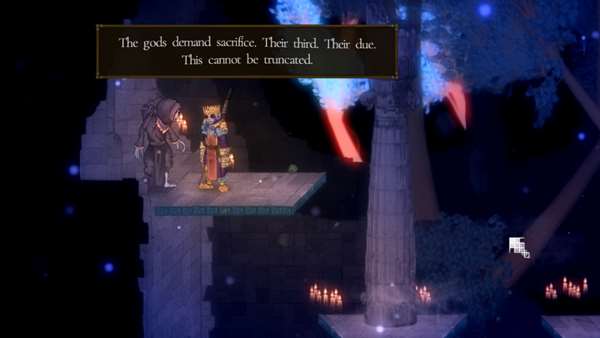
Once you defeat the boss, inspect the tree and you will be given a choice on how to end the game: Climb or Devour. Which ever option you choose, know that this is the point of no return and if you wish to complete any other activities, you should do them now.
Choosing the Climb option, you will take the place of the Undone Sacrifice, lashing yourself onto the tree as the camera pans to the sky and mysterious silhouettes manifest amongst the stars. After the credits roll, you will awaken back at Pardoner's Vale at the point after the Prologue, beginning a New Game Plus cycle.
Choosing the Devour option, you will stab the tree and devour its energies as the camera pans to the sky. Shortly after, a devastating meteor shower rains across the lands as the credits roll.
Elder Copse Additional Content
The following sections pertain to optional content and activities you can do that are not required in order to complete the game. However, they can lead to more equipment, bosses, quests and more that can greatly help you on your adventure.
Hallowed Hill Runes
Hallowed Hill is a secret optional location that can be traveled to by manually setting a certain Rune pattern at the Mirrorgate in Pardoner's Vale. This pattern can be found here at the Elder Copse, in a hidden area underneath the main Elder Copse Obelisk. To reach this location, travel east from the Obelisk and grapple up the ledge using the shortcut unlocked previously. A little bit further to the right is a red wooden platform. Jump onto this platform and drop down, then grapple to a rickety ledge to the left.
Drop down from this wooden platform and then grapple to the west to find the hidden area
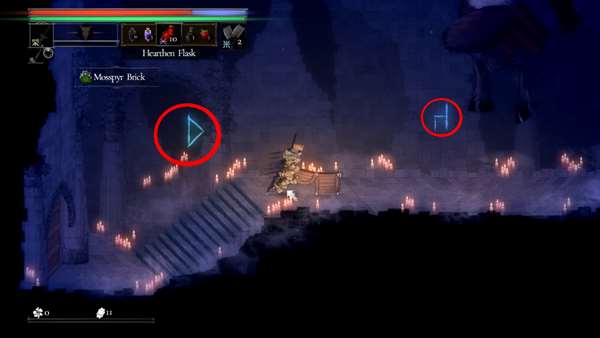
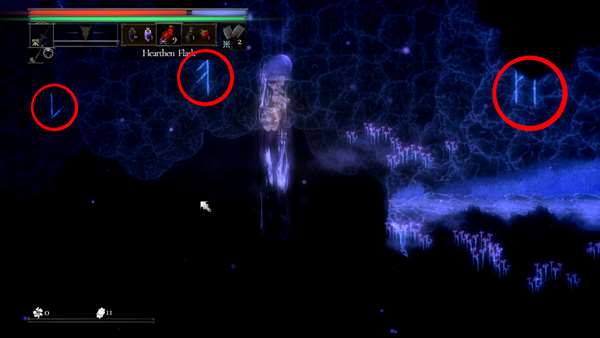
Head through the archway here to get to a long hall guarded by the Inphyrean Warden. This is the same overpowered boss that killed you during the game's Prologue and you can now finally get your revenge. This time, he does not have a Boss health bar and simply acts like a tougher regular mob or miniboss. The warden is also accompanied by an Aberrant Heart and a Sentinel Eye. Technically, you do not need to kill this enemy and can simply dodge as you head west along the hall. There is a Treasure Chest that contains a Mosspyr Brick near the western end as well as a door. As you approach the door, you should see two glowing Runes carved into the wall in the background. The remaining 3 Runes can be found outside by opening the western door. You could technically approach this large hall from the western side of the Elder Copse by utilizing the Ether Vents and grappling points to find the 3 Runes but you won't be able to open the door from that side so you will still need to enter the hall from the east for the last 2 Runes.

Return to Pardoner's Vale and set the Runes manually according to the order they appear in the background from left to right (not the order you see them as you traveled from right to left through the hall) and the portal should activate, allowing you to teleport to Hallowed Hill.
Temple of Embers - Inquisitor Amben Boss Fight
If you've been following Inquisitor Amben's questline through the previous major locations, finding him and exhausting his dialogue at each one, he will relocate to the rooftop of the Temple of Embers with his questline culminating in a Boss Encounter. To find the Inquisitor, make your way back to the top of the Temple of Embers where you fought The Worm That Does Not Die and look for an Ether Vent above a set of stairs in the west-end of the hall. Ride the Ether Vent to the platform on a wall and drop down while moving towards the opening in the wall underneath the platform.
The path to Inquisitor Amben. Navigate your way to the opening in this wall by using the Ether Vent and platform above it.
This opening leads outdoors to another Obelisk and an Ether Vent that will take you to the rooftop. Loot the Treasure Pouch below the vent for a Blazepyr Brick and then ride it up to the rooftop where you will find a bunch of shelves and scrolls strewn about. Inquisitor Amben will be sitting on the floor here. Interact with him and, similar to Inquisitor Selet, he will be corrupted by power and transform into his Boss form, immediately beginning the encounter.
Boss Fight: Inquisitor Amben
Loot:
- Strigid Mask
- Strigid Cloak
- Strigid Sleeves
- Strigid Skirt
- Salt x 27,760
- Silver x 280
Moveset:
Knife Stab - Inquisitor Amben raises his knife hand and stabs at the ground in front of him. Basic melee move that can easily be rolled through.
Rolling Slash - Inquisitor Amben leaps forward with good height and distance, lands in a rolling maneuver and ends with a large downward arcing slash with his knife. The Inquisitor cannot change directions after initiating this move so it is best to run or roll under his leap for a chance to retaliate but rolling through the slash itself is possible as well.
Advancing Strike - Inquisitor Amben takes on a lowered stance with one leg trailing behind him. He then leaps forward a good distance, stabbing at the ground with his knife upon landing. Note that the leap portion of this attack will also deal damage as the Inquisitor leads with his knee. Dodge through the leap to avoid damage.
Bladed Pinion - Inquisitor Amben brings one hand up in front of him, releasing a stream of feathers horizontally which subsequently fall to the ground, dealing damage to anything they touch. The Inquisitor will repeat this move with his other hand immediately. In addition to the damage, getting hit by these feathers will allow the Inquisitor to grab you and stab you on the ground with his knife. Finally, he will shove you forward with his palm. Dodge through to the back of the Inquisitor to completely evade the attack. Getting caught by the grab will lock you in an animation which you cannot escape.
Brilliant Plumage - Inquisitor Amben brings both hands to his side, raising them as they glow a bright white. Afterwards, a large amount of feathers rains from above over a very wide area around the Inquisitor. Avoid this attack by running far away from the Inquisitor as he raises his hands.
Feathered Dash - Inquisitor Amben leaps straight up into the air and then dashes forward in a straight line, dropping feathers along his travel path. These deal damage on contact but can be avoided by rolling through with good timing.
Strategy:
In direct contrast to Inquisitor Selet, Inquisitor Amben has many more moves with a longer recovery time between attacks. Despite leaving himself open after his movesets, Inquisitor Amben can be difficult to get close to due to the very wide hitbox of his feather attacks.
The most dangerous move in his arsenal is the Bladed Pinion attack. This move is deceptive in that it appears as a simple falling projectile attack but in fact hides a powerful grab maneuver which can take out a large portion of your health, if not outright kill you. Ensure that you are rolling behind the Inquisitor whenever he performs this move. This will also give you a window to attack 2-3 times if you are quick.
Another large opening you can make use of is his Rolling Slash. The Inquisitor leaps high up with his horizontal, culminating in a rolling maneuver and slashing with the momentum. As the Inquisitor cannot change directions once the move is initiated, you can easily get 3 or more hits in with most weapons if you run or roll past him as he descends to the ground.
When he uses the Brilliant Plumage attack, run far away to avoid damage as it has a very, very wide hitbox. Alternatively, you can attempt to roll through the feathers as they fall to the ground but this is quite difficult to do.
Finally, the Inquisitor is relatively easy to stagger with consistent attacks and doing so, you may get him in the special stagger animation where his eye glistens similar to grappling points. Use this opportunity to grapple to his head and deliver a powerful blow with your knife to deal a good amount of damage. You can also perform a falling attack right after the grapple for even more damage.
Interestingly, Inquisitor Amben will fall to his knees when you deplete his HP, allowing you to perform a finisher and devour his heart, similar to Mages. He will drop his entire armor set upon defeat and you can speak to his dying human form for some backstory before he perishes, ending his questline. You can also loot an Engraved Box artifact from his corpse.
Extras Header
Tips & other extra activity notes go here
Trivia & Notes
- By learning the Runes to reach Elder Copse, players earn The Copse
 trophy.
- Trivia and notes go here
 Anonymous
I haven't seen anyone talking about so far, so let this be my one contribution to this wiki: SCREW the temple of embers and the worm it rode in on! Worst designed area I have ever seen in a soulslike period. You can sit me down and tell me about different builds and armor sets and "git gud scrub!" all day! But you will never convince me that that area wasn't designed by someone with a literal burning hatred of all life in the universe.


"Once you defeat the boss, inspect the tree and you will be given a choice on how to end the game: Climb or Devour. Which ever option you choose, know that this is the point of no return and if you wish to complete any other activities, you should do them now."
The point of no return is when you kill the boss and not between killing the boss and choosing the option. I missed whole Hallowed Hill because of that.
3
+11
-1