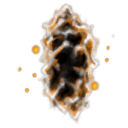
Guiltless Shard |
|---|
 |
| Effect |
| An uncorrupted shard of crystalized purity, stolen from the twisted heart of a Mage. Crush it to purge yourself of Spellmark and restore your physical flesh. |
Guiltless Shard is a Consumable item in Salt and Sacrifice. Consumables are known as perishable items with limited uses, usually consumed to gain temporary buffs and benefits or replenish any lost stats. These items will stack up in the inventory. Once used, players will gain its effects and the item may deplete. Items classified as consumables include food items, bombs and potions. These items are usually obtained from either enemy drops, picked up from bushes and shrubs, found in various locations in chests when looting, or obtained from other NPCs. Replenish health and focus, consumables and materials at an Obelisk.
Salt and Sacrifice Guiltless Shard Information
Guiltless Shards are used to counteract Spellmark effects, regaining your physical flesh and allowing you to use the full health bar.
- Item Type: Consumable
- Description: An uncorrupted shard of crystalized purity, stolen from the twisted heart of a Mage. Crush it to purge yourself of Spellmark and restore your physical flesh.
Where to Find Guiltless Shard in Salt and Sacrifice
Guiltless Shards can be looted off the various Supply Bags found throughout the game and defeating both Named and Unnamed Mages.
Dropped by:
- Named Mages (Common)
- Roaming Mages (Rare)
- Nameless Mages (Common)
- Fated Mages (Uncommon)
- Summoned Mage Minions (Very Rare)
Found at:
- x2 Guiltless Shards can be found in Pardoner's Vale, inside a chest behind the reindeer within the stables, where Stablehand Bren is located.
- x1 Guiltless Shard can also be found in Pardoner's Vale, in a bag to the upper left of Warpsmith Zakie, reached by using the Grappling Hook.
- x1 Guiltless Shard can be found in Ashbourne Village, in a bag near the chest containing the Executioner's Maul weapon.
- Froms the spawn point, head to the left up the ramps, then keep going up and left until you reach a locked wooden door. The shard is on the bag above, to the left.
- x1 Guiltless Shard can be found in Ashbourne Village, in a bag before the chest containing the Golden Candle and Bronze Snuffer items.
- From the spawn point, head to the left then below to the caves (Root-Ceil Cavern), then keep going down until you can go to the right. Keep heading right until you can jump from some platforms to a ledge with the bag.
- Guiltless Shard can also be found at Ashbourne Village, inside the Ashpeak Castle. From the castle's main entrance chamber, climb onto the rickety platform above using the solid platform on the right. Upon reaching it, quickly run to the wall on the left, perform a wall jump to get up to the solid platform above and then exit east to a balcony above the castle bridge. Climb the ladder to the second floor. Head into the entrance on the left to find a small room patrolled by an Undead Sage. There is a Treasure Chest at the bottom that contains a Guiltness Shard.
- One Guiltless Shard can be found inside a Treasure Pouch in Dreadstone Peak, located above the Obelisk east of the The Two that Remain bossfight.
Guiltless Shard Tips & Builds
- You can give a Guiltless Shard to Inquisitor Selet in each of the game's locations where he is found (Ashbourne Village, Bol Gerahn, Corvius' Mire and Dreadstone Peak), in what is a long quest spanning nearly the entire game. Completing his quest awards the entire Manganian Set.
- You need to consume a Guiltless Shard in order to be able to activate the Golden Candle and the Crimson Candle items.
- Using a Guiltless Shard will increase all of your Defenses, as well as your Item Find, by 10.0 points (this is always a flat bonus).
- It also restores 25% of your max HP, if your health isn't full.
- Before patch 2.0.0.1, this item used to allow you to obtain 100% of your max HP, as being Spellmarked would leave the player with only being able to have 75% of their max HP. This has been since removed.

Feels like the droprate from enemies summoned by mages (not the hazeburnt guys) is significantly increased when you're below 10 shards. Has anyone else noticed this or is it just pure coincidence?
1
+11
-1