Bol Gerahn is a Location in Salt and Sacrifice (SnS) and is the second main destination players will visit during their adventure. This Bol Gerahn Walkthrough helps you find and fight all Bosses and collect all items in the area. Bol Gerahn is a sacred burial ground home to the Temple of Bol Gerahn, a massive tomb that had been targeted by mages and the army of the warped. Bol Gerahn features a desolate desert theme with various cave systems and massive trees strewn about.
I saw the Tomb Temple of Bol Gerahn robbed of its last scraps of sanctity by the encroaching tides of chaos. Warped elements pilfer and boast in a desecrated land.
This page is a segment of the Walkthrough, featuring a comprehensive guide that aims to help players complete the main campaign. The Walkthrough covers each location in detail, including all obtainable Items and Equipment, NPCs, Enemies and Bosses, and is organized by location based on our recommended progression path to completing the game.
- See the Game Progress Route page for a minimalist guide on where to go and what to do next
- See the Quests page for details on quest progression
- See the New Player Help and Game Mechanics pages for tips covering the game's various mechanics
Bol Gerahn Guide
Previous: Ashbourne Village
Next: Corvius' Mire
Sub-Areas: Desolate Plain, Praying Giants, Forsaken Gulch, Temple of Bol Gerahn
Bol Gerahn Map
[map goes here]
NPCs in Bol Gerahn
- Blighttaker Zix
- Corvius' Mire Guard
- Inquisitor Amben
- Inquisitor Selet
- Kingdom Knight
- Sheriff Inquisitor Kier
Bol Gerahn Bosses
- Aur Cyrus, the Wild Pandemonium
- Nix Ocifiris, Caretaker of Dry Bones
- Padra Sakrev, Bearer of Guilt
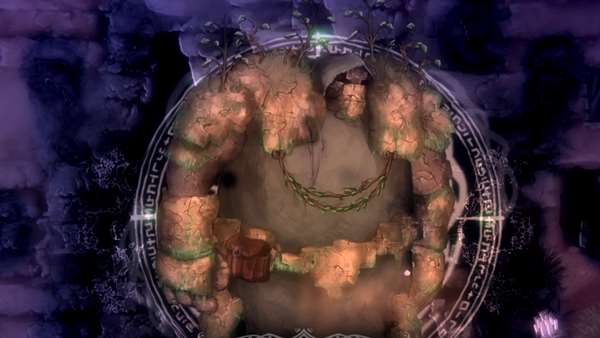
- Sto'h Karrig, The Immovable Bastion
- The Hate-Cursed Matriarch
- The Tireless Exalted
- Ture Vasari, The Blood-Drunk Blade
Bol Gerahn Enemies
- Baroness
- Creeping Sire
- Den Chamberlain
- Den Priest
- Skallin
- Surface Forager
- Surface Ranger
- Tomb Servant
- Undead Cleric
- Valley Bat
All Items in Bol Gerahn
Consumables
Materials
- Ashpyr
- Blazepyr
- Bluestone Mushroom
- Dragon's Tongue
- Exotic Strand
- Fine Leather
- Goldenpyr
- Haze Spiral
- Irona Ore
- Moltea Ore
- Mosspyr
- Shimmering Bud
- Twin Ashpyr
- Twin Blazepyr
- Twin Frospyr
- Twin Goldenpyr
- Twin Voidepyr
- Unstable Ore
- Valley Herb
Equipment & Upgrades
- Altarstone Glaive
- Beloved Idol
- Bloodstone Head
- Carved Feline
- Chain Whip
- Cleric Helm
- Cleric Skirt
- Cleric Vestments
- Emerald Feather
- Faithful Bracers
- Flagellant's Mask
- Healer's Gloves
- Healer's Hat
- Healer's Mantle
- Healer's Skirt
- Incantation Bowl
- Jeweled Crown
- Palatine Cuirass
- Palatine Gauntlets
- Palatine Greaves
- Palatine Hood
- Palatine Vanguard
- Runed Mace
Key Items
Other Items
Bol Gerahn Walkthrough for Salt and Sacrifice
Bol Gerahn Main Walkthrough
Desolate Plain
You start Bol Gerahn in the Desolate Plain sub-area. Interact with the Obelisk to your left and then head east. You will pass a locked door at the bottom of some stairs, as well as a small kiosk with a Talking Head NPC. You can speak to it for some backstory and then continue on east. Nearby, the path forks upwards and downwards. The path below leads to a sealed door that requires 1 heart of a Named Mage to open. Use your Grappling Hook to get to the upper path where a Surface Forager and Surface Ranger are standing guard. From here, you can take the path upwards or go through the tunnel with a green entryway nearby. Both paths lead to the same location but the tunnel has a Baroness enemy and several more Surface Foragers, as well as a Satchel that contains some Silver, Irona Ore and Poison Bomb. At the point where both paths meet, you can find a couple of grappling points leading further upwards into the next sub-area of Praying Giants.
Praying Giants
As you arrive at this sub-area, take the stairs west to find a giant tree with wooden platforms and ladders you can climb. Take out the Surface Forager and Surface Ranger guarding the foot of the tree and then make your way up the first ladder.
The foot of the first Praying Giants tree
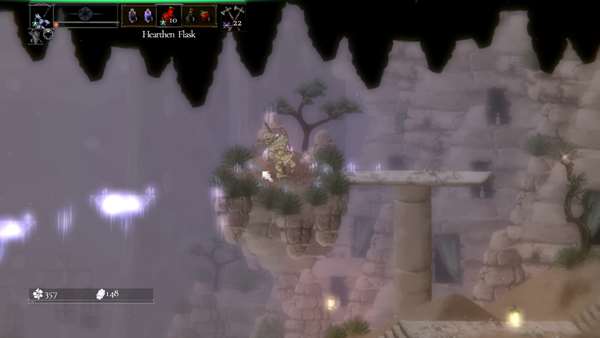
Climb the second ladder and kill or run past the Surface Forager and Surface Ranger, following the long platform leading to the right to a couple of grappling points over a gap. On the other side, perform wall jumps to reach the wooden platforms leading upwards and then head into the entrance in the right. This leads into a narrow, vertically-oriented cave with a Moltea Ore node which also has a chance to yield Unstable Ore. Wall jump to reach a ledge above which exits back outside where you can find the first Obelisk of this area. We'll call this the eastern Praying Giants Obelisk.
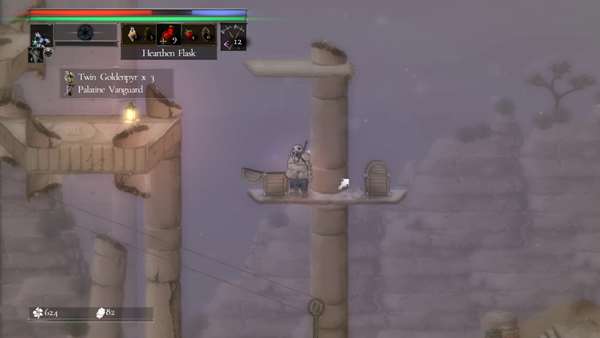
From the Obelisk, take a detour by climbing up the platform to your right to reach an upper section of the narrow cave. Mine the Moltea Ore node and then wall jump once again to reach the ledge above and exit west. Follow the path towards several wooden platforms where you can grab a glowing Treasure Pouch which contains 3x Blazepyr. Head back down to the Obelisk and from there, grapple west to get back onto the tree and then climb up the two ladders. At the top of the second one, there is a platform you can jump to on the right with a glowing Treasure Pouch containing a Shimmering Bud and a Salt Piece. Continue on west to reach solid ground and the western Praying Giants Obelisk past several more Surface Foragers and Surface Ranger enemies. Heading further west from here leads to the first boss fight of Bol Gerahn.
Boss Fight: The Hate-Cursed Matriarch
Loot:
- Blazepyr
- Goldenpyr
- Carved Vessel
- Salt x 3,500
- Silver x 415
Moveset:
Glaive Strike - The Matriarch performs a powerful overhead slash with her glaive. No special properties, but it can hit quite hard. Dodge through and behind the boss to avoid.
Stomp - The Matriarch leaps towards the player and stomps downwards with her legs. You can dodge under her as she is in the air.
Lightning Bolts - The Matriarch twirls her glaive once and holds it upwards with both hands as lightning forms on the blade, shooting several bolts outwards in a diagonal cone in front of her after a short delay. Dodge through her to avoid the attack.
Lightning Storm - The Matriarch twirls her glaive up high several times as lightning forms on the blade. She then plunges it down to her side, sending several columns of lightning cascading outwards in front of her. Get behind her as she's twirling her glaive to completely avoid the attack. Alternatively, you can dodge through the lightning columns with precise roll timing.
Lightning Burst - The Matriarch raises her glaive slowly with one hand while lightning forms on the blade, culminating in a burst of lightning in a medium radius around her. Can be avoided with a perfectly timed dodge or by simply running away from her.
Strategy:
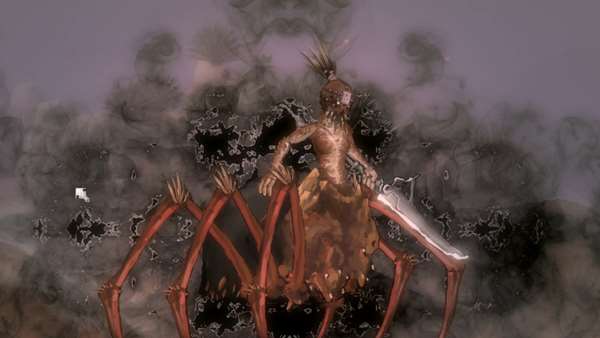
The Hate-Cursed Matriarch is large human/spider hybrid equipped with a glaive weapon. She uses powerful lightning magic and can combo players relentlessly. Success in this fight hinges on your ability to quickly get behind her and recognize all her different lightning spell patterns and telegraphs. Nearly all of her moveset can be avoided and punished by getting behind her.
Her most dangerous move by far is the Lightning Storm but it is also the most highly telegraphed as she twirls her glaive several times before casting the spell. She is vulnerable during this wind-up and it is also the best opportunity to get behind her to not only completely avoid the attack but to also get several hits in. Alternatively, if you are too far away from her when the attack begins, prepare to roll through the columns of lightning as they form. Be warned as getting caught by a lightning column can result in certain death due to the cascading nature of the attack, allowing each successive column to hit, dealing immense damage.
Her Lightning Bolts attack only hits in front of her and can easily be punished similar to the storm by getting behind her as she winds-up. It has a shorter recovery so don't get too greedy with your attacks. Be careful not to overcommit to attacking her as she can quickly retaliate with Lightning Burst. While this move does not do much damage, it has a very quick recovery time and a clean hit will knock you down, setting you up for other follow-ups such as her basic glaive strike, which does quite a good amount of damage.
The Magnesin Supply
Defeating the Matriarch allows you to go further west and your next goal should be to obtain another tool that will help with traversal and unlocking even more areas. Head west from the Matriarch's arena to an area with several stone pillars. Take out the Surface Forager here and then drop down to find the western Praying Giants Obelisk. Head east down the slope to find another large tree. Make sure to lower the first ladder here and descend the tree. There is a Tresaure Satchel here which can yield Silver, Irona Ore, Fine Leather and Firebomb items. At the bottom of the tree, take out the two Skallin and then head west into the small tunnel. There is a Moltea Ore node here that you can mine before exiting to the cliffs to the west. Drop down the cliffs onto the wooden platform below where you can loot a glowing Treasure Pouch for a Medium Bag of Silver and 3x Twin Frospyr. Continue downwards and enter the tunnel to the east.
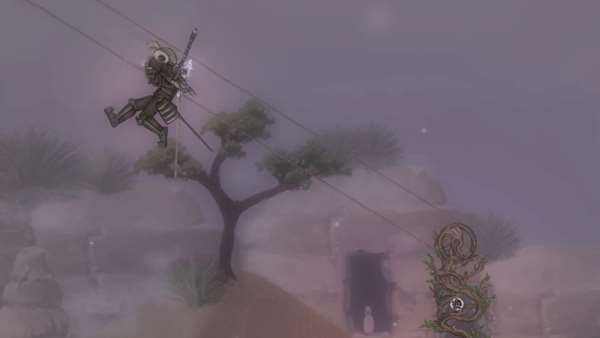
Inside, a Baroness will ambush you from the ceiling. Defeat it and then jump up the wooden platform by the stairs. Make your way across the crumbling platforms to find another solid wooden platform at the end where you can loot a Treasure Pouch containing an Exotic Strand. Down below, you can find a corpse at the end of the path holding the Magnesin Supply, an Inquisitor Tool that will allow you to operate the many pulley transit systems found across the Alterstone Kingdom. Much like the Grappling Hook, this tool will allow you to reach new locations to explore, as well as unlock shortcuts. The pulley transit systems work much like mechanical ziplines, allowing you to quickly travel between a start and end point. To activate a pulley, you will first need to find and power the start point with the Magnesin Supply stones, which has a distinct look from the end point. Once powered, you can freely travel back and forth from either point.
After collecting the tool, pull the lever by the gate to open it, unlocking a shortcut. This leads back to the first large tree you encountered.
Bol Gerahn Mage Hunt
Now that you have the Magnesin Supply stones, you can reach previously inaccessible areas and begin hunting down Mages. Head east from the gate you just unlocked to find a raised platform with the start point of one of the aforementioned pulleys. Interact with it to activate the pulley and grab on. This takes you up to a ledge with a door that leads to the base of the second large tree from earlier. Activate the pulley down here and ride it up to a platform above with a Mage corpse. This initiates the hunt for Aur Cyrus, an Aeromancer. There is also a platform to the right where you can find an unnamed Nomad NPC. He will warn you about the strange rift to the right and will offer a hint about a tool that will allow you to ride the air current. Ignore the rift for now.
An unnamed Nomad found atop the second tree in Praying Giants
Mage Hunt: Aur Cyrus, The Wild Pandemonium
Loot:
- Ethereal Heart (50%)
- Misty Lung x 1-2 (50%)
- Cloudy Vein x 1-3 (50%)
- Longing Wisp x 1-5 (50%)
- Blazepyr x 1-5 (5%)
- Frospyr x 1-5 (5%)
- Salt x 1,750
- Silver x 875
- Guiltless Shard
Summoned Mobs:
Chase Sequence
Aur Cyrus can initially be found at the base of the same tree you initiate the hunt from. He will then teleport east, just next to the pulley. After this, he will teleport up the eastern tree. Use the grapple points and climb up two ladders to get to where he is. He will then teleport further up, past the tree. Climb up the tree while moving eastward toward the eastern Praying Giant Obelisk. From here, jump up the ledge on the right and head through the entryway into the narrow vertical cave. Wall-jump up to the ledge above and exit west to find the Mage again. Defeat any remaining summons and his Boss Fight will begin.
Boss Fight
Moveset:
Advancing Slash - Aur Cyrus conjures a sword of wind, holding it behind him and then dashing forward while slicing in a wide arc upwards. Below 50% HP, he will often follow up with a downward slash.
Retreating Slash - Aur Cyrus conjures his sword high above him and then slices in a wide arc downwards as he dashes backwards. Dodge away to avoid damage.
Rolling Twister - Aur Cyrus summons a slender column of wind that moves across the screen, hitting multiple times and throwing the player high up into the air. Aur Cyrus uses two versions of this move. If he lowers both hands in front of him and then raises them up, the tornado is summoned from behind the player and moves towards the Mage. If he stands tall and twirls his hands around, the tornado is summoned from his position and moves towards the player. Dodge through the tornado to avoid getting damaged and thrown.
Wind Blades - Aur Cyrus channels with one hand higher than the other, creating several small blades of wind that fly diagonally towards the ground in front of him. The area right in front of him is safe and the blades will pass over you if you stick close to him.
Strategy:
Aur Cyrus is a spam-heavy boss who likes to repeatedly cast his spells and combo with his sword attacks, with very little recovery in between. Oddly, his melee sword attacks are much stronger than his spells. However, players should beware of his Rolling Twister attack which can come from either direction. While this move does not deal much damage, it will throw the player high up in the air, causing them to bounce upon landing and leaving them open to follow-up attacks and juggles. The tornadoes are easy enough to dodge through but always be watching his hands as he can spam this move over and over.
Aur Cyrus' sword attacks are incredibly quick, especially below 50% HP. His Advancing Slash will almost always be followed up by a downward slash which has very good tracking, even if you dodge through him for the first attack. Furthermore, he has very little recovery time between slashes and you will frequently see combos of the double Advancing Slash followed by a Retreating Slash. It's important to recognize the different telegraphs for his sword attacks so you can properly dodge. Dodge through him for his advancing slash but get ready to dodge away for the follow-up slash. Dodge away for his retreating slash and avoid getting pushed towards the sides of the arena.
Your best windows for attacking is during his Rolling Twister variant that spawns the tornado behind you as he will be locked in animation for a few seconds after. If the tornado originates from him, you can dash away and throw a couple of ranged attacks before the tornado reaches you to chip away at his health. He does not have particularly good damage resistances and even exhausting your entire ranged ammo supply should take out a large chunk of his health bar while remaining relatively safe. Lastly, his Wind Blades move also has a long enough recovery that you can get at least one hit in as long as you remain on point with closing the distance as he casts the spell.
Once his health is depleted, he will assume a lowered position where you can press the appropriate button to devour his heart, ending the encounter.
After defeating Aur Cyrus, speak to his dying human form for some backstory and pick up the loot he drops for 3x Longing Wisp, a Blazepyr and a Beloved Idol. From his arena, head west and up the three platforms. Power up the pulley here to unlock a shortcut. Make your way back to the main Obelisk in Desolate Plain to begin the next section.
Creeping Caves & Forsaken Gulch
From the Desolate Plain Obelisk head to the east and just past the Talking Head in the kiosk, take the lower path to a door that you can unlock now that you've devoured the required Mage Heart. This leads to the Creeping Caves sub-area. Inside, descend the first section while defeating the Den Priests. There are also several ore nodes in this area. At the bottom, head east and jump the gap towards the Creeping Sire. Defeat it and then head down the ladder on the right. Walk to the west slightly and activate the Pulley start point here but don't take it yet. Instead, drop down to the pit on the left and loot the Treasure Pouch which contains 3x Ashpyr. Head back to the Pulley and ride it west over the pit. The ledge you drop off on is guarded by another Den Priest and a Den Chamberlain and past them, you will be ambushed by a Baroness on the left. Take the path to the right where there is a ladder going down but watch out for the swinging spike trap as you approach.
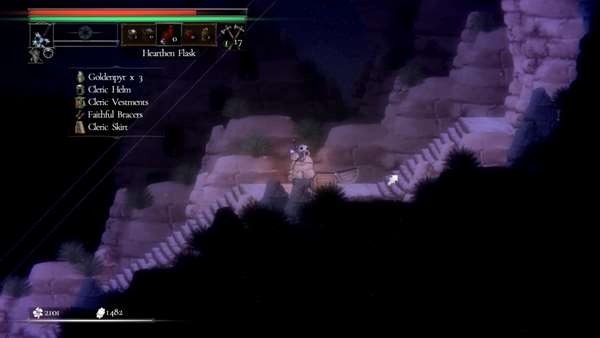
From the ladder, head west and watch out for a Creeping Sire ambush as you approach the end of the path. Continue on towards several wooden platforms you can drop down from. Take the stairs to the left which exits onto a cliff in the Forsaken Gulch. There is an end point of a Pulley here. Drop down below and open the Treasure Chest which contains 3x Goldenpyr, a Cleric Helm, Cleric Vestments, Faithful Bracers and Cleric Skirt.
The Cleric Set and other items obtainable near the Pulley in Forsaken Gulch
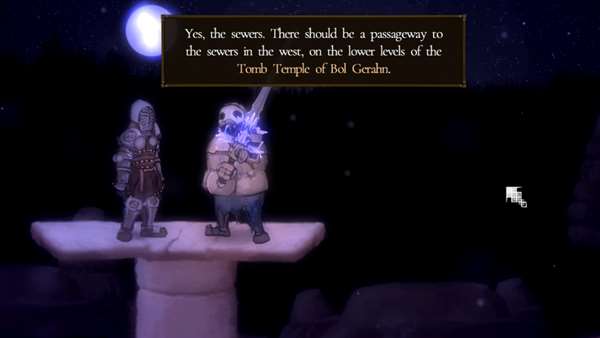
You can head west from the chest down the stairs to activate the Pulley. Before heading back into the Creeping Caves, jump to the pillar on the left and drop the ladder below for a shortcut to the Pulley. Climb up to the top platform and speak to the Kingdom Knight whom you met earlier in Ashbourne Village.
The Kingdom Knight atop a pillar in the Forsaken Gulch
Speak to the Knight to learn about the area and receive a hint about the sewers below. Navigate your way to the lower east section of this area to find a small cave with an Obelisk to create a checkpoint. Now, head back to the Pulley and take it back to where you left off in the Creeping Caves.
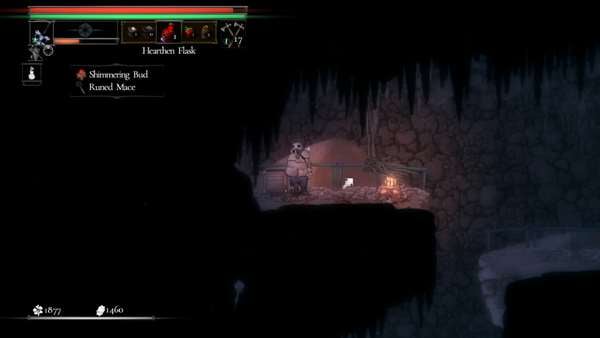
Drop down to the bottom of the platforms and jump to the area on the right with two Den Chamberlains and a Valley Bat. Defeat them and continue to the right where you will see a green pillar with two platforms attached to it. Use wall jumps to reach the platforms and at the top, grapple to the left to reach a platform with a Treasure Pouch containing 3x Twin Blazepyr. Get back to the main area and drop down one level using the ladder to the left. Head west and quickly climb up the crumbling platforms to reach a concrete ledge. Watch out for the Baroness ambush from below. Jump the gap to the left and quickly roll to avoid the swinging spike trap. Open the Treasure Chest for a Shimmering Bud and a Runed Mace.
A Treasure Chest containing a Shimmering Bud and the Runed Mace
Drop down to the area below and defeat the two Den Chamberlains and take a quick detour to the right, descending the ladder to pick up the Treasure Pouch on the left which contains 3x Mosspyr and a Small Bag of Silver. Head back up the ladder and to the west where you will find a distortion in the area. Inspecting this distortion will allow you to initiate the hunt for Sto'h Karrig, a Terramancer.
Mage Hunt: Sto'h Karrig, The Immovable Bastion
Loot:
- Stone Heart (50%)
- Earthen Lobe x 1-2 (50%)
- Stony Backbone x 1-3 (50%)
- Granite Mote x 1-5 (50%)
- Ashpyr x 1-5 (10%)
- Salt x 4,550
- Silver x 875
- Guiltless Shard
Summoned Mobs:
Chase Sequence
Note that you may encounter unnamed versions of Mages you've fought previously while hunting down Sto'h Karrig. They are inconsequential and serve only to distract you but they can drop their crafting materials if you choose to go after them. From the hunt's initiation point, head east and take the upper path then head up the ladder to the large area with a green pillar to the very east. Fight Sto'h Karrig here for a while and he will teleport to the lower east. Head back down the ladder you climbed up and head directly east from it. You will find Sto'h Karrig next to a green wooden bridge. He will then teleport to the lower west. Simply drop down from the bridge and head into the pit to the left. Fight him here for a while until he teleports again. Head up the stairs to the west and up the ladder. Watch out for the swinging spike trap and continue on to find Sto'h Karrig near his hunt's initiation point. After this, head out into the Forsaken Gulch area to the west and drop down to the area next to the cave with the Obelisk. After fighting him here, he will teleport one last time further west where the Boss Fight will begin.
Boss Fight
Moveset:
Ground Pound - Sto'h Karig's basic melee attack involves smashing the ground with his fist. Very easy to avoid by dodging through or away from him.
Dash Punch - Sto'h Karig dashes a short distance forward while holding his fist in a low stance. The fist can be jumped over and the rest of his body does not have a hitbox during this move.
Leaping Smash - Sto'h Karig leaps a short distance and smashes with his fists upon landing. Be careful as he can quickly turn around during the landing, aiming his fists in the exact opposite direction he leaps from. Move away from him as he leaps.
Geo Punch - Sto'h Karig raises a fist up high and then punches the ground, sending jagged rocks bursting out of the ground horizontally in front of him. The rocks are only slightly taller than the player and can be jumped over if timed properly.
Geo Stomp - Sto'h Karig raises one leg up and violently stomps the ground after a short delay, sending jagged rocks jutting outward from the point of impact. Dodge behind him to avoid the attack.
Rock Barrage - Sto'h Karrig raises one arm high up behind him, gathering a cluster of small rocks which he then sends flying towards the player. These rocks can be dodged through, jumped over or you can run away from them if there's enough space as they will hit the ground and collapse if baited a good enough distance away.
Rock Crush - Sto'h Karrig summons a large rock in between his two hands and then brings his hands together after a short delay, crushing the rock and sending a wave of dust and debris out in a small radius around him. Simply stay away from the radius to avoid damage.
Strategy:
Sto'h Karrig is not particularly difficult, but depending on your upgrades and level, he can hit quite hard. Almost all his attacks can be avoided by jumping or rolling behind him. Ranged attacks as particularly effective as Sto'h Karrig tends to close the distance before attacking but has a very slow, lumbering walk. Run away from him and pelt him with your ranged weapons as he slowly walks towards you.
The best window for attacking Sto'h Karrig is during his Rock Barrage move. This attack fires in a diagonal path towards the ground in front of him and the area directly in front of his legs is completely safe. Making your way to his legs while he casts the spell will allow you to get at least 3 hits in and even more with faster weapons. For his Geo Punch move, there is a small window while he raises his fist where you can roll towards his back, completely avoiding the jagged rocks and allowing you to get a couple hits in. The Geo Stomp move has a similar obvious telegraph with the raising of his leg, also allowing you to get behind him and punish the mage.
After depleting his HP, Sto'h Karrig falls to his knees, allowing you to devour his heart and end the encounter.
After defeating Sto'h Karig, speak to his dying human form for some backstory and pick up your loot which includes more of his crafting materials as well as a Carved Feline and Twin Ashpyr. Directly above his boss arena, you will find a sealed door that you can now unlock, having devoured 2 Mage Hearts in the area. This door leads to the Temple of Bol Gerahn sub-area.
Temple of Bol Gerahn
Immediately after heading west from the Temple's entrance, you will be met with another boss encounter.
Boss Fight: The Tireless Exalted
Loot:
- Twin Voidepyr
- Goldenpyr
- Twin Goldenpyr
- Incantation Bowl
- Salt x 8,450
- Silver x 770
Boss Fight
Moveset:
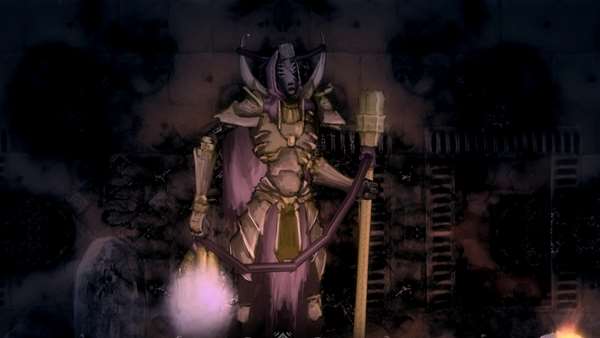
Wraith Call - The Exalted summons 3 wraiths from his lantern which home in on the player. The wraiths can be dodged through or jumped over if they are low enough but they have a staggered release and players should be on the move when the spell is cast, ready to avoid the wraiths. Note that he can lift the lantern either in front of him or up at this side. Neither animation seems to provide a difference in the attack.
Lantern Bash - The Exalted swings his lantern downwards in front of him, pummeling anything in its path. The impact point is slightly ahead of his legs and sticking close to them is relatively safe.
Staff Smash - The Exalted raises his staff up high and then swings it downward in front of him. This attack has a very long reach but the area in front of his legs is safe.
Staff Slam - The Exalted slams the butt of his staff on the ground in front of him, sending a dust shooting outward a short distance from the impact point. The area between the staff's impact point and his legs is safe. Below 50% HP, the staff releases several small projectiles that home in on the player.
Strategy:
The Tireless Exalted will primarily attack with melee strikes which are easily avoided by hugging his legs or rolling behind him. His attacks are not particularly fast but they have little recovery time. Use single hits between his attacks to consistently deal damage. Periodically, he will summon his wraiths which don't do much damage on their own, but they can stagger you and set you up for one of his hard-hitting melee moves. When he is summoning the wraiths, take the opportunity to attack him a few times but get ready to dodge as they spawn in.
Once his HP reaches 50%, his Staff Slam move becomes much more dangerous, summoning a number of small homing projectiles that move really fast and have excellent tracking. You may need to use a combination of rolls and jumps to avoid them. Aside from that, this isn't a terribly complicated fight.
Collect your loot and continue on west. Take note of the sealed door here, you will need more Mage Hearts to unseal it. Climb up the ladder and defeat the Undead Cleric laying there. Climb up the second ladder and then jump up to the platform above. Beware of the blade trap. Head east to fight another Undead Cleric and a Tomb Servant. Climb up the ladder behind them and take out the Surface Ranger to the left. Defeat another Tomb Servant to the east and climb up the platforms on the pillars, the second of which has a Treasure Pouch containing an Exotic Strand and a Salt Shard. Drop back down and continue eastward and climb up the ladder at the end of the path. Jump up the platforms and pull the lever on the right to unlock the gate which leads to a new area called the Unclean Oasis. Interact with the Obelisk here but ignore the area and head back into the temple for now.
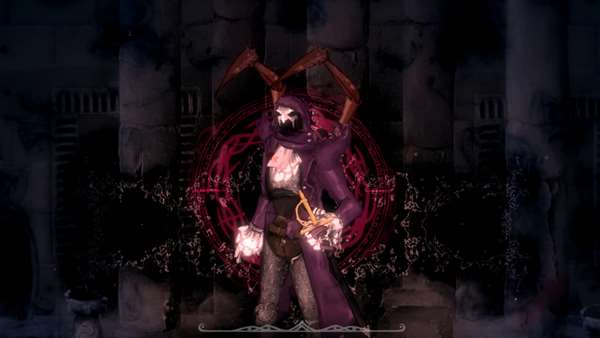
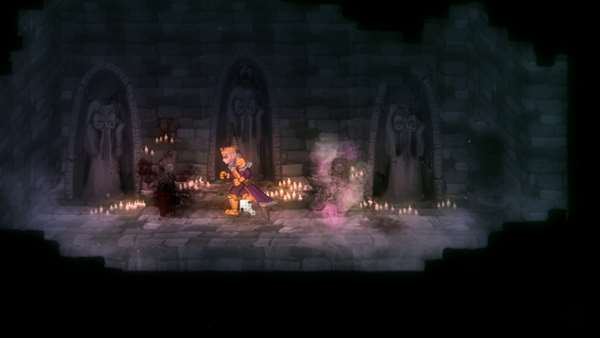
Head west and mind the blade trap. Climb up the stairs past the Tomb Servant and Surface Ranger and jump onto the platform to the right. There is a Mage corpse here that will initiate the hunt for Nix Ocifiris, a Necromancer. While defeating him is not necessary to progress the campaign, devouring his heart will allow you to unlock more areas later on. His Chase sequence is also along the path towards your goal: getting the key to the sewers at the throne of the temple further up so you may as well initiate the hunt. Wall jump up to the wooden platforms above and then make your way across the crumbling platforms towards the left to pick up a Treasure Pouch which contains a Steel Key. Drop down below and climb the ladder on the left and one more ladder to get up to the next floor. Mind the blade trap and head east and up to find the Temple's Obelisk. Activate it and then head west past another blade trap. Climb up the ladder at the end of the path but mind the pressure plate nearby which will trigger a barrage of arrows from a trap on the left. Climb up another ladder and make your way across the platforms heading east while defeating the enemies. There is another lever you can pull at the very end in the east to unlock the gate to the main section of the Desolate Plain, where you first entered Bol Gerahn from. Climb the platforms above the lever to unlock another door at the top which also leads outside. Climb back down and follow the steps west towards the Throne, in front of which you can loot a Treasure Pouch containing the Filthy Key.
The Filthy Key found in front of the Temple Throne
This key will allow access to the sewers below the temple which is your next destination. However, if you've activated the hunt for Nix Ocifiris, he will initially be found here at the throne.
Mage Hunt (Optional): Nix Ocifiris, Caretaker of Dry Bones
Loot:
- Rotted Heart (50%)
- Fetid Liver x 1-2 (50%)
- Decayed Gut x 1-3 (50%)
- Grave Pebble x 1-5 (50%)
- Voidepyr x 1-5 (5%)
- Ashpyr x 1-5 (5%)
- Salt x
- Silver x
Summoned Mobs:
Chase Sequence
The chase sequence for Nix Ocifiris is fairly straightforward as it takes place entirely within the Temple of Bol Gerahn. Starting from the throne at the very top, simply follow him as he descends each floor of the Temple. His final teleport location will be the same spot you fought The Tireless Exalted.
Boss Fight
Moveset:
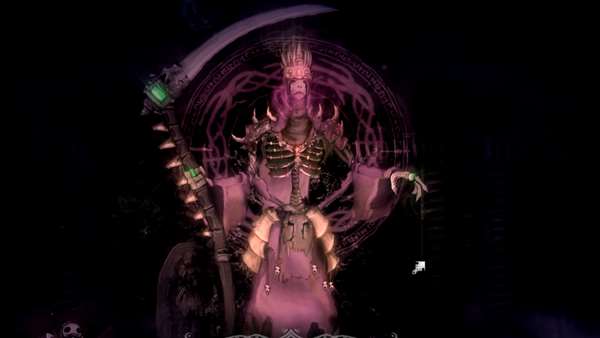
Crescent Slash - Nix Ocifiris lifts his scythe up high and performs a very wide downward swing that covers his entire front, ending slightly behind his legs. He then follows up by smashing the scythe blade on the ground in front of him. Beware of rolling behind him for the first attack as the blade extends past his legs and can still hit you. Try to jump over the blade as it comes down instead. The second attack has very good tracking and he can change directions as he performs it. This second attack should be dodged through.
Death Spray - Nix Ocifiris summons a skull in the air which sprays a steady stream of death magic diagonally towards the ground in front of it, slowly arcing downwards before disappearing. Get behind the skull or far away from it to avoid the spray. Getting caught in the spray and staying in its path will very quickly deplete your health.
Death Bolts - Nix Ocifiris raises one hand to shoulder height and releases several bolts of death magic which travel in varying patterns, but typically towards the player. The bolts can be dodged through and don't deal much damage individually.
Ground Scythes - Nix Ocifiris holds his scythe horizontally with the blade facing upwards. Shortly after, two scythe blades rise from the ground on either side of the player which proceed to dash along the ground, meeting in the middle and continuing through the entire length of the arena. This attack can be very difficult to avoid due to the speed of the scythes. Try to position yourself where the two blades meet and i-frame through both of them with a well-timed roll.
Strategy:
Nix Ocifiris is a scythe-wielding Necromancer with few attacks, but nearly all of them are very powerful. Unlike most other bosses' melee attacks, his Crescent Slash's first hit covers a very wide arc and continues past his legs behind him. To avoid this, stick close to his legs and jump over the blade as it swings down. Beware of the follow-up strike which hits slightly ahead of him but has very good tracking and can catch you even if you move behind him. This second strike has a bit of a recovery, allowing you to retaliate with at least 2 hits for most weapons.
The Death Bolts he summons aren't anything special and can be dodged through or baited across the arena. The Death Spray skulls are easy enough to avoid as their death streams have a narrow hitbox that follows a slow downward arc. However, do not underestimate their power as getting caught in the path will destroy you in a matter of seconds. Your biggest opportunity to deal damage is as he is summoning these skulls as he is locked in the animation for a while. His most difficult move to avoid is the Ground Scythes. Watch for the telegraph noted above and quickly position yourself to where the scythes would meet so you can roll through both of them. You can also attempt to do a double dodge but this is generally difficult to pull off given the speed of the attack.
Like all mages, depleting his health will cause him to collapse, allowing you to deal the final blow and end the encounter.
Speak to the dying Mage's human form and collect your extra loot.
Temple Sewers
Now that you have the Filthy Key, you can unlock the door to the Temple's sewers. You can find the door by climbing up from the bottom of the temple until you reach the three pillars where you collected the Exotic Strand and Salt Shard earlier. The door is above the wall on left-most pillar's platform.
Ascend these pillars to find the door to the sewers
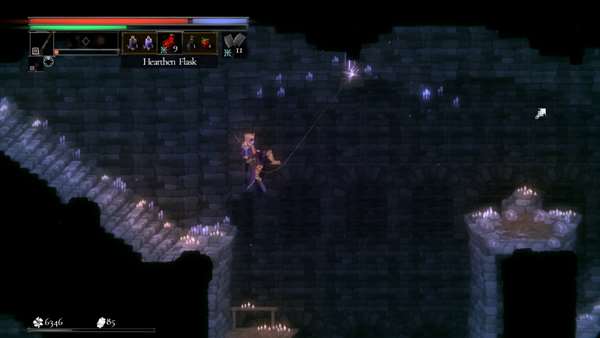
Inside the sewers, drop down to the first wooden platform you see to loot the Treasure Pouch which contains a Chain Whip and a Small Bag of Silver. Make your way to the bottom pit and defeat the Verdant Guard in the bottom left corner. Perform alternating wall-jumps in the narrow space above where the guard was to make your way up. Continue ascending the sewers and after the second alternating wall-jump section, look to the right corner to find the Corvius' Mire Guard NPC. Speak to him to acquire the Runestones that will allow you to teleport to Corvius' Mire from the Mirrorgate in Pardoner's Vale.
The Corvius' Mire Guard found in the upper sections of the sewers
Jump over the gap to the west and follow the path upwards to unlock a door that leads back into the Temple. From this point, you can move on to the next major area. However, there are still a lot of optional things to do and discover in Bol Gerahn, which we will cover below.
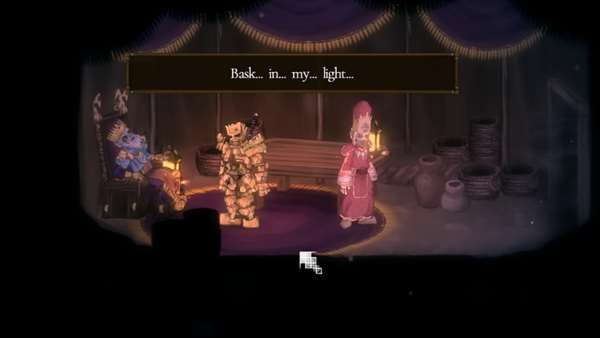
Note: On your next visit to the Pardoner's Vale after acquiring the Corvius' Mire Runestones, you will receive a summons. Speak to Champion Hera and then travel far west, past the cat on a barrel to the guarded tent. You can now enter the tent here and speak with the NPC inside for some backstory regarding the King. This NPC is part of the Royal Retinue.
The ailing King and his aide
Bol Gerahn First Visit Additional Content
The following sections pertain to optional content in Bol Gerahn that you can complete during your first visit. These are not required to complete the game. However, there are plenty of Boss encounters and Equipment to find that can greatly help you on your adventure.
The Unclean Oasis - Sheriff Inquisitor NPC and Inquisitor Selet
Head back into the Temple of Bol Gerahn and navigate your way to the Unclean Oasis entrance on the east side of the temple's middle levels. Make your way east from the Obelisk to a bridge made up of crumbling platforms. There is an NPC standing atop some ruins below the bridge. Drop down from the middle of the bridge and speak to him.
This NPC is the Sheriff Inquisitor Kier who will move to Pardoner's Vale and sell you various gear after exhausting his dialogue here. He will also give you the Tealfeather Amulet, an item used to engage in a type of PVP activity. You can find him in the caves below the Pardoner's Vale. The entrance to the caves is to the left of Herbalist Shanna, under the stairs.
After speaking to the Sheriff, you can drop down to the waterlogged area below to pick up a Dragon's Tongue and then make your way back to the top by wall-jumping through the narrow passages to the left. Make your way across the bridge and into the tunnel entrance to reach a section of the Creeping Caves. Take the path going up and watch out for the Baroness ambush. At the top, there is a Pulley you can activate. Ride it up and unlock a door at the top which leads back into the Desolate Plain, near the main Obelisk. Continue west from the Pulley's activation point to acquire a Blueblossom. If you've spoken to Inquisitor Selet in the basement of Ashpeak Castle in Ashbourne Village and have given him a Guiltless Shard there, he can be found further west of this area, crouched at the end of the path and Spellmarked once more. He will once again ask you for a Guiltless Shard before moving to his next location in Corvius' Mire.
Inquisitor Selet's second location
Temple of Bol Gerahn - Upper Sections, Tome of Fate, Inquisitor Amben and the Shroud Alliance NPC
From the Temple's throne, head east and climb the tall wooden structure by the gate and exit through the door at the top to a balcony outside, in the Desolate Plain. You can activate a Pulley here for a shortcut to the bottom level. Grapple up to the ledge above where there is a mage-sealed door. This requires 3 hearts to unlock. Inside, ignore the western section and climb up the platforms above the entrance. Head out of the opening on the left halfway up and climb the ladder. Make your way across the rickety wooden platforms to the left but watch out for the blade trap.
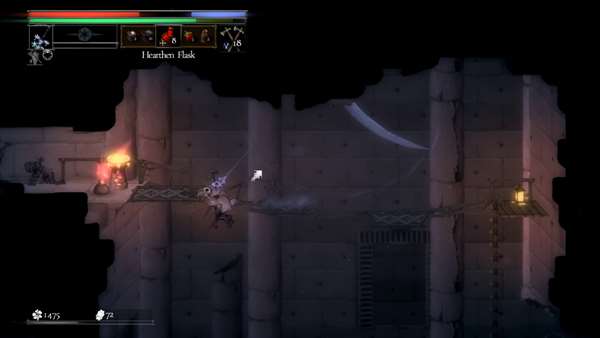
Spinning blade trap above rickety platforms in the upper section of the temple
Past the platforms is a Treasure Pouch containing a Sunfire Toadstool and past that is a door that leads to a small room. The door requires the Steel Key to unlock, which you should already have. Otherwise, check the temple section in the main walkthrough above. Inside the room are three pillars. Check the left wall for another Treasure Pouch with 3x Voidepyr and 3x Shroud Token. Make your way up the pillars to find the Blighttaker Zix, the Shroud Alliance NPC. Speak to him and answer "Yes" to his questions. He will award you the Threat gesture and move to Pardoner's Vale, in the caves (Treacher's Grotto) under the village. He will sell you various equipment as well as the Page of Curses, an item used to engage in certain PVP activities.
Blighttaker Zix, the Shroud Alliance NPC found in upper-west Temple of Bol Gerahn
Head back outside and retrace your steps to the platforms above the entrance, going all the way up and exiting through the door in the east. This leads to another upper section in the Desolate Plain. Activate the Pulley here for a shortcut to the Praying Giants/Creeping Caves and then climb up the balcony using the two ladders and head back inside the temple through the opening at the top.
Inside, make your way up the main hall, up a ladder and a set of stairs. Defeat the Undead Cleric in the corner and a second cleric and Tomb Servant on the second set of stairs. Head through an opening on the left behind the second cleric to a narrow, vertical hall. Navigate your way to the top using wall-jumps, the crumbling platforms and your grappling hook. There is a ledge near the top on the right with a Treasure Pouch containing the Altarstone Glaive weapon. On the left is the entrance to a small room with several scrolls. Loot the Treasure Pouch inside to acquire the Ochre Tome of Fates. Bring this back to Runereader Diedela in Pardoner's Vale to unlock another set of Fated Hunts. If you have found and spoken to Inquisitor Amben in Ashbourne Village, he will also be found in this room. Exhaust his dialogue here to continue his questline. He will move to Corvius' Mire next.
The Scroll Room in the upper Temple of Bol Gerahn where the Tome of Fates and Inquisitor Amben can be found
Go back to where you fought the Undead Clerics and Tomb Servant and climb up the ledge past the stairs. There is an opening up on a ledge to the left which you can go through to reach a small room.
Climb up this ledge to find an opening to a small room
Inside the room is a Treasure Chest containing the Healer's Hat, Healer's Mantle, Healer's Gloves and Healer's Skirt. Make your way up to the ledge above by wall-jumping and follow the path east. Back outside, you will find a platform below with a Pulley start point you can activate for a shortcut from the Praying Giants, west of where you fought the Matriarch. You can also unlock the gate below which leads to the same area in Praying Giants. In the ledge to the upper right is a kiosk with a head which initiates the hunt for Padra Sakrev, a Thaumamancer. There is also a sealed door behind the kiosk but you will need to defeat the mage first to unlock it (assuming you have 3 total hearts at the moment).
Mage Hunt: Padra Sakrev, Bearer of Guilt
Loot:
- Golden Heart (50%)
- Martyr's Bone x 1-2 (50%)
- Ashen Relic x 1-3 (50%)
- Silver Note x 1-5 (50%)
- Goldenpyr x 1-5 (10%)
- Salt x 5,395
- Silver x 875
- Guiltless Shard
Summoned Mobs:
Chase Sequence
To find Padra Sakrev, retrace your steps back to the Temple's throne. Fight him and his mobs here for a while and he will teleport east at the bottom of the stairs from the throne. He will then teleport just outside the temple in the Desolate Plain. Follow him by heading out the gate further east from the throne. He will then teleport into the upper sections of the temple. Take the pulley closest to you and it should bring you up to the first balcony. Enter the temple from the top ledge here to find the mage again. After fighting him for a while, his Boss Fight will begin.
Boss Fight
Moveset:
Mace Strike - Padra Sakrev conjures a mace of light and strikes in a downward arc in front of him. Standard melee move, easily rolled through.
Spinning Mace - Padra Sakrev raises his one head to his side, conjuring instances of his mace in different locations along the ground. The maces spin in place briefly before disappearing.
Pillar of Light - Padra Sakrev raises one hand up high and conjures an orb in the air that emits a very thin pillar of light, moving very slowly along the arena. The attack can easily be avoided and dodged through but deals high damage on contact.
Blades of Light - Padra Sakrev lifts both hands by his waist as they glow with a bright light. Shortly after, several blades of light swirl in an area near the mage, shredding anything they come in contact with. Get behind the mage before the blades manifest.
Strategy:
Padra Sakrev's most dangerous move is the Blades of Light which he channels for several seconds. Dodging through this attack seems to still deal damage but does not stagger the player, making it a very dangerous move to roll through. The move has a very good telegraph however and you should attempt to position yourself close to the mage while still avoiding the blades as the channeling leaves him completely vulnerable. The rest of his moveset are unremarkable and can easily be avoided.
Speak to the dying mage's human form for some backstory and collect your extra loot. You can now unlock the door to the west of where you fight him. Inside, you will find a distortion to initiate the hunt for a Nameless Thaumamancer. This nameless variant will drop all the same loot as Padra Sakev as well as a unique helm, the Flagellant's Mask, should you choose to engage him.
Head back to where you initiated the hunt for Padra Sakrev and unlock the door behind the kiosk. This leads to a balcony outside where you can jump onto a pillar platform containing two Treasure Chests you may have seen earlier and can finally open. The left one contains 3x Twin Goldenpyr and the Palatine Vanguard weapon while the right one contains the Palatine Hood, Palatine Cuirass, Palatine Gauntlets and Palatine Greaves.
Double treasure chests high above lower western Praying Giants
Bol Gerahn Revisited
The following sections pertain to revisits of areas after acquiring more Inquisitor Tools aside from the Grappling Hook and Magnesin Supply.
Desolate Plain - The Nameless Aeromancer
After obtaining the Luminstone Inquisitor Tool in Corvius' Mire, you can gain access to the Nameless Aeromancer hunt, the initiation point of which can be found in the Desolate Plain. From the starting Obelisk, head east past the Talking Head's kiosk and grapple up to the path leading to the Praying Giants. Along the way, look for the following a pillar with a Stone Circle just before the next two grappling points. Grapple up to the pillar and activate the Stone Circle to reveal several luminous platforms heading west.
A pillar with a Stone Circle just before the Praying Giants. Activate it to reveal luminous platforms leading to the Nameless Aeromancer's initiation point.
Follow the luminous platforms to a concrete platform with a Treasure Pouch containing 3x Blazepyr Trio and 3x Oathbound Token. The Mage's distortion can also be found here. This fight is essentially the same as Aur Cyrus. The Mage will drop the same loot from Aur Cyrus' loot table as well as a unique helm, the Evangelus Mask once he is defeated. Lastly, activate the Pulley up here for a quick shortcut to the bottom area.
Praying Giants - Ether Vent
At the Praying Giants, climb up the second large tree up to where you saw the nameless Nomad NPC on your first visit and jump into the Ether Vent to the right of that platform. Ride the vent up to a grappling point above and grapple to an opening to a tunnel on the left of it. Follow the tunnel west and loot the Treasure Pouch near the end for a Bluestone Mushroom. The end of the tunnel just leads back outside, right above the left side of the tree.
Temple of Bol Gerahn - The Named Sanguimancer
Ture Vasari, the Sanguimancer, is a Named Mage that can be found and hunted after obtaining the Luminstone Inquisitor Tool in Corvius' Mire and devouring the hearts of 3 Named Mages within Bol Gerahn. To find him, head back to the Temple of Bol Gerahn's bottom floor using the entrance from the Forsaken Gulch and head all the way to the west to a mage-sealed door behind a ladder. This leads to an underground area that requires the Luminstone in order to traverse.
Inside, drop down from the stairs to a Stone Circle by the left wall. Activate it to create a luminous grappling point above the pit to the right which you should quickly use to get across. Note the second Stone Circle above the ledge on the opposite side of the pit which you can use to get back.
A luminous grappling point created above an otherwise impassable pit
Follow the linear path leading further down and loot the Treasure Pouch along the way for 3x Twin Voidepyr and 3x Chaos Token. At the end of the path, you will find a blood fountain Mage distortion from which you can initiate the hunt for Ture Vasari.
Mage Hunt: Ture Vasari, The Blood-Drunk Blade
Loot:
- Glistening Heart (50%)
- Sanguinary Cluster x 1-2 (50%)
- Hungry Vein x 1-3 (50%)
- Sanguine Drop x 1-5 (50%)
- Twin Mosspyr x 1-3 (5%)
- Twin Voidepyr x 1-3 (5%)
- Salt x 11,040
- Silver x 875
- Guiltless Shard
Summoned Mobs:
Chase Sequence
After commencing his hunt, Ture Vasari can be found right outside the dungeon, on the bottom level of the Temple. After this, it's a straightforward chase as he ascends the Temple. He will teleport a few floors above just outside the entrance to the sewers where the Corvius' Mire guard was found. After fighting him there, go through the sewers and exit through the path at the top past the Corvius' Mire guard as the Mage will be found just outside and to the right. Fight him there and his next teleport spot will be at the Temple's throne, just a couple floors above. Finally, exit out to the east of the throne room and climb up the balconies to reach the Temple's upper section where the Boss Fight will commence.
Boss Fight
Moveset:
Flèche Combo - Ture Vasari leaps backwards as he unsheathes his rapier. He then proceeds to perform a violent combo with repeated rapier strikes while advancing. This combo ends in an upwards sweep. This move will hit several times and can quickly shred your health if the full combo connects. To avoid this attack, you need to either roll behind him just as the attack begins or run away as he advances and wait for the short break before he performs the upwards sweep which can easily be rolled through.
Sanguine Flèche Combo - Ture Vasari grasps the handle of his rapier as it glows a bright red. After a brief delay, he unsheathes the rapier, releasing a long, horizontal stream of blood in front of him which deals a small amount of damage and has a very strong knockback. He then quickly follows up with the Flèche Combo. You can avoid this move the same way you would avoid the regular Flèche Combo except you also need to dodge the blood stream. Note that the blood stream will not hit you if you hug his legs.
Leaping Thrust - Ture Vasari graps the handle of his rapier while bending his knees slightly. He then leaps forward a good distance and performs a diagonal stab as he lands. Note that the leaping motion will also deal damage as the Mage leads with his knee. Roll through the leap to avoid the attack completely.
Tendril Stab - Ture Vasari leans forward and stabs at the ground in front of him using the two tendrils on his shoulders, quickly repeating the move a second time. This move does not have much forward movement but the Mage can change directions during the second hit so be wary of rolling through.
Electrified Blood - Ture Vasari holds his hands to the sides of his waist as they glow a bright red. He slowly raises them as three sets of two blood globules, each connected by red electricity appear in the air. These appear and move in the air in varying patterns, dealing damage on contact. The blood globules and electric link can be dodged through but keep careful watch of their patterns as well as any other attacks the Mage might be doing.
Strategy:
The main difficulty of fighting Ture Vasari is dealing with both variants of his Flèche Combo, which is extremely aggressive, quick and has a very long travel distance. The safest way to avoid these attacks is to run away and stay ahead of his rapier strikes, and then roll through the upward sweep ending move as there is a brief break before he performs it. Depending on the move he uses next, you may have time for a single hit after rolling through. When dealing with the Sanguine variant of the move, you can dash ahead as he charges up, hugging his knees while attacking. The blood stream will not hit you from this range but watch out for the incoming Flèche Combo. Disengage as soon as he leaps backwards and run in the opposite direction, waiting to roll through the upward sweep.
He will rarely use his Tendril Stab move but when he does, beware of rolling through the first hit as he will quickly turn around to perform the second hit which comes out very quickly. Keep moving away from him as you roll through. His Leaping Thrust attack also hits twice, once during the leap and then again as he lands. This move has a very long recovery time as he resheathes is rapier after landing so ensure you are rolling through the leaping motion and running back towards him to retaliate. You can easily get 3 or more hits with most weapons this way if you are quick.
His Electrified Blood move, while not dealing much damage, can stagger you and leave you open to his rapier combos and other attacks. The casting animation is quite long and you can make use of this time to attack him once or twice before rolling through. The blood globules and their electric link have varying patterns and you should keep a careful lookout for them and dodge accordingly.
Finally, try to play aggressively when you get his patterns down. Ture Vasari is relatively easy to stagger with consistent hits and you may get him in a special stagger animation where his eye glistens similar to a grappling point, allowing you to grapple to his head and perform a powerful knife attack. You can follow this up with a falling attack for even more damage.
Once you deplete his health, the Mage will collapse to the ground, allowing you to devour his heart and end the encounter.
Upon defeating the mage, speak to his dying human form for some backstory and collect your extra loot, including an Emerald Feather.
Forsaken Gulch - Nameless Mages
After defeating all 4 Named Mages of Bol Gerahn, you can unlock the mage-sealed door in the very west of the Forsaken Gulch, below the entrance to the Temple of Bol Gerahn. This door leads to a small room where you can find two Mage distortions where you can initiate the hunt for a Nameless Sanguimancer and a Nameless Necromancer. These are essentially the same fights as those against Ture Vasari and Nix Ocifiris, respectively. Each will drop the same loot from their Named counterparts but they will each also drop their unique helms, the Bloodstone Head and the Jeweled Crown.
The small room in the west of the Forsaken Gulch where two Nameless Mage hunts can be initiated
Trivia & Notes
- By learning the runes to reach Bol Gerahn, players earn The Wastes
 trophy.
 - Trivia and notes go here
 Anonymous
 Anonymous
I keep overlooking sewer area.. I have filthy key but have not talked to guard npc for runes to new location b cause I’m suffering difficulties due to being able to find the location.. damn place is a maze and there’s no map.. only way to keep track of where you are is keeping track of those resupply return to town crystals..


yow wheres the rootspoken armor set
0
+10
-1