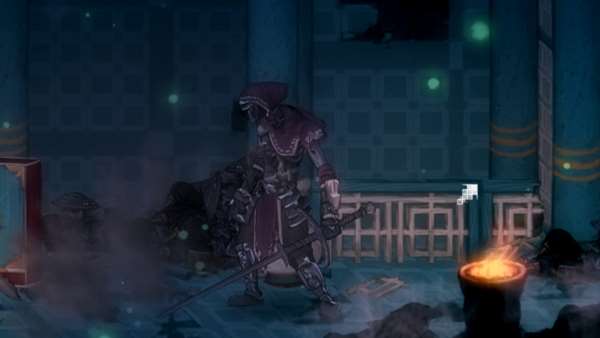
Inquisitor Selet's Questline |
|
|---|---|
|
|
|
| Rewards | Mangian Helm Manganian Cuirass Manganian Bracers Manganian Greaves |
| Starting Location | Ashpeak Castle, Ashbourne Village |
| Prerequisites | Acquire the Magnesin Supply and defeat 3 Named Mages in Ashbourne Village |
Inquisitor Selet's Questline is an NPC Mission and one of the Quests in Salt and Sacrifice (SnS). Quests are various tasks or missions that a player can acquire and complete throughout the game, typically giving a reward such as Weapons, Armor or other equipment and items. This page features guided information on Inquisitor Selet's Questline including how to start it, where to find relative NPCs, Boss fight strategies, rewards and more.
Inquisitor Selet's Questline Information
Inquisitor Selet's Questline is a long chain spanning nearly the entire game and involving Inquisitor Selet's constant pursuit of the Mages and subjecting himself to their torment, culminating in his eventual corruption thanks to the powers of the mystic warp. To begin this quest, you must first find Inquisitor Selet in Ashbourne Village and cure him of the Spellmark affliction by giving him a Guiltless Shard. He will then move to his next location. You will need to find him at every location, giving him a Guiltless Shard each time except for the last encounter. His questline will eventually come to an end after a Boss encounter and you will be rewarded his entire Armor set for freeing him from his torment.
Inquisitor Selet's Questline Objectives
The persistent objective of this questline involves finding Inquisitor Selet in various locations and giving him a Guiltless Shard. This item can consistently be acquired by defeating Mages, named or unnamed. You will need a total of 3 to complete the Inquisitor's questline.
- Find and speak to Inquisitor Selet at Ashpeak Castle in Ashbourne Village and give him a Guiltless Shard.
- Find and speak to Inquisitor Selet at the bottom of Desolate Plain in a section of the Creeping Caves in Bol Gerahn. Give him a Guiltless Shard.
- Find and speak to Inquisitor Selet at the very top of Betrayal Crag in Corvius' Mire and give him a Guiltless Shard.
- Find and defeat Inquisitor Selet in a section of the Blasphemer's Vault in Dreadstone Peak.
Inquisitor Selet's Questline Walkthrough
Inquisitor Selet's location in Ashbourne Village
Before you can find Inquisitor Selet in Ashbourne Village, you must first acquire the Magnesin Supply Inquisitor Tool in Bol Gerahn. You will also need to hunt down and devour the hearts of 3 Named Mages in Ashbourne Village. Refer to each location's walkthrough pages for details on how to accomplish these tasks.
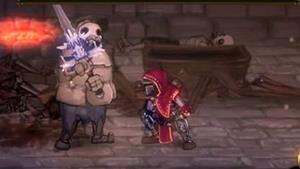
After the prerequisites are met, head to the upper-west from the starting Obelisk in Ashbourne Village. Continue heading to the upper-west until you reach the bottom rear gate of Ashpeak Castle. This gate may or may not be unlocked, depending on your progress through the castle. From here, activate the Pulley system and ride it up to a platform in the upper-east where you can unlock a mage-sealed door with the three hearts you've devoured. This leads to the basement forge of Ashpeak Castle. Inside, you will be able to find Inquisitor Selet, crouched by the forge and Spellmarked.
The Spellmarked Inquisitor found near the bottom of Ashpeak Castle
Speak to him and give him a Guiltless Shard to provide him temporarily relief from his affliction. You will receive the Squat Gesture. He will move on to Bol Gerahn after this.
Inquisitor Selet's location in Bol Gerahn
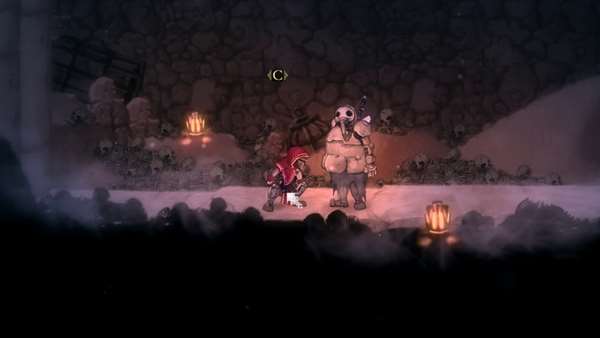
Inquisitor Selet can be found in the upper-west section of the Creeping Caves, right below Desolate Plain. The easiest way to reach this area is from the Unclean Oasis sub-area, east of the Temple of Bol Gerahn's middle section. From the Unclean Oasis Obelisk, make your way east and across the bridge made of rickety platforms to a tunnel entrance in the Creeping Caves. From here, follow the path leading upwards and beware the Baroness ambush along the stairs. At the top, you will find a Pulley start point that will unlock a shortcut back to the Desolate Plain, near the starting Obelisk. Continue west without riding the Pulley and you will eventually found Inquisitor Selet crouched at the end of the path, Spellmarked once again.
Inquisitor Selet's second location in upper-western Creeping Caves
Speak to him here and give him another Guiltless Shard so he can move on to his next location in Corvius' Mire.
Inquisitor Selet's location in Corvius' Mire
To find Inquisitor Selet's location in Corvius' Mire, you will need to have acquired the Luminstone Inquisitor Tool after defeating Marega Gredanya in the Foulmurk Marsh sub-area. You also need to defeat 2 Named Mages in Corvius' Mire and devour their hearts. Check the Corvius' Mire walkthrough page for details on how to complete these tasks.
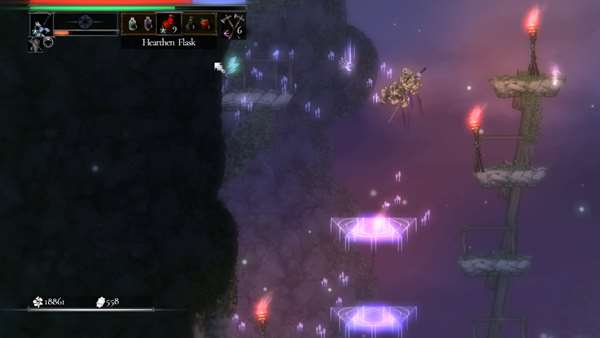
Once the prerequisites are met, make your way to the Betrayal Crag sub-area which can be found by going through a door in the upper-east section of The Great Tree, past the tree tops and through a mage-sealed door. Through the door is a small connecting room to the main Betrayal Crag area further east. Activate the Stone Circle underneath the wooden stairs to create two luminous platforms and a grappling point outside in the main area, allowing you to scale the western wall which leads to this region's Fated Tome and Inquisitor Selet's location. After activating the circle, quickly head outside and climb up the two luminous platforms and then grapple to the wooden platform on the western wall.
Luminous platforms leading up to upper-west Betrayal Crag
Climb up two more platforms above to find a Treasure Pouch containing the Emerald Tome of Fates. Continue past that to an archway leading to a small room where you will find Inquisitor Selet crouched in the corner. Spellmarked yet again, he will ask for another Guiltless Shard to ease his condition. Oblige him and he will move to his final location in Dreadstone Peak.
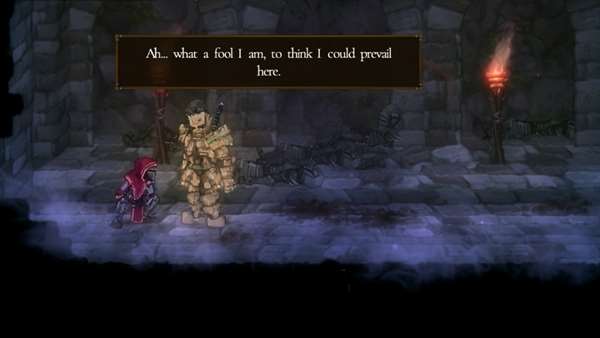
Inquisitor Selet found in a hidden room in upper-west Betrayal Crag
Inquisitor Selet's location and Boss Fight in Dreadstone Peak
The final step in Inquisitor Selet's questline involves finding him in the Blasphemer's Vault sub-area of Dreadstone Peak. This area can only be reached after defeating The Two That Remain, obtaining the Ethercloth Bolt and defeating 2 Named Mages, devouring their hearts so you can unlock the mage-sealed door to the lower-east of the Temple of Eleven. This door leads to the Old Annex and subsequently the Pilgrim's Respite and Blasphemer's Vault sub-areas. See the Dreadstone Peak walkthrough page for a detailed guide to reaching the vault.
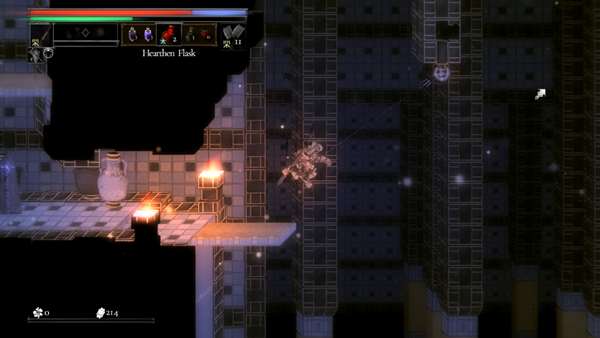
Once all prerequisites are met and you have made your way through the Blasphemer's Vault, you can find the Inquisitor by making your way to the Obelisk just above and to the left of the very large hall where Draeaxenerion is fought. From this Obelisk, navigate your way to a ledge far to the upper-east by using the grappling points in the ceiling above the hall.
The path to Inquisitor Selet through the grappling points above the large hall in Blasphemer's Vault
Once on this ledge, head through the archway to a narrow corridor with an Ether Vent at the end. Loot the Treasure Pouch for a Bluestone Mushroom and then ride the Ether Vent up to a large area above. At the eastern end of this area, you will find Inquisitor Selet crouched down. Interact with him and he will transform into his corrupted Boss form, beginning the encounter.
Boss Fight: Inquisitor Selet
Loot:
- Mangian Helm
- Manganian Cuirass
- Manganian Bracers
- Manganian Greaves
- Salt x 20,080
- Silver x 850
Moveset:
Advancing Smash - Inquisitor Selet closes the distance by leaping forward from medium range and smashing his greatsword on the ground as he lands. This move comes out very quickly and has no obvious telegraphs but he will typically only use this from short-medium range, not from melee. Note that the leap portion of this attack will also deal damage as the Inquisitor leads with his knee. Dodge through the leap to avoid damage.
Overhead Combo - Inquisitor Selet raises his greatsword to his shoulder before delivering a powerful overhead strike. He will then perform the same attack again as a quick follow-up. Watch out when rolling through this attack as the Inquisitor can quickly change directions for the second strike.
Greatsword Flurry - Inquisitor Selet quickly spins 360 degrees while advancing forward, following-up the movement with an upward slash with his greatsword. He then performs a quick stab and then grasps his sword by the blade, performing an overhead strike with the pommel. Unlike the Overhead Combo, the Inquisitor will not change directions between each part of the combo so you can safely roll through the upward slash and punish as he continues his combo still facing the other direction. Note that if you stagger him at any point during this combo, he will continue the combo where he left off after regaining his composure.
Strategy:
The fight with Inquisitor Selet is a straightforward melee-centric battle. He only has 3 attacks in his moveset and he has no fancy gimmicks. However, he is very fast and relentless in his pursuit. Success in this fight hinges on your ability to keep up with his speed while mastering reading his three moves. You should typically be rolling through all his attacks.
Your biggest opening is during his Greatsword Flurry. Rolling through the spinning upward slash that initiates this move will allow you to retaliate with at least 3 hits with most weapons as he continues to attack air on the other side. He is unable to change directions in the middle of this combo so make sure to use this to your advantage.
For his Overhead Combo, be careful when rolling through the first strike and make sure to follow-up with a second roll in the same direction as the Inquisitor will quickly follow up with a second smash with excellent tracking. If you are fast enough, you can quickly turn after the second roll and hit him with a ranged attack before he begins his next move.
Finally, his Advancing Smash travels a considerable distance during the leap portion so beware when rolling through and trying to retaliate as you may not be close enough to do so in time. Consider using the same strategy of turning around quickly after the roll and using a ranged attack or throwable to keep your damage up.
Upon depleting his HP, Inquisitor Selet will burst into an explosion of energy and get disintegrated, dropping his entire armor set and ending his questline.
Inquisitor Selet's Questline Notes & Tips
- Notes & Tips go here

