Corvius' Mire is a Location in Salt and Sacrifice (SnS) and the third main destination players will visit during their adventure. This Corvius' Mire Walkthrough helps you find and fight all Bosses and collect all items in the area. Corvius' Mire features a large swamp beset by the warp and invaded by creatures both violent and grotesque. At the center of the swamp stands The Great Tree, a sacred bastion of nature marred by the Mages' destructive powers.
The swampland of Corvius' Mire must be purged of the Mages.
This page is a segment of the Walkthrough, featuring a comprehensive guide that aims to help players complete the main campaign. The Walkthrough covers each location in detail, including all obtainable Items and Equipment, NPCs, Enemies and Bosses, and is organized by location based on our recommended progression path to completing the game.
- See the Game Progress Route page for a minimalist guide on where to go and what to do next
- See the Quests page for details on quest progression
- See the New Player Help and Game Mechanics pages for tips covering the game's various mechanics
Corvius' Mire Guard
Previous: Bol Gerahn
Next: Dreadstone Peak
Sub-Areas: Darkearth Lair, Foulmurk Marsh, The Great Tree, Verdant Ruins, Veruna's Shrine, The Fetid Grotto Betrayal Crag
Corvius' Mire Map
[map goes here]
NPCs in Corvius' Mire
Corvius' Mire Bosses
- Anamus Kane, The Infernal Machine
- Ghor Lorhotha, Wearer of Tortured Flesh
- Luxian Steel-Glass, The Blind and Blinding
- Marega Gredanya
- Por Myec, The Encroaching Rot
- Sapblood Heart
Corvius' Mire Enemies
- Abnormality
- Alchemist
- Bleeder
- Bogfly
- Bog Vicar
- Chikku
- Eigndalian
- Fenbug
- Fertile Priest
- Sacred Knight
- Valley Bat
- Verdant Guard
- Vitae Scholar
All Items in Corvius' Mire
Consumables
Materials
- Ashpyr Trio
- Blazepyr Trio
- Boug Ore
- Dismin Ore
- Fine Leather
- Goldenpyr Trio
- Haze Spiral
- Irona Ore
- Mosspyr Trio
- Shimmering Bud
- Sunfire Toadstool
- Twin Mosspyr
- Valley Herb
- Voidepyr
- Voidepyr Trio
- Wispleaf
Equipment & Upgrades
- Butcher's Mask
- Carved Feline
- Clockwork Helm
- Cone Cap
- Corvin Gloves
- Corvin Hood
- Corvin Mantle
- Corvin Skirt
- Elder's Gloves
- Elder's Skirt
- Elder's Tunic
- Engraved Box
- Golden Armlet
- Herbalist's Gloves
- Herbalist's Hood
- Herbalist's Sandals
- Herbalist's Tunic
- Jeweled Fibula
- Light Mask
- Oceye Bracers
- Oceye Cloak
- Oceye Cowl
- Oceye Sandals
- Pilgrim's Urn
- Sporesack Head
- Verdant Gauntlets
- Verdant Greaves
- Verdant Helm
- Verdant Plate
Key Items
Other Items
- Other items
Corvius' Mire Walkthrough for Salt and Sacrifice
Corvius' Mire Main Walkthrough
Darkearth Lair and the Fungalmancer
Activate the Obelisk when you first spawn in and ignore the eastern area for now. Head west as far as you can while fighting off the Fenbugs and climb up the ladder at the end to reach a cave opening. Head inside to reach the Darkearth Lair sub-area.
Inside, drop down one level to the west to find a Treasure Chest. Warning: This is a fake chest which is in fact a Chikku; a monster that hides in boxes and chests to ambush unsuspecting travelers. When you approach the fake chest, it will still have the prompt to open it, but doing so will cause the Chikku to swallow you up and chew you up for huge damage. However, you can also pre-emptively attack the chest to prevent it from using this ambush move.
Fake Chikku treasure chest ambushes the Inquisitor
From this point on, you should attack every chest you come across just to be safe but we will also point out any Chikku chests throughout the walkthrough. This Chikku will drop a Small Bag of Silver and refill your Hearthen Flask upon defeat. Drop down to the lower east where you can see a Treasure Pouch but roll through as you pass the torch as there is a spike trap just before the pouch. The pouch contains a Salt Sliver and a Black Starstone. Head down to the lower west path and note the poison fungus along the path. These grow in size as you approach and pop to spray a blighted mist in the area, building up blight on contact. Once the blight status takes effect, your health rapidly drains, faster than the poison effect. These fungi are prominent in this location so be careful when traversing the various areas.
Take a quick detour to the right under the stairs to activate the Darkearth Lair Obelisk and then head back up to the west. At the west-end of the path, you will find a distortion from which you can initiate the hunt for the first Mage of this location: Por Myec, a Fungalmancer. Before starting the hunt, you may want to head to the lower east to collect a Sunfire Toadstool up on a wooden platform where dripping water can be seen. Further to the east from here is a large space with a green mining node on the rock formation on the right. This node can yield Boug Ore and Dismin Ore as well as other common materials and they can be found all around Corvius' Mire. Jump over the rock formation and drop into the opening on the right to land on an otherwise unreachable ledge at the bottom where a Treasure Pouch containing 3x Twin Mosspyr can be found. When ready, make your way back to the Fungalmancer's initiation point.
Mage Hunt: Por Myec, The Encroaching Rot
Loot:
- Moldy Heart (50%)
- Morel Sac x 1-2 (50%)
- Spore Bag x 1-3 (50%)
- Puff Pod x 1-5 (50%)
- Frospyr x 1-5 (5%)
- Mosspyr x 1-5 (5%)
- Salt x 6,900
- Silver x 1,725
- Guiltless Shard
Summoned Mobs:
Chase Sequence
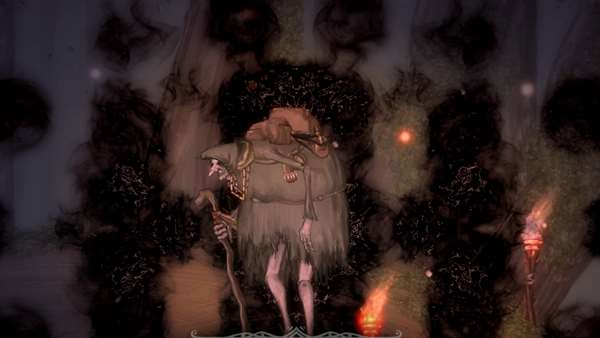
Por Myec can first be found back in the main Corvius' Mire section. Make your way back out of the Darkearth Lair to find the Mage and fight him and his mobs for a while until he teleports. Go back to where you where inside the cave and head to the lower east to find the Mage again. From here, it's a straightforward chase descending the cave each time he teleports until the Boss Fight ensues.
Boss Fight
Moveset:
Staff Smash - Por Myec performs a simple downward smash with his staff. Basic melee move, easily avoided by staying away or dodging through to the Mage's backside.
Fungal Spray - Por Myec raises his staff in front of him and sprays a fungal mist in an arc starting from his legs and moving outwards. Get behind him before the spray or dodge through the lower section of the arc.
Fungal Sprout - Por Myec holds his staff in front of him with his back hand, causing mushrooms to sprout all over the arena. These mushrooms explode in proximity, inflicting damage and building up blight. Stay away from the shrooms and jump over them if you need to pass.
Fungal Sporelings - Por Myec grasps his staff with both hands and channels in an animation akin to stirring a cauldron. Several flying mushroom cap-like creatures appear and move across the screen in an erratic pattern. These sporelings explode on contact, inflicting damage and building up blight.
Strategy:
Nearly all of Por Myec's attacks build up blight while also dealing a good amount of damage. His Fungal Sprout and Fungal Sporelings attacks are very easy to avoid and serve more as obstacles and distractions rather than actual attacks but do not underestimate them as the blight status they inflict can quickly turn the tide of battle against you.
Your largest opening for attacks is as he's channeling the Fungal Sporeling spell but right before the sporelings appear, as well as the Fungal Spray spell, but you will need to dodge through the initial portion of the arc or get behind the mage before the attack even begins. Both these moves allow for at least 3 hits for most weapons if the animations are managed correctly.
Speak to the Mage's dying human form for some backstory and then collect your extra loot. Now, head east and grapple up to the ledge and unseal the door. This leads to the next sub-area of Corvius' Mire.
Foulmurk Marsh
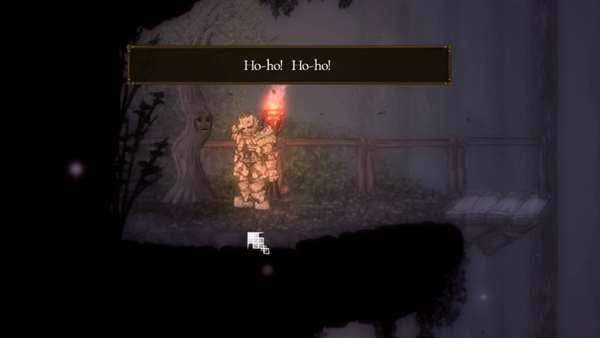
From the entrance, drop down to the lower levels and head east while fighting off the Fenbugs and Alchemists until you reach a platform with a Treasure Pouch. Loot it to collect a Salt Sliver and Guiltless Shard. Make your way back to the west near the entrance and across the wooden platforms above to reach one where the western Foulmurk Marsh Obelisk is located. From this Obelisk you can jump across the platforms to the left to find a Talking Tree NPC which introduces itself as The Voice of the Mire.
Speak to the tree for some backstory and then jump back onto the platform to the right of it. There is a Pulley you can activate here which leads high above the Marsh. At the top, cross the platforms to the left and activate another Pulley, unlocking a shortcut back to the Darkearth Lair Obelisk. Go back down to the western Foulmurk Marsh Obelisk and drop onto the platform to its right. From here, grapple up to the east onto a large cut-off tree trunk where a Boss Fight will ensue.
Boss Fight: Marega Gredanya
Loot:
- Twin Mosspyr
- Pilgrim's Urn
- Salt x 6,900
- Silver x 870
Moveset:
Staff Smash - Marega performs a slow downward smash with her staff. Basic melee attack that is easy to dodge through. Below 50% HP, she will follow up with an advancing kick.
Melee Smash - Marega strikes the player with her hand and then quickly follows up with a quick downward smash with her staff. The staff strike deals more damage and should be the attack you dodge if you can't dodge both.
Summon Poppet - Marega's hand glows a bright green as she slowly brings it forward. Afterwards, a Straw Poppet add will drop in on the player from above and will remain in the fight, constantly attacking the player until defeated. Below 50% HP, Marega summons two Poppets at once. Defeat these as soon as they spawn in to prevent getting overwhelmed and distracted. Additionally, quickly staggering Marega while she is in the summoning animation will cancel the summon altogether.
Green Bomb - Marega floats high above the arena as her hand glows a bright green. She then tosses a bomb down to the ground which explodes on impact, dealing damage in a medium radius. Quickly run under or behind her as she will only toss the bomb where she is facing.
Spinning Combo - Marega spins in place several times, striking with her staff. She ends the move with a Staff Smash and if under 50% HP, will follow up with an advancing kick. She will typically use this move as she lands from the Green Bomb attack. Keep on the move and get out from under her after the bomb impacts the ground.
Conceal - Marega's hand glows a bright green as she raises it above her. The move turns her invisible, shrouded in a dark mist. You can tell where she is but it may be difficult to gauge what attacks she is using, especially when using her melee moves. She will only use this move below 50% HP and she will reappear after a few seconds.
Strategy:
Marega Gredanya is quite easy to stagger, especially with heavy weapons. If you are sufficiently leveled with decent gear, trading blows with the hag is a viable strategy. Her melee strikes are a bit hard to read and they come out quite rapidly but all of them can be dodged through except for the Spinning Combo, which typically only happens after she tosses her Green Bomb.
Make sure you are clearing her Straw Poppets every time she summons them. You can also apply constant pressure with quick strikes to stagger her during the summon animation to cancel it completely. When she conceals herself, be careful of getting within melee range of her. It is recommended that you create distance and attack from range while she is in this state.
Grab your loot and then grapple east of her arena onto a platform with another Obelisk. To the right of it is a larger platform with a corpse leaning over a Stone Circle, holding a crystal. Inspect the corpse to obtain the Luminstone Inquisitor Tool. With this tool, you will be able to activate Stone Circles such as the one in front of you to reveal hidden platforms, grappling hooks and other traversal implements, allowing you to reach greater heights and explore new areas.
Revealing hidden pathways with the Luminstone
Now that you have the Luminstone, head back to very first Obelisk in the main Corvius' Mire area to progress the main campaign.
The Great Tree
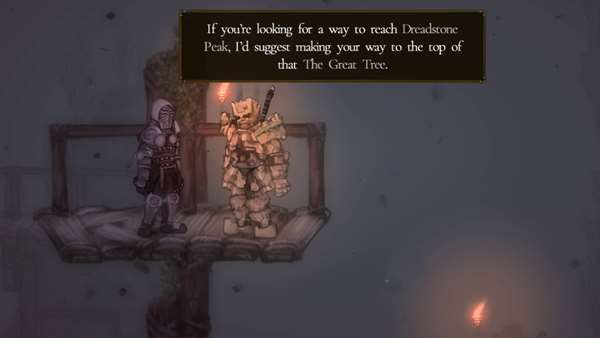
The Great Tree sub-area is directly above the Corvius' Mire Obelisk. To reach it, head east and climb up the wooden platforms where you can find a Stone Circle. Activate it to reveal a luminous platform that leads to the mage-sealed door to the left, which you can now open after having defeated one named mage in this area. Additionally, if you've spoken to the Kingdom Knight in Bol Gerahn, you can find him at the top of the platforms above the Stone Circle. Speak to him and he will tell you about climbing The Great Tree.
The Kingdom Knight atop the wooden platforms east of The Great Tree
Alternatively, you can also get to The Great Tree from the western side using similar wooden platforms and another Stone Circle. Both paths lead inside to the hollowed-out tree and both require having devoured one Named Mage's Heart.
Inside, you can unlock another mage-sealed door to the right which just gives another entrance from the east. Climb up the wooden platforms on the right side of the tree, wall-jumping where necessary. Watch out for the Bleeder enemies. Grapple up to the platform on the upper left and get ready to jump up on the rickety platforms above. Beware the two rotating traps above them. These rotate quickly 3 times before a short break, time your traversal during the break and make your way to the second rickety platform on the right. There is a small cavity on the right wall of the tree here where you can jump to collect a Treasure Pouch which contains a Salt Shard and 3x Goldenpyr Trio. You may need to wait for the right rickety platform to reappear. Once it does, time your jump with the rotating trap and then grapple up to the solid platform above and to the left.
Keep climbing up and defeat the Bleeders along the way. You will eventually find the Great Tree Obelisk on the right side which you can grapple to. Activate it and grapple back to the left to go further up. On the platform right above the Obelisk there is a Treasure Pouch containing a Grimgrip Cap. Above this platform is another platform with a wooden door on the right which leads to the upper east section of the main Corvius' Mire area. There is a similar door to the west up the stairs. Ignore these areas for now and continue upwards to find the Sapblood Heart Boss encounter.
Boss Fight: Sapblood Heart
Loot:
- Voidepyr
- Engraved Box
- Salt x 12,270
- Silver x 460
Boss Fight
Moveset:
Spectral Aberration - The Sapblood Heart's main form of attack is summoning spectral beings that float around and shoot a projectile at the player. These projectiles have slight homing and are easily avoided by rolling or jumping over them. The aberrations cannot be attacked and will sometimes disappear on their own but the longer the fight draws on, the Heart will summon more and more of these beings and managing their projectiles can get troublesome.
Spectral Blast - The Sapblood Heart will periodically get released from the arteries holding it up and it will perform a large shockwave attack emanating from its whole body. It can perform two versions of this attack. The first is a blast that travels almost the entire length of the arena but can be rolled through with good timing. Otherwise, get behind the opponent as it charges the attack. This is telegraphed by the charge up and the direction the heart is facing. The second variation is a radial blast that releases the shock wave in a large radius around the enemy and is telegraphed by it standing in a neutral orientation with the charge-up concentrating into the center of its body. This can again be dodged with good timing on your roll. Otherwise, run far away before the blast goes off. Note that the Heartblood Sap will often follow any of these attacks up with a quick smash with its armblade.
Unleash - Below 50% HP, the Sapblood Heart can release itself from the arteries for an extended period, allowing it to walk and dash around the arena, allowing it to use any of the above attacks as well as several melee-oriented moves:
Armblade Slash - Used while Unleashed. Teleraphed by the creature raising its armblade up high and then slashing downwards in a large arc after a short delay. This attack can be avoided by creating distance or rolling through but beware of a second follow-up slash.
Armblade Plunge - Used while Unleashed. The creature plunges its blade into the ground and then pulls it out violently, sending debris traveling along the ground in front of it. Both animations will can hit players and deal damage but can be avoided by creating distance or dodging through. The debris wave can be jumped over.
Wild Dash - Used while Unleashed. The creature dashes a good distance in front of it, trampling the player on contact. This attack can be rolled through as the monster approaches.
Strategy:
The Sapblood Heart will spend the majority of the fight chained to the center of the arena via the arteries on either side. It will periodically get unleashed for very short periods to perform its Spectral Blast attack. In this battle, time is of the essence as the Sapblood Heart will continually summon Spectral Aberrations to harass the player. These cannot be attacked and will float around the arena, shooting projectiles at the player. While one or two shouldn't pose too much of a problem, they seem to remain in the fight for a very long time, only disappearing on their own sometimes so you could be dealing with up to 5 at once if you take too long to defeat the boss. Ensure you are consistently dealing damage by throwing at least one attack as you dodge the Aberrations' projectiles.
Once the boss' HP dips below 50%, it can Unleash itself from the arteries for extended periods and begin using deadly melee attacks on top of the rest of its moveset. Your priority is to always try to get behind him and retaliate with single hits to quickly whittle his health down. Keep watch for its Spectral Blast telegraphs as these attacks can be devastating at this point of the encounter where you will likely be dealing with 3 or more Aberrations.
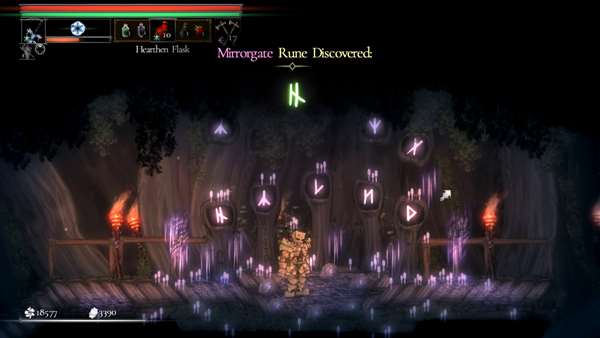
After defeating the Sapblood Heart, continue to the large walkway above by taking the ladders to the left of the arena. Here, you will find a Stone Circle in front of a peculiar device. Activate the Stone Circle with the Luminstone and you will receive the Runestones allowing you to travel to the next major location of Dreadstone Peak by using the Mirrorgate at Pardoner's Vale. It will also grant you the partial Runeword for an Unknown Location, the remaining parts of which will be acquired later on.
The device atop the Great Tree where the Dreadstone Peak Runestone is obtained
From this point, you can continue onward with the main campaign by heading to Dreadstone Peak. However, there are still lots of things to discover in Corvius' Mire, which we will cover in the Additional Content section below.
Corvius' Mire First Visit Additional Content
The following sections pertain to optional content and activities you can do on your first visit that are not required in order to complete the game. However, they can lead to more equipment, bosses, quests and more that can greatly help you on your adventure.
Corvius' Mire Main Area - Nameless Fungalmancer & Oathbound Watcher NPC
With the Luminstone in hand and having defeated Por Myec early on, make your way west of the starting Obelisk in the main Corvius' Mire area. Climb up to the platform with the Stone Circle that creates a path towards The Great Tree. Activate it but instead of going to the tree, use the grappling points it creates in the upper left to reach a wooden platform there. On this platform, you will find the Mage distortion from which you can initiate the hunt for the Nameless variant of Por Myec, the Fungalmancer. He will drop all the same loot as well as a unique helm, the Sporesack Head.
Return to the Stone Circle and activate it once more but this time, continue along the grappling points to a platform in the upper right. On this platform, you will find Watcher Oman, the Oathbound Watchers representative. Speak to him here and answer "Yes" to his question to unlock the Oathbound Interventions PVP activity and have him move to Pardoner's Vale where he will also serve as a Merchant. In Pardoner's Vale, he can be found on top of a wooden tower in the upper-west of the village, near the steps leading up to the Trifaul Idol.
Luminous grappling points leading to the Nameless Fungalmancer hunt on the left and the Oathbound Watcher Oman on the right.
Verdant Ruins - Inquisitor Amben, Corpumancer and more
To find the Verdant Ruins sub-area, head back to where you obtained the Luminstone, in the upper east section of the Foulmurk Marsh past where you fought Marega Gredanya. Activate the Stone Circle up here and quickly cross over the luminous platforms as they will soon disappear. On the other side, there is a switch mechanism on the ground that you can pull to reveal a grappling point above the gap you just crossed, to more easily cross later on. Continue east through the doorway to get to the ruins.
Right at the entrance, pull on the switch mechanism at the edge of the ledge to reveal a grappling point up above. Drop down below and kill the Fertile Priest by the ledge and then drop further down. Take the stairs heading to the lower west and pull the lever at the end to unlock the gate which is a shortcut from the lower section of Foulmurk Marsh. Head back up the stairs and go east. Defeat the large Bog Vicar and continue on east, up the ledge. Defeat the Fertile Priest up here and attack the Treasure Chest behind him. This is a Chikku in hiding and it drops a Small Bag of Silver upon defeat. Climb up the ledge to the right and wall-jump up to the wooden platforms above, the second of which has a Treasure Pouch containing 3x Ashpyr Trio and a Salt Sliver. From here, jump over to the stairs leading up on the left and mind the rotating trap before continuing on. It rotates 3 times before taking a short break. Cross over during the break and jump through the rickety wooden ledges.
You are now on the upper ledge which the grappling point above the entrance leads to. Defeat the Bog Vicar here and climb the ladder on the left. There is a Fertile Priest up on a platform here that you can kill by doing jump attacks, and a green mining node on the left wall. Jump over the gap to the right and up the stairs to a section with more rickety wooden ledges you have to cross. Look very closely between the first two platforms as there is another rotating trap. Be very careful with your timing as getting hit by the trap can send you plummeting all the way down to certain death. On the other side is another Fertile Priest up on a platform. There is another platform adjacent to it with ladders attached that you can climb. Make your way up and jump across the platforms to the left at the top. The second platform has a Treasure Chest containing 3x Ashpyr Trio and 10x Wispleaf. Continue on west to the stairs with another rotating trap above it.
Past the trap, defeat the Fertile Priest at the base of the next set of stairs on the top right and then go to the ledge on the west with the Stone Circle. Activate it with the Luminstone to create a series of platforms and grappling points. Quickly navigate your way to the west before they disappear. On the other side is another Stone Circle so you can get back. Follow the path west and to the bottom to find a scroll room with a Treasure Pouch containing a Shimmering Bud. If you've spoken to Inquisitor Amben in Ashbourne Village and Bol Gerahn, he will also be found in this room. Exhaust his dialogue here and he will move to Dreadstone Peak for the next step in his questline.
Note: You can also drop down to the pit below where the luminous platforms are created by using the ladder next to the Stone Circle you start from. In this pit is an Eigndalian enemy. This is a very powerful opponent who has a lot of health and is more or less a miniboss. It is guarding a Treasure Pouch containing a Jeweled Fibula and a Mosspyr Trio, as well as a mage-sealed door on the very left that requires you to defeat 3 Named Mages to unlock. Inside is a small room with seemingly no purpose. However, return to this room after defeating Luxian Steel-Glass, the Luminimancer and you will be able to find a mage distortion from which you can initiate the hunt for his Nameless variant, who will not only drop all the same loot but a unique helm, the Light Mask, as well. Luxian Steel-Glass can be found in the Betrayal Crag sub-area. Refer to that location's section of the walkthrough below.
Make your way back to the main path and then go up the stairs in the upper right where the Fertile Priest was. Continue to the end of the path and head up the ledges, killing another Fertile Priest on one of them. Climb up the ledge on the left and defeat the Bog Vicar there, then continue on westward. There is a lever you can pull at the end which unlocks the gate, giving you another shortcut from the eastern section of the main Corvius' Mire area (the area to the right of the Obelisk that you ignored at the start). Above the lever is a Mage distortion where you can initiate the hunt for Ghor Lorhotha, a Corpumancer.
Mage Hunt: Ghor Lorhotha, Wearer of Tortured Flesh
Loot:
- Stitched Heart (50%)
- Combined Organ x 1-2 (50%)
- Weaved Flesh x 1-3 (50%)
- Pained Leather x 1-5 (50%)
- Frospyr x 1-5 (5%)
- Ashpyr x 1-5 (5%)
- Salt x 8,550
- Silver x 1,725
- Guiltless Shard
Summoned Mobs:
Chase Sequence
After activating his hunt, head out through the shortcut to the main Corvius' Mire area right below the distortion. After fighting him and his mobs here for a while, he will teleport back into the Verdant Ruins just to the east of the same shortcut. Next, he will teleport one level below. After this, he will teleport further down the ruins, on the ledge that you can grapple to from the lower west main entrance from Foulmurk Marsh. Finally, he will teleport one floor below, in the large area where a Bog Vicar usually is.
Boss Fight
Moveset:
Cleaver Slash - Ghor Lorhotha pulls out his gigantic meat cleaver and performs two quick, criss-crossing slashes. Dodge through and behind him to avoid the attacks.
Cleaver Leap - Ghor Lorhotha holds his cleaver in a low stance in front of him and then leaps towards the player to perform a leaping smash. Dodge under him as he leaps to avoid the attack.
Ensnare - Ghor Lorhotha raises both hands to either sides of his waist as a dark mist swirls around his fists. After a short delay, he brings his hands together, causing a snare to jut out of the ground right where the player is, ensnaring them for several seconds and leaving them vulnerable to other attacks. Watch his hands as he channels this spells and dodge roll as his hands come together to avoid getting trapped. If you do get trapped, mash the directional input, jump and roll buttons to escape more easily.
Swarm of Flies - Ghor Lorhotha raises one hand behind his head as a dark mist swirls around it. After a short delay, two clusters of flies fly slowly toward the player, dealing damage per second the flies are in contact. Dodge through the flies but beware of them following you.
Barrier of Flies - Ghor Lorhotha moves both hands towards his torso in a swirling motion as a dark mist swirls around them. This summons a cluster of flies that encircle him, creating a damaging proximity shield for a few seconds. Time your approach and attacks while the flies are in a different area of his body.
Meat Hooks - Ghor Lorhotha raises both hands far to his sides, up to his shoulders as a dark mist swirls around them. After channeling, several chains with hooks fall from the ceiling in a staggered fashion. Each chain retracts to the ceiling after a short delay, dealing damage to anything caught in their path. Look for sections of the arena where no chains are falling or dash towards the positions of chains after they retract.
Strategy:
The most dangerous part of this battle is his Ensnare move which will render you helpless and vulnerable to attacks for several seconds. Avoid this attack at all costs by watching his hands at all times to prepare your dodge. You have several windows of opportunity for attack when fighting this mage as his spells all have a short delay before they start dealing damage. Try to get in single hits while he's casting but don't get greedy.
Periodically, if you've been consistent with your damage dealing, Ghor Lorhotha will be locked in a special stagger animation where his eye glistens very briefly. This acts as a grappling point. You can jump up and grapple to his face to perform a highly damaging attack that will take a huge chunk of health from him. Be sure to take advantage of this mechanic when it occurs.
Once his health is depleted, press the appropriate button to devour his heart and end the encounter.
Speak to the Mage's dying human form for some backstory and collect your extra loot. Refer to the Betrayal Crag section below for where to find his Nameless variant.
The Fetid Grotto - Elder Set, Oceye Set, Shortcuts
The Fetid Grotto is a sub-area in the lowest reaches of the Darkearth Lair inaccessible until you obtain the Luminstone. To get there, navigate your way through the Darkearth Lair, keeping towards the lower-west. You will eventually get to a section a wooden platform covering an opening in the ground. Drop down from here to reach an area with a tall ledge and a Vitae Scholar standing atop it. There is a Stone Circle at the bottom of the ledge which will create luminous platforms above, allowing you to reach the ledge and kill the scholar. Continue through the path behind it, dropping down some wooden platforms on the right to reach The Fetid Grotto.
Head west from the entrance and jump across the wooden platforms to find the Fetid Grotto Obelisk. Right above it is another platform with a Treasure Chest containing the Cone Cap, Elder's Tunic, Elder's Skirt and Elder's Gloves. From the Obelisk, drop down to the floor below and defeat the two Vitae Scholars at the bottom of the stairs. Climb up the wooden platforms behind them to loot the Treasure Pouch on the second one. It contains a Dragon's Tongue.
Continue eastwards through the very long cavern. There are 4 sets of Stone Circles along the way that you can use to create luminous grappling points to more quickly navigate the cavern. Past the fourth Stone Circle, there is a Verdant Guard lying in wait. Right above where he was sitting is a wooden platform with a Treasure Pouch. To reach it, activate the fourth Stone Circle again and quickly rush to the right to find a luminous grappling point and platform that will allow you to the pouch. It contains 3x Voidepyr Trio.
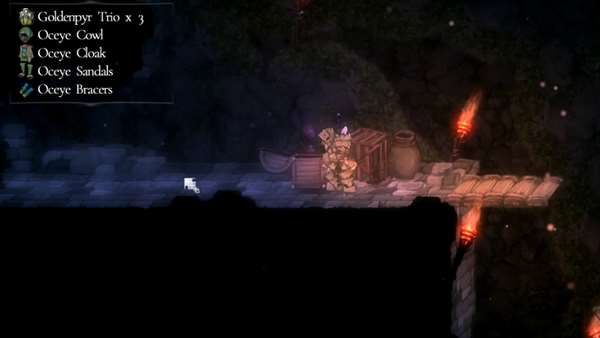
Go back down to the main cavern floor and continue east where you will find wooden platforms along the wall. Use wall-jumps to climb them and reach the lever above. Pull it unlock the gate right next to it and go through. Continue east in the next room and up the steps to find more wooden platforms along the walls and Sacred Knight enemies guarding them. Climb all the way to the top where you will find a Treasure Chest on the left. This contains 3x Goldenpyr Trio as well as the Oceye Cowl, Oceye Cloak, Oceye Sandals and the Oceye Bracers. Further to the left is another lever. Pull it to unlock the gate which leads to the lower-west section of the Verdant Ruins.
The treasure chest containing the Oceye Set, in the upper-east of The Fetid Grotto
Veruna's Shrine - Verdant Set, Mechanomancer and more
Veruna's Shrine is a sub-area high above in the upper-west of Corvius' Mire. To get there, climb up the Great Tree all the way up to the Obelisk and exit through the door slightly above and on the western side past a set of stairs. This leads to the western treetops area. Make your way across the wooden platforms here and watch out for an ambush by a Sacred Knight. At the end is an archway leading into the Shrine. In the first room, head down the ladder and defeat the Vitae Scholar sitting on the floor. Note the green mining node behind the ladder. Continue west into the main Veruna's Shrine area.
In the main area, jump onto the platform in the middle and defeat the two Vitae Scholars on it. Continue west where you will find a Stone Circle right by the wall. Activate it to reveal two luminous platforms along the wall and a grappling point at the top. Use wall jumps to climb the platforms and use the luminous grappling point to get to the ledge at the top. On this ledge is a wooden deck that you can climb via wall-jump. Step to the edge of this deck and note the grappling point to the top right, over the center of the room. Grapple your way to this point and two more leading to a wooden platform in the east where a Treasure Chest can be found, protected by a Verdant Guard. The chest contains the Verdant Plate, Verdant Helm, Verdant Gauntlets and Verdant Greaves, the exact same armor set worn by these guards.
Grapple from this deck to the east to find a chest with the Verdant Armor Set
Make your way back to the deck and use the grappling point to its upper left this time, leading to a small ledge on the wall. Grapple once again to the stairs in the top right but watch out for the poison spray trap in the wall above you. Time your grapple during its breaks to safely make it across. There is an archway at the top of the stairs which leads to a long hallway with a mage-sealed door at the end, requiring 2 Hearts to unlock. Ignore this for now and grapple up to the left to find the Verdant Shrine's Obelisk so you can create a checkpoint and then make your way back down to the Stone Circle you used to get up here.
Back at the bottom, descend the ladder to the right of the Stone Circle and defeat the Verdant Guard nearby. Continue east where you can descend wooden platforms to reach the bottom areas of the Shrine. There is another Stone Circle on a ledge to the left which will create a luminous platform that will allow you to reach another ledge on the right. On this ledge, you can find a Mage Distortion from which you can initiate the hunt for Anamus Kane, a Mechanomancer. Warning: Due to the difficulty and tankiness of the enemies here (particularly the Verdant Guards) as well as the sheer density of them in the bottom areas, consider clearing the path first before commencing the hunt.
Continue on below the platforms and defeat the Vitae Scholar and Verdant Guard at the bottom. Note the mining node on the right and go through the archway in the left to a small corridor patrolled by another Verdant Guard. To the left of this hallway is a narrow vertical section where you can perform alternating wall-jumps. Note that this is the only way to get back to the top. In the middle of the hallway is a wooden platform covering an opening in the floor which leads further below. Be careful when dropping down to the bottom of this opening as there is a floor spike trap here below a second wooden platform.
Roll towards the left immediately as you drop down from the opening to avoid the Spike Trap
Carefully navigate your way through the narrow path to the west to a large hallway below. There are three poison mist traps by the walls and ceilings here. Get down to the thin ledge just below the third trap and note the Verdant Guard standing right below it. There is another floor spike trap right in front of the guard so make sure to roll as you pass by. In the east of this hall, there are two Vitae Scholars and another Verdant Guard further to the east, below a set of stairs. At the very end of the hall is a lever next to a gate that leads back into the main Corvius' Mire area, right above the entrance to the Darkearth Lair.
Mage Hunt: Anamus Kane, The Infernal Machine
Loot:
- Clockwork Heart (50%)
- Noble Oil x 1-2 (50%)
- Mechanum Gear x 1-3 (50%)
- Hidden Spring x 1-5 (50%)
- Twin Mosspyr x 1-3 (20%)
- Twin Ashpyr x 1-3 (20%)
- Salt x 10,575
- Silver x 1,725
- Guiltless Shard
Summoned Mobs:
Chase Sequence
Upon initiating his hunt, Anamus Kane can first be found in the large hall at the bottom section of Veruna's Shrine, near the shortcut gate to the main Corvius' Mire area. From here, it's a straightforward chase as he ascends the shrine. He will next be found in the corridor with the wooden platform covering the opening in the floor. He will then teleport to the upper-middle platform in the shrine's main section. Finally, he will teleport to the large hall to the east of the Obelisk high above the main area and his Boss Fight will ensue.
Boss Fight
Moveset:
Fist Combo - Anamus Kane raises both fists high up in the air and slightly forward in a reverse stance. He then performs a backhanded ground smash with both fists and then quickly follows up with a single punch. The initial smash will send the player bouncing upwards on a direct hit, setting them up for the punch follow-up. Roll through the first attack and get behind the mage.
Leaping Smash - Anamus Kane leaps forward a great distance and comes crashing down fists-first. Quickly dash underneath the boss as he leaps to end up behind him.
Bouncy Grenades - Anamus Kane raises a fist in front of him and releases three grenades as he swerves his fist behind him and to his side. These grenades bounce a very short distance a few times before exploding. Get away from the grenades before they explode.
Disengage - Anamus Kane leaps backwards a good distance as he throws three grenades at the player. These grenades bounce a very short distance a few times before exploding, dealing damage in a medium radius around them. Simply avoid being within range of the grenades.
Strategy:
Anamus Kane is a very simple boss with not much of note in terms of abilities. The only attacks to really watch out for are the ones where he releases his grenades. The explosions from these have a deceptively large hitbox so consider rolling to i-frame through the blast.
Your biggest window for attacking is during the animation for Bouncy Grenades as he releases all three in a staggered manner. Take this opportunity to get a few hits in while he is locked in the animation but always be aware of the grenades' positions and do not overcommit to attacking. His Disengage can also be punished easily as long as you stick close to the boss and can close the distance quickly as he leaps backwards. He can only throw the grenades out in front of him, making the area next to his legs after his lands quite safe and allow you to get some attacks in.
Consider baiting him around the long hallway and pelting him with ranged attacks and throwables as he tries to (slowly) close the distance. Anamus Kane can also be put into a special stagger animation where his eye glistens and acts like a grappling point, allowing you to hurl yourself towards his head and perform a damaging knife attack.
Once the Mage's health is depleted, he will collapse to the ground allowing you to devour his heart and end the encounter.
Speak to the dying Mage's human form for some backstory and collect your extra loot. Head to the end of the hall to the east where you can now unlock the mage-sealed door. This leads to the upper treetops just outside the western side of The Great Tree. Power up the Pulley just before the wooden platforms to unlock a shortcut from the lower treetops. Defeat the Sacred Knight here and then jump onto the platform to the right of the Pulley to find a Treasure Chest containing a Carved Feline artifact and the Corvin Hood, Corvin Mantle, Corvin Gloves and Corvin Skirt. Make your way up to the wooden platform furthest to the upper left. From here, you can jump to the left and grapple up to a ledge on the side of the shrine building where you can initiate the hunt for the Nameless variant of Anamus Kane. This variant will drop all the same loot as well as a unique helm, the Clockwork Helm.
Betrayal Crag - Fated Tome, Inquisitor Selet, Luminimancer and more
Betrayal Crag is another sub-area far above in the upper-east of Corvius' Mire. To reach it, ascend The Great Tree all the way up to the Obelisk. From here, make your way to the door just above the Obelisk on the right side of the tree's interior. This leads to the eastern treetops area. Make your way across the platforms and grappling points here, fighting off Sacred Knights as you head towards the mage-sealed door at the end. This door requires 2 Named Mage hearts to unseal which should be no issue if you've followed the guide up to this point.
Through the door is a small connecting room to the main Betrayal Crag area further east. In this room, defeat the Bogfly and note the Stone Circle underneath the wooden stairs. Activating this will create two luminous platforms and a grappling point outside in the main area, allowing you to scale the western wall which leads to this region's Fated Tome and Inquisitor Selet's location. After activating the circle, quickly head outside and climb up the two luminous platforms and then grapple to the wooden platform on the western wall.
Luminous platforms leading up to upper-west Betrayal Crag
Climb up two more platforms above to find a Treasure Pouch containing the Emerald Tome of Fates. Return this to Runereader Diedela in Pardoner's Vale to unlock another set of Fated Hunts. From here, continue west through an archway to a small room. If you've been following Inquisitor Selet's questline and have spoken to and have given him a Guiltless Shard in Bol Gerahn, you will find him crouched in this room, Spellmarked yet again. Just as in the previous two locations, he will ask for another Guiltless Shard to ease his condition. Oblige him and he will move to his next location in Dreadstone Peak.
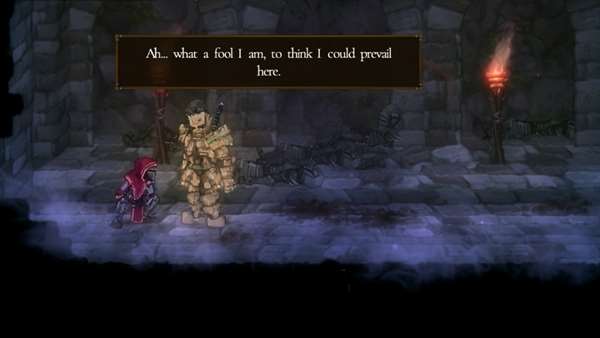
Inquisitor Selet found in a hidden room in upper-west Betrayal Crag
Make your way back down to the main Betrayal Crag area and jump across the wooden platforms directly opposite the entrance you came in from while defeating the Bogflies and Sacred Knights. Jump onto the long ledge on the right where a large Abnormality enemy can be found. Defeat it and collect the Treasure Pouch by the east wall for a Salt Sliver and 3x Blazepyr Trio.
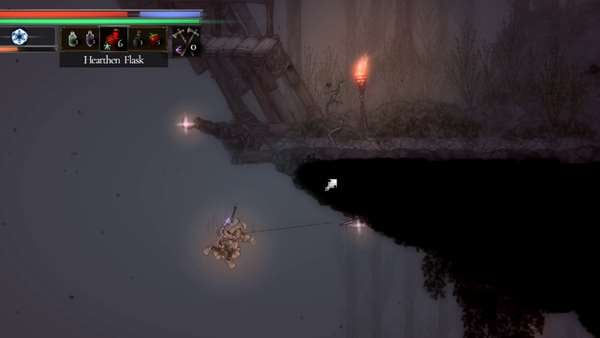
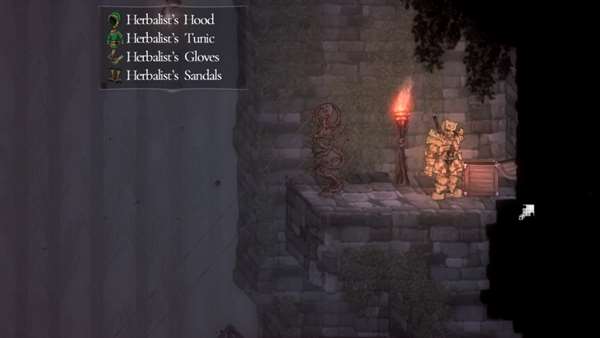
Go back to the wooden platforms and instead of following them to the lower east, drop down onto the long ledge on the lower left and follow it out west to a small room with a couple of Bogflies and a Sacred Knight. Defeat them and unlock the mage-sealed door to the left. This leads out to a cliff with another Abnormality to defeat. At the edge of the cliff is a wooden deck with two platforms. Climb up to the top platform and loot the Treasure Pouch for a Salt Shard. Look carefully at the bottom of the first platform for a grappling point an a second one right under the cliff. Drop off the edge of the cliff and grapple to the second one, following a series of more grappling points along the bottom of the cliff leading to an otherwise unreachable ledge in the eastern section of the main Corvius' Mire area. There is a Treasure Chest here that contains the Herbalist's Hood, Herbalist's Tunic, Herbalist's Gloves and Herbalist's Sandals. Activate the Pulley to the left for an easy shortcut from the main Corvius' Mire grounds.
If you've killed Ghor Lorhothra, you can also find the Mage distortion for his Nameless variant on the wooden platform just below. This is essentially the same fight with all the same drops but he will also drop a unique helm, the Butcher's Mask.
Now, backtrack to the Betrayal Crag by using the same grappling points to get back up to the cliffs and re-enter the crag from the alternate entrance. Inside, drop down to the lower area and you will find a Mage distortion on the left, opposite the wooden stairs. From here, you can initiate the hunt for Luxian Steel-Glass, a Luminimancer. Before initiating the hunt, take a quick detour to the lower-east where you can find a lever to unlock the gate to the top of the Verdant Ruins.
Mage Hunt: Luxian Steel-Glass, The Blind and Blinding
Loot:
- Bright Heart (50%)
- Brilliant Eye x 1-2 (50%)
- Lucent Node x 1-3 (50%)
- Shining Drop x 1-5 (50%)
- Twin Frospyr x 1-5 (25%)
- Twin Goldenpyr x 1-5 (25%)
- Salt x 9,195
- Silver x 1,725
- Guiltless Shard
Summoned Mobs:
Chase Sequence
Luxian Steel-Glass has one of the longest chase sequences, spanning several sub-areas. After initiating the hunt, he will first be found on the cliffs outside the lower-west of Betrayal Crag, the same cliffs leading to the Herbalist's Set mentioned above. From his initiating point, climb up the stairs on the right and get back onto the hanging platforms above using wall-jumps. Follow them to the west and drop back down onto the long ledge in the lower left that exits onto the cliffs. Fight him and his mobs at the cliffs until he teleports to his next destination which is back in the Betrayal Crag, right by the lower alternate entrance. After this, he will teleport to the eastern section of the main Corvius' Mire area. Use the shortcut to Verdant Ruins at the bottom of the crag, and the shortcut back to Corvius' Mire just below Ghor Lorhotha's initiation point. After fighting him in the east, he will teleport to the west, past the starting Obelisk. Next, he can be found in the middle section of Darkearth Lair before moving to the bottom sections. Finally, he will teleport to the long cavern in the Fetid Grotto, right after the second Stone Circle.
Boss Fight
Moveset:
Claw Swipe Combo - Luxian Steel-Glass drops down to all fours and claws at the player twice while advancing, ending in an uppercut. You can roll through the first claw swipe to completely avoid the entire combo as the Mage cannot change directions in between each hit.
Luminous Cannons - Luxian Steel-Glass raises his arms to shoulder-height, creating two orbs in the air, each with a pointy spoke. The spokes attempt to lock onto the player and after a brief delay, they extend outwards, forming very narrow streams of light that deal continuous damage on contact. These light "cannons" can change directions while they are firing. You can dodge behind the Mage as he is casting the spell to completely avoid the cannons.
Luminous Windmill - Luxian Steel-Glass brings both hands together in front of his head and then summons a light orb in midair with three spokes pointing in different directions. After a very brief delay, the spokes extend outwards, forming very narrow streams of light as the orb rotates like a windmill. Each "blade" of the windmill can be dodged through but watch out for other attacks and effects in the arena.
Luminous Tri-Orbs - Luxian Steel-Glass holds both hands behind him in a charging stance. After a brief delay, he brings his hands outwards releasing three luminous orbs in a triangular formation, rotating counter-clockwise and slowly traveling the entire length of the arena in whichever direction the Mage is facing when he releases them. These orbs deal damage on contact. Dodge behind the Mage as he is charging up the move to completely avoid it. If you are caught a fair distance away, simply roll through one of the orbs when it is closest to the ground.
Luminous Pulsing Orbs - Luxian Steel-Glass raises both elbows up towards the sides of his head, creating two orbs in the arena that linger for a few seconds, pulsing intermittently and dealing damage in a small radius around them with each pulse. These orbs are easy enough to avoid but can be troublesome when combined with the Mage's other attacks and effects in the arena. Below 50% HP, he will summon three orbs instead.
Strategy:
The fight against Luxian Steel-Glass is a test of your ability to manage many simultaneous effects occurring on the battlefield. Luxian Steel-Glass uses a plethora of spells with area-denial properties, lingering for several seconds and dealing damage in an area. Despite this, the patterns are rather simple and easy to avoid as long as you take some time to learn how they work and watch for telegraphs. Beware of the Luminous Windmill attack as it has the potential for the most overlaps with other moves, including his melee combo.
You will get windows for attacking any time he is casting a spell as he doesn't have any spells that come out instantaneously. For example, the Luminous Cannons start-up animation is quite long and if you can quickly roll behind him during this time, you not only have a chance for at least 3 hits but the cannons themselves will not hit you due. Another good window is while he is charging up the Luminous Tri-Orb attack. Once again, roll to his back before he releases the orbs and you should be able to get 2 or 3 hits in.
Once his health is depleted, the Mage will collapse to the ground where you can finish him off and devour his heart, ending the encounter.
Upon defeating the Mage, speak to his dying human form for some backstory and extra loot including a Golden Armlet. Refer to the Verdant Ruins section above for where to find his Nameless variant.
Trivia & Notes
- Players earn The Swamp
 trophy, by learning the runes to reach Corvius' Mire.
 - Trivia and notes go here
 Anonymous
 Anonymous
Pretty sure you missed an entire named mage hunt? The luminous mage, or something like that. I just killed him. Then, there's another mage door you can open after killing 3 named mages. I'm trying to find it rn. But yea.

 Anonymous
Please note that you need to defeat two (2) named mages to gain entry to the great tree

There's a secret path just up-right of Ghor's mark, hidden by the black foreground, but I can't find what's in it. There's a drop that you can jump past, and a wall at the end, but walljumping doesn't seem to do anything.


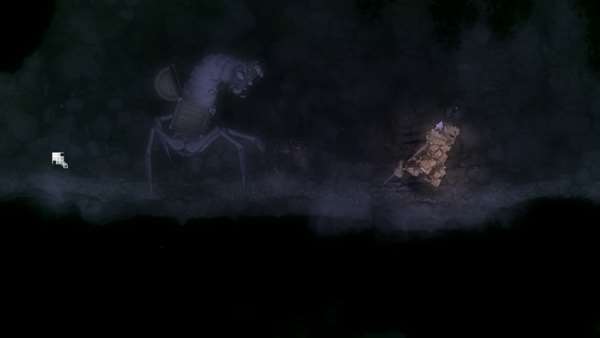
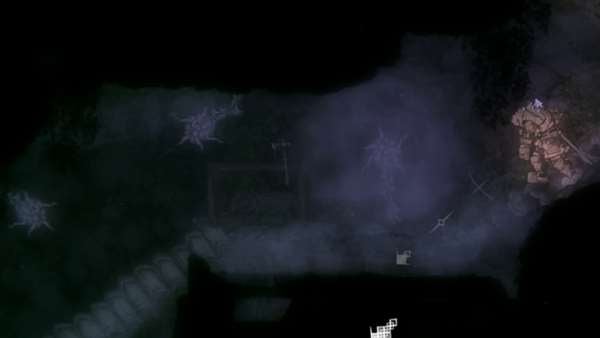
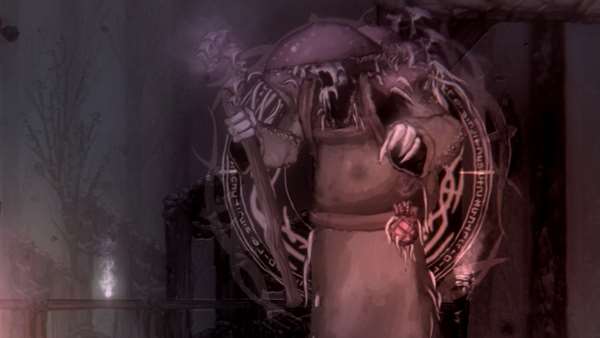
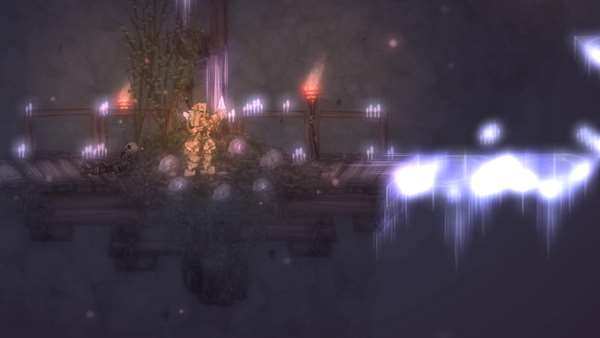
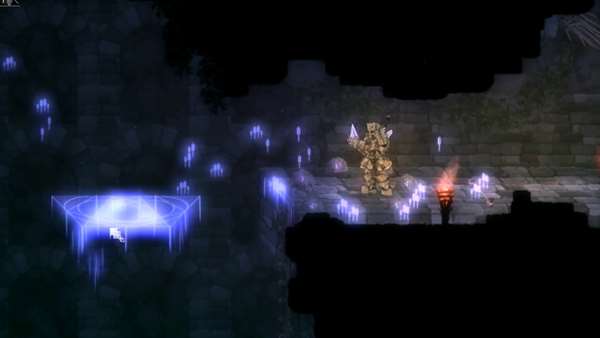
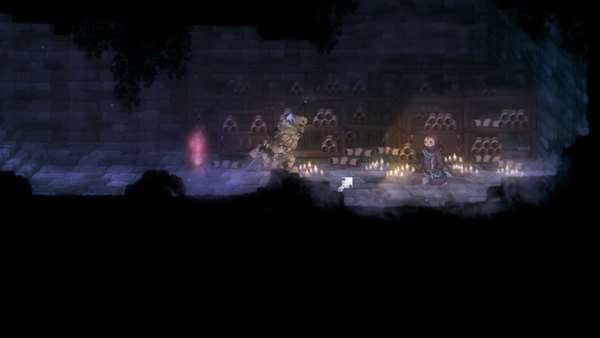
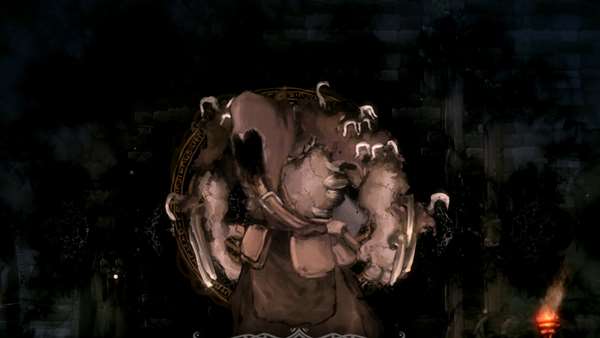
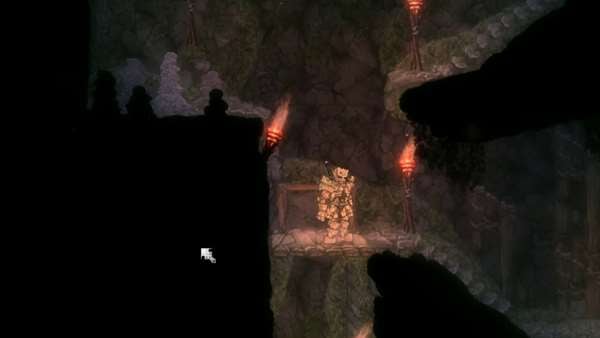
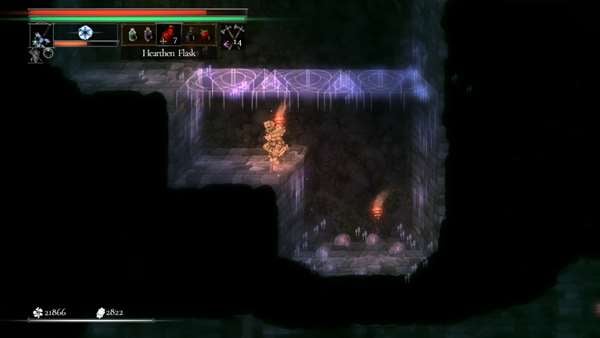
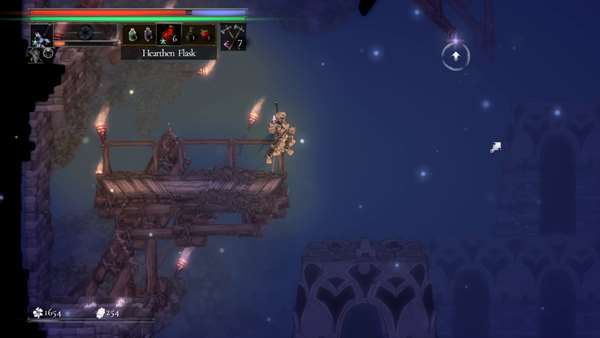
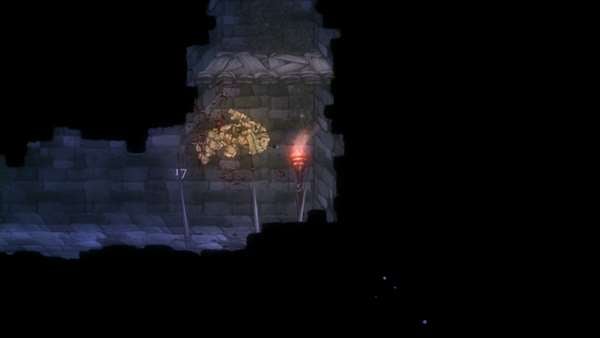

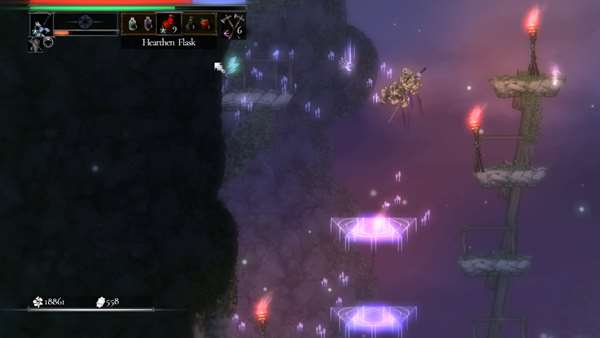
Unlockable door for the nameless lumininancer is in Verdant Ruins down a long ladder and then a long straight stone path, about halfway up from the lower entrance. Hope this helps.
0
+10
-1